|
|
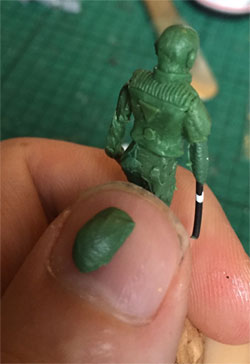
I have found that the best place to keep putty while you are sculpting is on the back of your thumbnail. This makes a very convenient surface for chopping off small bits and sticking them on. If you keep the putty on your work surface, then that isn’t as convenient, and if you hold it in your left (non-tool holding) hand, then sooner or later you will end up crushing it on to your half finished sculpt in a moment of inattention.
 p Spare putty on the thumbnail
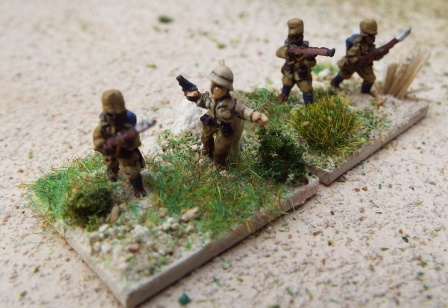
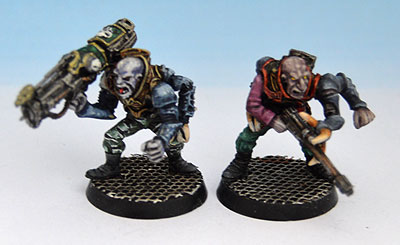
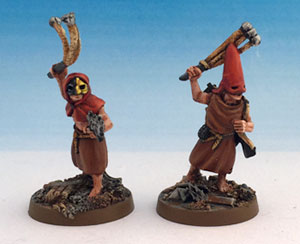
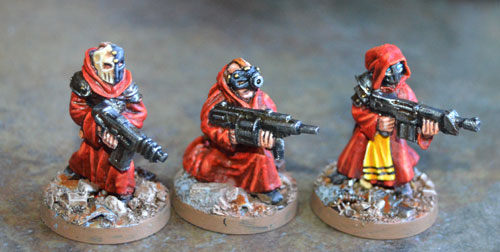
The numbers of my cultist/redemptionist gang have risen to 24, so it’s really more of a small army now – I took some photos to get the full effect. I’ve posted most of these before, but here they are en masse. They are equipped with three flamers, two grenade launchers and the rest are equally split between close combat weapons and more general small arms (mostly some kind of autogun).
The models are either converted Foundry monks and priests or from my Warfactory cultist range (with a lone GW Redemptionist waving his gun at the back).
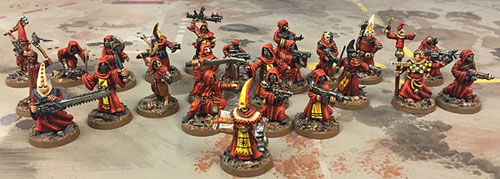 Cultist army 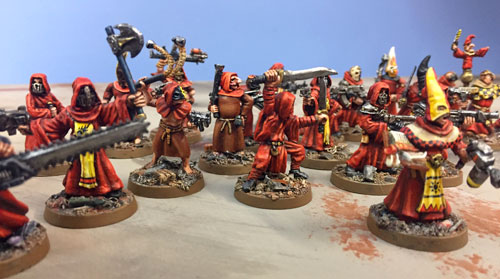 Cultist Army 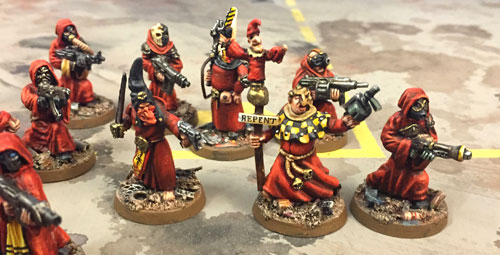 Cultist standard bearer 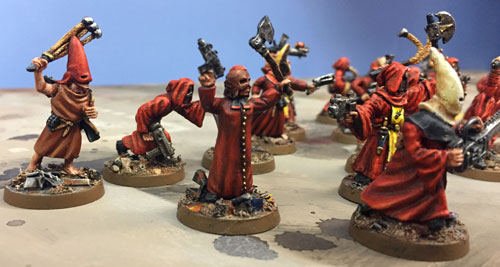 Close combat Cultists
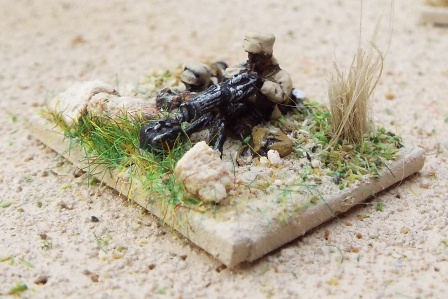
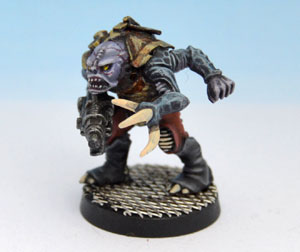
In preparation for Space Hulk I have dug out some hybrids, so I thought I’d photograph them for the site (a couple are a bit blurred – sorry about that but I couldn’t be bothered to set up again after I found out). One of the more recently painted has a 1999 date underneath – some of the others were probably done around 1990 when they first came out. I think Bob Olley’s style works really well on these. The big, bony faces, the intricate and creepy looking armour give a good alien feel to them.
 Hybrids with bolt pistol and lasgun The empty hand of the left hand hybrid is actually a claw from a damaged Cold One. The one on the right has Imperial Guard arms with the pouches cut off. I’ve gone with the classic purple and blue colour scheme but very de-saturated colours because brightly coloured genestealers look a bit ridiculous to me.
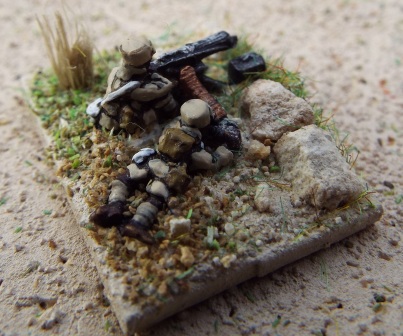
 Hybrids with conversion beamer and lasgun When I first assembled these, I thought the fat end of the conversion beamer was the front (like a heavy plasma gun). I later saw a picture that showed the spike was definitely the front, and had to turn them round. The left hand one is one of the earlier paint jobs – a bit cruder than the others.
 Hybrids with lasgun and missile launcher The edging on the left hand one’s armour is Tamiya copper. A really good bright copper colour that can be toned down with inks if required.
 Plastic genestealer hybrid Finally my only painted plastic hybrid from the Genestealer expansion. These and the Terminator librarians from the same box really are awful models. I’ve stuck a few extra bits on the armour to give it some detail and then done my best to disguise the blobby cone shaped head with some shading and patterning. Not really worth the effort of painting, frankly.
UPDATE
As this bit about the plastic hybrid seems to have attracted the most attention, I’ve taken a couple more photos to show more closely what I did. Here he is next to a standard one. I’ve added a gun metal coloured pipe and an extra bit of detail to the top of the carapace. I also realised that the head had been carved back quite a bit, as the basic one is very bulbous. (I converted this over a decade ago, so I don’t remember actually doing it). The sculpting of the shoulders is very weak – the arms are obviously stuck on to something that doesn’t really look like clothing. To hide this joint, I cut thin strips of plastic card into an interesting shape and covered them up.
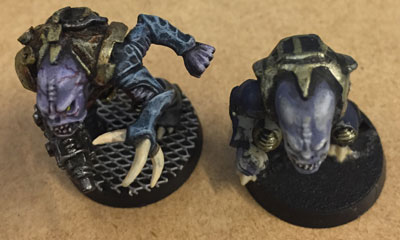
Here’s a view from the back – you can see little discs have been added to the right shoulder.
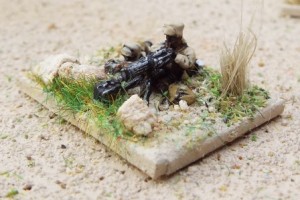
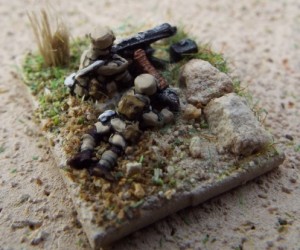
First batch of troops are completed and based. Trouble with photographing the smaller scale figures is that they show up the painting errors in a way that you don’t really see on the table. I painted 4 packs of figures from Pendraken, which were the Kings African Rifles infantry, KAR Machine guns, Early German askaris and German askari machine guns. The early askaris had access to new or new-ish uniforms, as opposed to the later ones which would have had to make do with what could be captured or made locally.
First time I’ve done 10mm. Approach was an Army Painter spray undercoat of Desert Yellow, followed by a thinned black wash. Once that was dry, I blocked in the colours. Last touch was a thin black wash over puttees and machine-gun gunbelts to bring out those details, gloss varnish, then a spray with Army Painter matt. basing was a Sandtex masonry paint, fine sand sprinkled on and worked in with more paint, hemp dry-grass tufts and various other scatters added.
Kings African Rifles infantry first;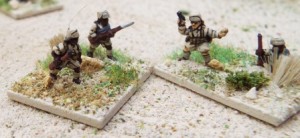 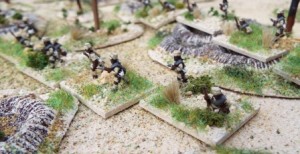 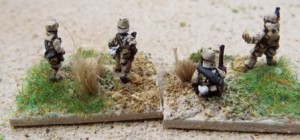
The left-most figure in the first pic is not from the KAR pack. It’s an imperial infantryman from the Middle East Pendraken range. All I did was trim off the front and sides or the brim of the Wolesley helmet. It has enough of a rear brim to hint at a neck-flap. The top is then cut a bit flatter to represent the covered fez rather than the dome of the original helmet. I just like to have as much variety of figure as I can.
KAR Machine Gun next;
Here is a shot of KAR troops moving into a shelled area to take advantage of the cover; 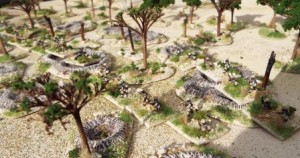
Germans next. Askari infantry;  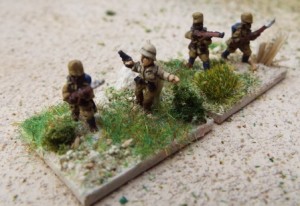 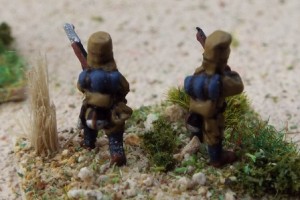
German MG teams – the white officers did the firing.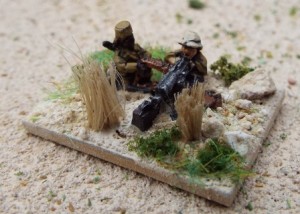 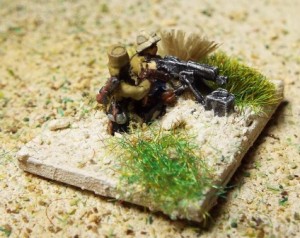
Finally, German askaris defending the village.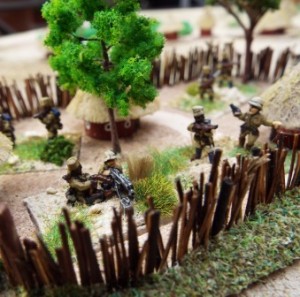
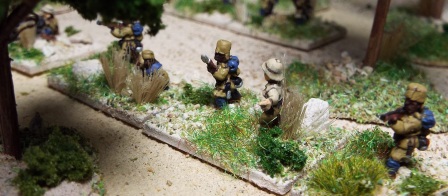
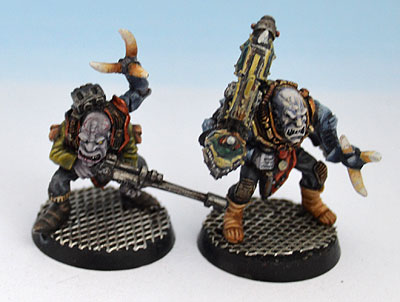
Another couple of recruits for the Redemptionist gang. These are converted Wargames Foundry flagellants.
The first was converted with a new mask and hood, and was given an auto pistol (from the Foundry Street Violence range).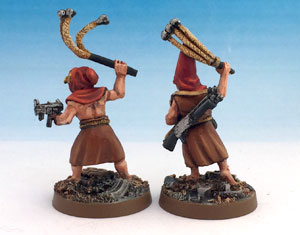
The second just needed arming. A shotgun on his back and a grenade at his belt brought him from the Middle Ages into a dystopian future.
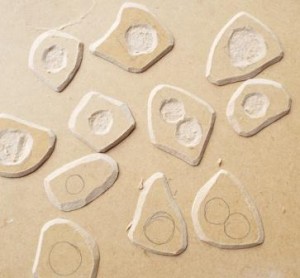
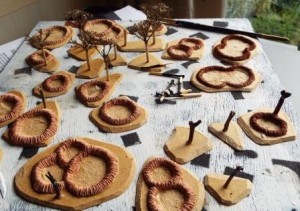
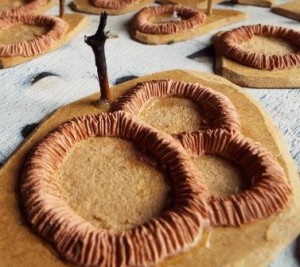
Following on from the savannah trees, I thought I would put together some pieces to represent the aftermath of a bombardment. I have constructed some craters, some tree stumps and some trees which have had most of the foliage stripped by fire or blast.
Figured most of the fighting would probably be in the dry season, so decided not to put water in the shell holes, but it would easily be done with varnish or resin and would look good. Before the artillery buffs tell me the shell holes are too big for the ordnance in use – I deliberately made some of them bigger so that I could put a unit base in them as I reckon that a dry shell-hole would make pretty good cover.
As for the bases. As per usual, they are 3mm mdf with a chamfered edge.
Firstly I drew a circle on those that were to have shell craters on them. They allowed space around them on the base to take the rim of earth thrown up by the blast. I then used a craft knife to cut around the circle, making sure not to go all the way through, then prised out the leaving around 1mm depth mdf across bottom of the shell-hole. This was just to give the hole a bit more depth.
The rim is then made with air-drying modelling clay. Roll a thin sausage of the clay to a length equal to the outside of the crater. This won’t stick to the mdf, so I put a layer of white glue on the mdf and applied the clay sausage to that with a roughly triangular profile.
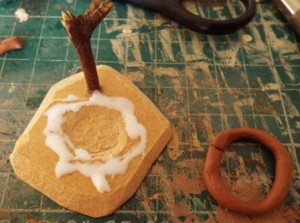 
I then used the blunt side of a craft blade to create radiating ridges in the rim – not really sure why but I though as the blast drove earth and stones outward it would most likely create that effect. Should have looked at pictures really, but I’m reasonably happy with it. Inside first, then outside, then top to round it a bit. It’s quick – doesn’t need to be neat. For this one I deliberately had the gap in the middle to take a figure base. In the shots below there are multi-crater pieces where I have tried to make it appear that craters have overlapped and the latest shell has disrupted the rim of the earlier craters where they have overlapped.
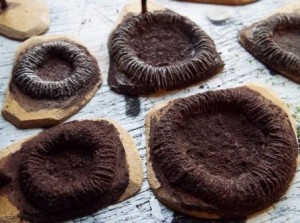
Allowed the clay to dry.
Next I put the trees and stumps in place, as per the method in the Savannah Trees article. When they had dried, out with the matches. In the dry weather I figured that fires would readily catch, so I wanted a blackened and burnt effect on some of them. I carefully applied lit matches to get the effect I wanted. Tip 1 – have a little water put by to stop the twigs from continuing to burn after the match is removed. Tip 2 – burn the twigs rather than yourself. Tip 3 – don’t forget tip 2 30 seconds after first recognising the need for it.
Anyway, next job is to paint the twigs with watered down dark brown paint for a consistent colour. Don’t paint the burnt bits – you want them black.
Now to the base. I first tried just using the sand colour across the base, but the craters didn’t stand out enough for me, so I opted for a dark brown. This is on the probably rubbish basis that the soil below the surface would be darker. I worked in a small amount of playpit sand for texture.
When that is dry, dry-brush with the sand-coloured paint. Here is a picture with the brown at the front and the first dry brush at the back. I dry-brushed them further after the picture.
Next job is the rest of the base. Sand-coloured smooth masonry paint with some playpit sand for texture, then tufts of hemp for long dry grass, small pieces of smashed sandstone, a few clumps of static grass and some flock. The long tufts were placed so that looked as if the blast had pushed it back. For bases where there are trees with branches remaining, I applied a few tiny clumps of the clump flock to a few of the branches with white glue to represent a few leaves not blasted off, and a few small clumps on the ground around the tree.
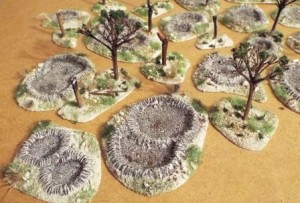 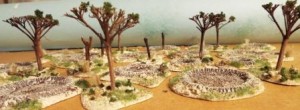
Final job was to dry-brush a little black here and there, particularly on tufts, to represent the singing caused by the explosion. I did this after the photos above and I think it improves it a bit.
Job done. Might be able to improve them a bit – probably by looking at others’ efforts at SELWG next week – but happy enough for now.
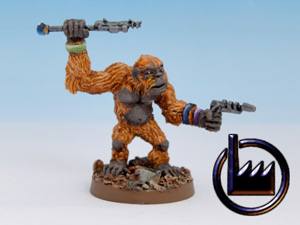 APE01 – Techno ape – leader The 8 models in my second batch have been painted and photographed, so here are the other 3 – the techno-apes. I really enjoyed doing the ape faces, and they’ve each come out with their own character. I found doing the fur much more difficult than I expected. Previously I had thought of fur as being pretty easy, but that was because I’d just done the odd cloak or scrap – small blobs. Once the fur has to clad a body shape and reveal muscles etc., it gets a whole lot harder. I ended up having to make it in quite small patches and sometimes had to cut back an unsuccessful area and do it again.
As experts in creating miniaturised technology, they have mainly just got a few wearable items on their wrists and arms.
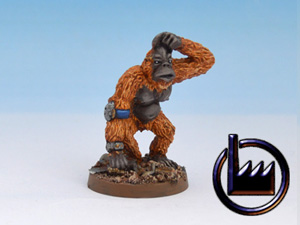 APE02 – Techno ape I was particularly pleased with the pose on this one below – by the third sculpt I was getting into the whole ape body shape a bit more. I had to be a bit careful placing the arms and legs to ensure it could be moulded in one piece.
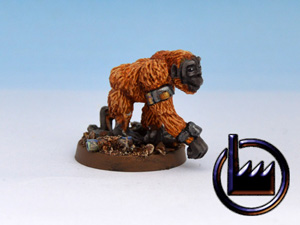 APE03 – Techno ape If there’s sufficient interest in these, I’m planning to do a few more including a variant of the walking one with a baby ape on its back, and a couple of young ones (goblin size).
I’ve just had eight new models cast up for the Warfactory range – 3 techno-apes and 5 cultists. They will be going on sale at Lancer next week. These three cultists are variants of the existing models, packing some heavier firepower than their colleagues.
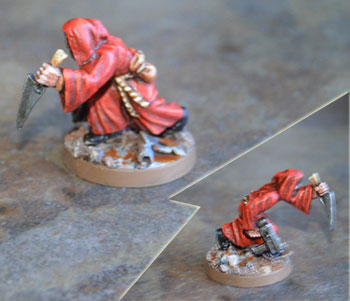
 3 new variants of the cultists There are also 2 completely new sculpts. The first is a sort of cultist assassin.
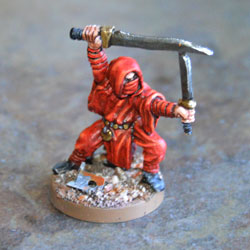 Cultist Assassin And finally another cultist who prefers sneaking and stabbing to straight firepower.
 Creeping cultist Pictures of the painted apes to follow…
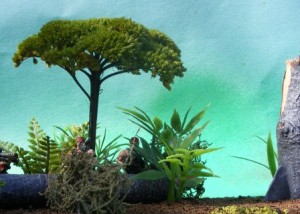
Still waiting for the figures (come on Pendraken) but focussing on some terrain in readiness. Although these have been sized for my 10mm setup, the same technique can easily be used for larger scales. Here’s one which has simply been sprayed green.
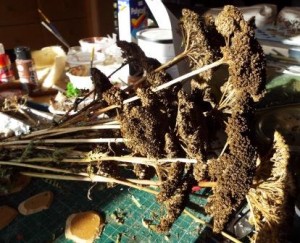
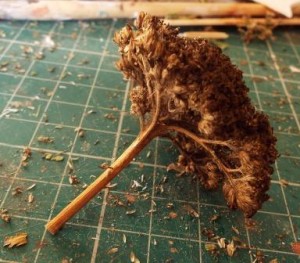
The raw material is the dried flower heads of a garden flower called Achillea Filipendula. Common name is yarrow. There are a lot of different types, but the one I use is one of the bigger ones with bright yellow flowers called ‘Cloth of Gold’. The individual flowers are tiny, but as you’ll see if you google that plant they are massed in heads which are flattish domes. The bigger heads are good for 28mm.
Some of the smaller flower heads are good for the smaller scales, but if you only have bigger simply remove the side stems to bring it down to the size you want. Here is a bundle of them I let dry hanging up in the garage.
This shot shows a single flower head.
For my purposes I wanted to remove the dry flower heads to leave what looks like branches. Do that with a pair of small sharp scissors, cutting as high as possible. I don’t always do this, as shown above. Couple of small huts under construction in the background.
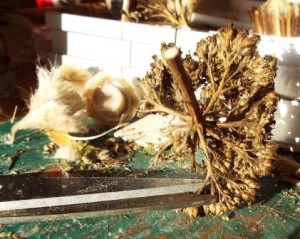
This shows one that has been trimmed.
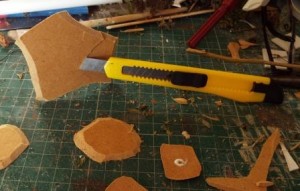
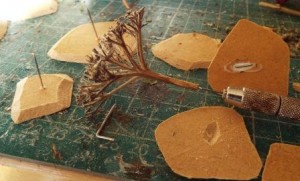
Next prepare the bases/ I use small pieces of 3mm mdf or samsonite. I cut them at an angle to produce a chamfered edge, but also because it is much easier to cut this at an angle, because of the way the material is made in layers. If the chamfered edge needs to be made neater, use the scissors to trim the lower edge at an angle.
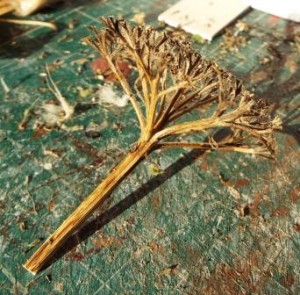
I attach the trees to a base by drilling a hole with a pin vise and pushing through a bent pin with the head removed, Before doing that I cut a recess in the bottom of the base so that the bent part of the pin can be glued in there and let the base sit flat.
Next, use the pin vise to drill out the ‘trunk’. This is very easy – the plant has a pithy soft core, but it’s worth doing or the pin will probably split it. If the piece is too thin, replace it with a thicker piece of stem and fix the head of the tree in place with some wood glue. Coat the pin in glue before pushing the trunk onto it.
 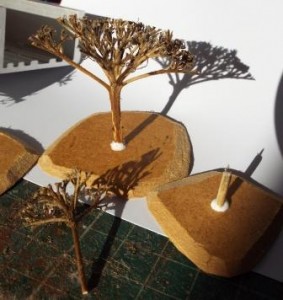
You now have a bare-branched tree. These would look quite effective as winter trees, or for a wood which has been subjected to bombardment and had the leaves blown off, especially if you mixed them with shattered and scorched stumps and craters.
Next, base them to match your terrain. I have used sandtex masonry paint with playpit sand sprinkled on and worked in. The tall brown grasses are small clumps of hemp, the grit is some sandstone broken up with a hammer, then a couple of types of flock scattered over it.
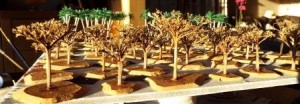
When that’s dry, create the foliage. put some wood glue in one plate and some woodland scenics clump foliage in another. Dip the head of the tree in the glue so that the tips are covered, then press it into the clump foliage and stand it somewhere to dry.
When dry, tip off the loose foliage and use a dab of glue and a bit of the foliage to any patches which are too bare. Don’t use tons of the stuff – gaps in the foliage look good, in my opinion.
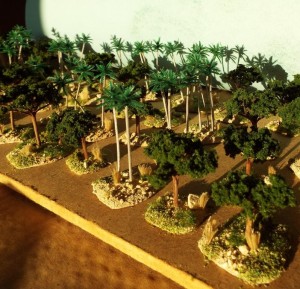 
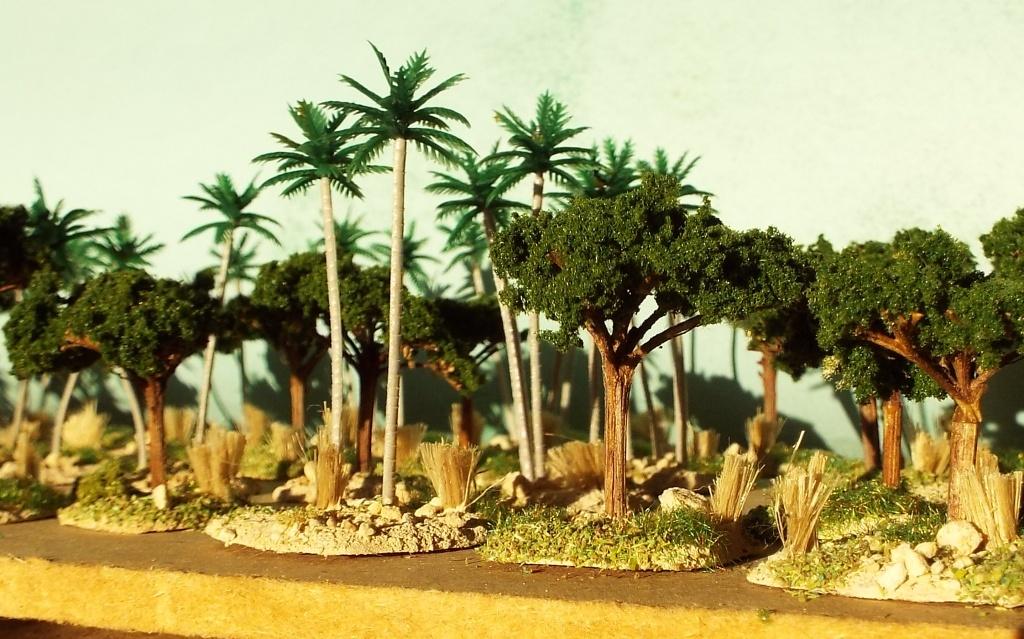
The palm trees were easy. A chinese supplier on ebay provided 100 of them for a few pounds. Hardest bit was fixing them to teh bases, as the stems are soft plastic. Drilled holes in teh mdf, cut out a recess below, pulled the trunks through and used a hot glue gun to melt them underneath. Trimmed the excess level with the bottom of the base so they sit flat. Very pleased with them. If I wanted to be really anal I would add some hemp to represent dead fronds around the trunk just below the leaves, but I haven’t. (Although I did for some 15mm jobbies in the biblical city, so I’m obviously a terrain nerd.)
 Been interested in the East Africa campaign in WW1 for a long time. Have a few of my Darkest Africa28mm that would do the job, but I know I’ll never get a big enough collection in 28mm to refight any of the battles, and artillery in 28mm takes a bigger table than I can manage. 15mm might have been an option, but there is a dearth of figures for the campaign. Amazes me that we can have dozens of different ranges for a French napoleonic fusilier or ECW pikeman, but none for German askaris. Opted for 10mm based on the Pendraken ranges. Don’t have specifics for everything, but the smaller scale makes it easier to use figures that are close, such as Boers for Schutztruppen. Smaller scale means that I should be able to paint them a bit quicker – at least that ‘s the theory. Been interested in the East Africa campaign in WW1 for a long time. Have a few of my Darkest Africa28mm that would do the job, but I know I’ll never get a big enough collection in 28mm to refight any of the battles, and artillery in 28mm takes a bigger table than I can manage. 15mm might have been an option, but there is a dearth of figures for the campaign. Amazes me that we can have dozens of different ranges for a French napoleonic fusilier or ECW pikeman, but none for German askaris. Opted for 10mm based on the Pendraken ranges. Don’t have specifics for everything, but the smaller scale makes it easier to use figures that are close, such as Boers for Schutztruppen. Smaller scale means that I should be able to paint them a bit quicker – at least that ‘s the theory.
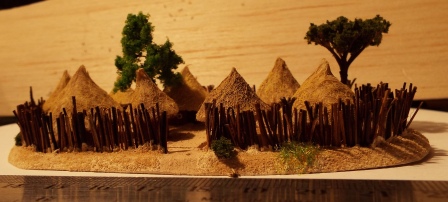
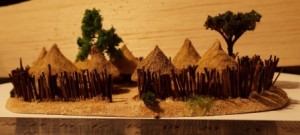
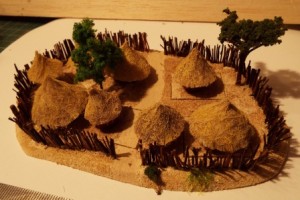
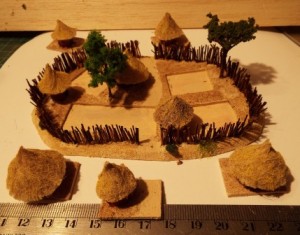
Still waiting for my figures to be delivered, so have started turning out some terrain. First bit is an African village – some huts surrounded by a palisade. I decided that I wanted to be able to put troops in there if necessary, so I made 5 lift-out bases which could be replaced by troop bases if the village is occupied. The base size in the ITSLU rules from Two Fat Lardies is 2.5cm by 2 cm. I decided on 5 bases being enough for 1 company and an accompanying Machine gun.
The base for the village is made of 2 layers of artists mounting board. I cut the base spaces out of the top layer, and glued them together. I then cut a slot in the top layer around the perimeter to take the palisade, leaving 2 gaps as entrances.
The palisade consists of sections of bristle from a scrubbing brush. They are stiff natural bristles, as opposed to the softer coir bristles on some brushes. Mine was £2 from Robert Dyas – I’m sure other sales outlets are available. They always say that on the BBC. A bit haphazard and irregular is the look I was aiming for. Next the huts. Went for round huts. Used sections of bamboo and balsa dowel to get a variety. Cut sections around 12mm high or therabouts. To make the roofs, I cut a disk of card, cut out a wedge and turned it into a cone so that when glued to the cylindrical hut base, gave me an overlap of a couple of millimetres all round. When that is dry, use scissors to cut a small bunch of the fibres from cream-coloured teddy-bear fur.Th bunch is then glued to the cone roof, with the fibres running down the roof and overlapping the card by a another couple of millimetres. Using thinned wood glue I then use a brush and lay it over the fur to glue the fibres down.
Allow these to dry, then using scarp scissors, neaten the bottom edge. Paint the walls a red-brown, with a black panel for the entrance. I applied simple patterns to a couple of them but to be honest, I don’t think it was worth the effort. Dry-brush the roof with a sand colour, and highlight with a little yellow. I then applied sand-coloured smooth masonry paint to the slots in the village base and allow it to dry. I will texture the bases with sand and don’t want it in the slots because the bases won’t then sit in them properly. I then apply the base paint to the rest of the village bases and the hut bases, and scatter some fine sand over them to give it some texture. When that is dry, I apply a very thin wash of dark brown to pick out the texture, to try and provide more contrast with the hut roofs.
Finally I glue the huts which are to be permanently attached to the village base in place, add a couple of trees and a few small bushes and tufts of grass. Job done. The ruler is included in the picture to show the scale. First pic shows the huts in place, second shows the bases taken out to allow troop bases to be put in place. Sadly, no toys yet to show this.
|
|