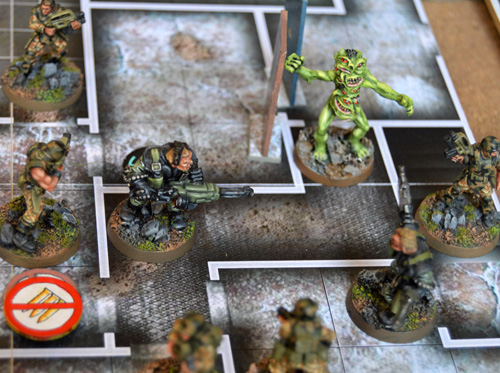
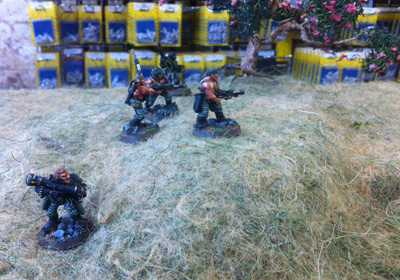
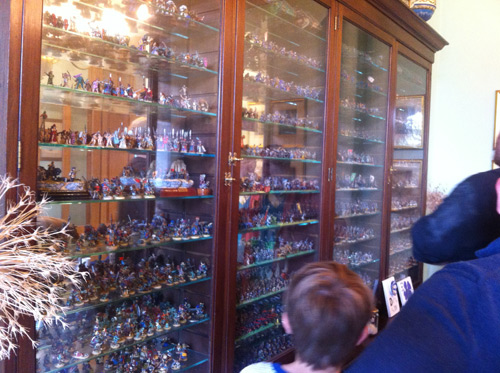
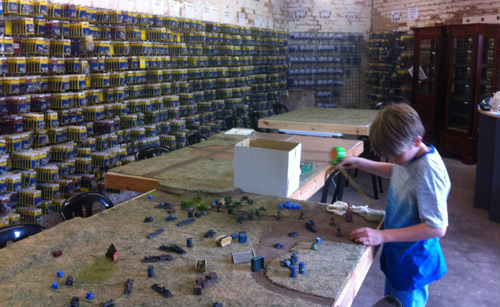
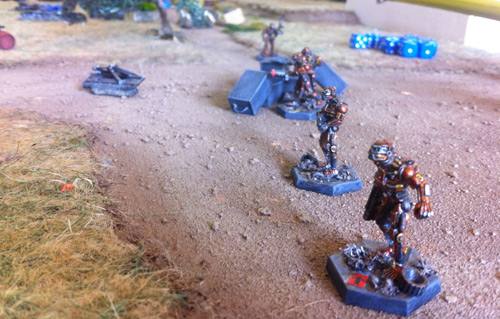
The first game has been played at Bring Out Your Lead 2015. The last Chainsaw Warrior (controlled by Skarsnik) reached Darkness with 5 minutes to go, only to be battered down after he missed with his Laser Lance. Here you can see them working their way across the 2nd floor being chased by the green mutant (strength 14).
|
||||||
|
As anyone following the retro 80s wargaming scene must know, we are merely days away from BOYL 2015 @ Wargames Foundry, Newark. “Chainsaw Warrior with Space Hulk Rules” (got to think of a snappier title), will be making an appearance. The schedule is here http://forum.oldhammer.org.uk/viewtopic.php?f=40&t=4906, there are still spaces, so sign up quick. The Meat Machine, the mutants and the military zombies will make their debut appearance, and as if that wasn’t enough there will be a prize of a “Darkness” for the first person to kill Darkness. As Zhu puts it so beautifully in his po-mo deconstruction of the original game it’s a “splatterpunk groundhog day”. Are you ready to be “unleashed against an unending relentless nightmare of death and gore and passageways and mutants and radiation and shotgun shells and broken lift-shafts and filth and rats and undead and chainsaws…”
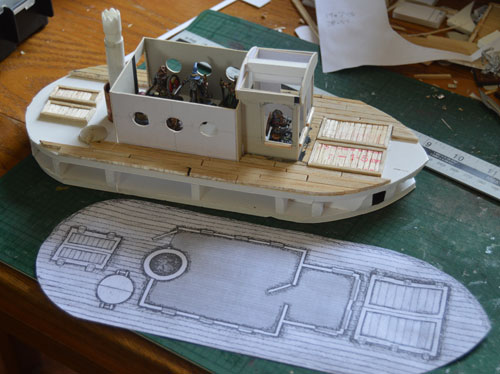
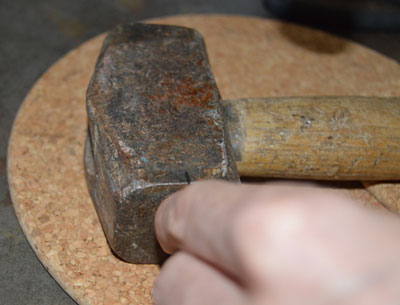
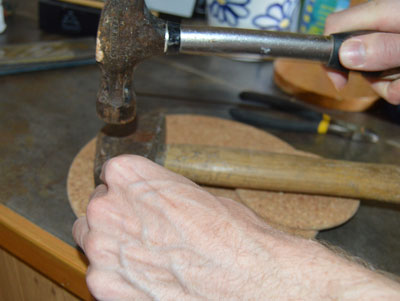
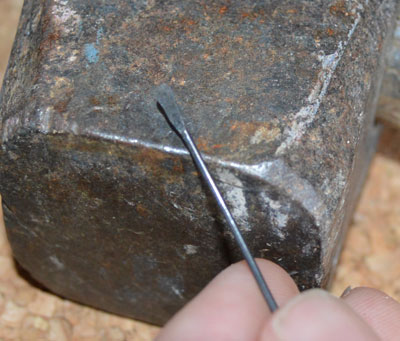
As a late entry for Oldhammer Ahoy, we have started work on the Voltsvagn from the WFB 2nd Edition Magnificent Sven scenario. Helpfully the template is printed in the scenario. I scaled it up slightly to the largest that would fit on a piece of A4 – there’s not a great deal of room in it as it is. The hull is made from foam card and the superstructure from mounting board and balsa. I don’t have any of the original models, so have been selecting some stand-ins for the crew. When I started collecting DBA armies in 1:72 plastic, the moulding quality was generally very good, except for one thing – the spears. In soft plastic, very thin straight rods just don’t work very well, so I started replacing them with my own, made from wire. Hammering the points into spear tips seems to be common practice, but I struggled to find much detail about how to do it. After a bit of experimentation, I ended up with this method. It’s quite a quick process and it’s very satisfying playing the miniature blacksmith. First you will need an anvil. You can get little jewellers’ anvils, but I settled for this big metal hammer. Then you need something to hit the wire with. A jewellers’ hammer would be ideal, but I used an ordinary claw hammer. Finally you’ll need some solid side cutting pliers to trim the wire, and of course some wire itself. I used straight lengths of florists wire from Hobbycraft, which is about 20 gauge. Make sure you don this on something solid, not a rickety table. I’ve put the hammer on a thick cork mat to cushion it. Place the wire just overlapping the edge of the ‘anvil’ as in the first photo and just give it a few wallops. One problem with the shape of the point is that the ‘shoulders’ of the point tend to taper out rather gradually from the spear shaft, and real points tend to jut out rather more sharply. Using fewer harder blows will give you sharper ‘shoulders’ on the spear point. Turn it over half way, to stop the blade being on one side of the shaft.
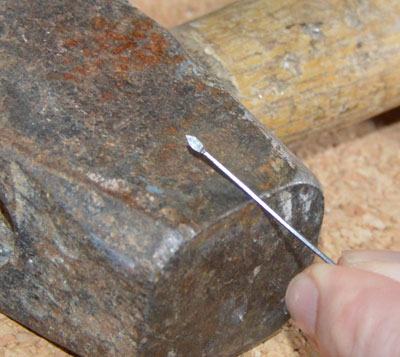
You should now have something a bit like this – it’s a sort of flat spoon.
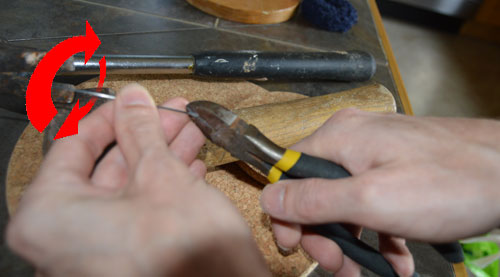
The final stage is to cut the point on the spear. Hold the side cutters at an angle and cut one half of the point. Then, keeping your hands still, twiddle the shaft as below, so that it is the other way up, and cut again. This will mean you cut both sides of the point at exactly the same angle. That’s it – you’re done. On to the next one. I’ve used this technique for spears, javelins and pikes. You can also use thicker wire (e.g. from old sparklers) and make 28mm javelins.
I’ve been getting steadily more successful at home casting some of my sculpts, so I thought I would share my methods. Note that the models for sale in my shop via Lancer are not produced in this way – they are spin cast in a commercial set up. You will need:
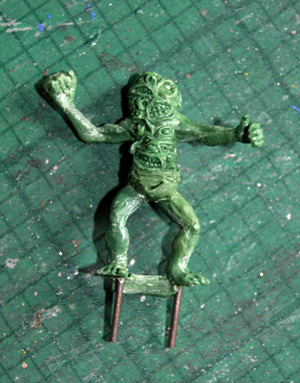
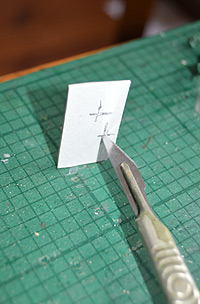
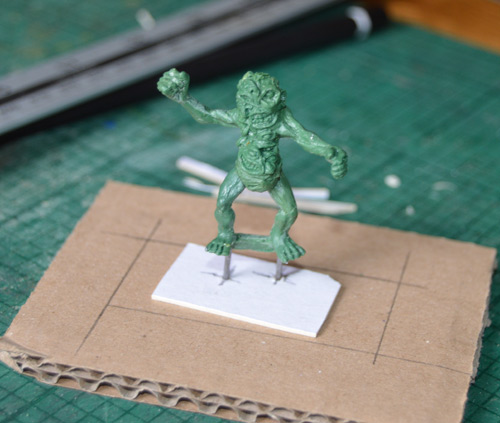
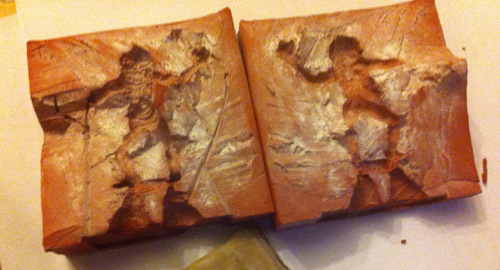
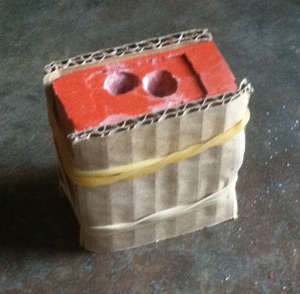
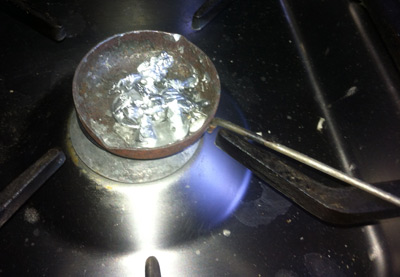
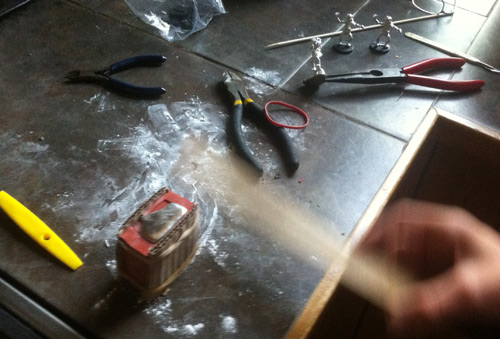
Stage 1 – Mould casing The first step is to make the mould casing. I’ve used green putty, but you could also use bits of plastic, other models, beads, wire etc. etc. I don’t have a vacuum chamber to force bubbles out of the silicone rubber, so I cast them standing up. This means that any bubbles are likely to be trapped underneath in not very noticeable places, rather than somewhere like the face. The bottom of the mould will become the top for casting, so ‘underneath’ the model, I’m going to need somewhere to pour the metal in. To make space for this I’ve superglued two bits of thick wire to holes in the bottom of his feet. Next I need to attach him to a base. I’ve cut a rectangle of mounting board, held the model on it and marked the wire positions as two small crosses. Using the tip of the scalpel, I open up two small holes. The wire is poked into these and superglued in. This holds him very strongly.
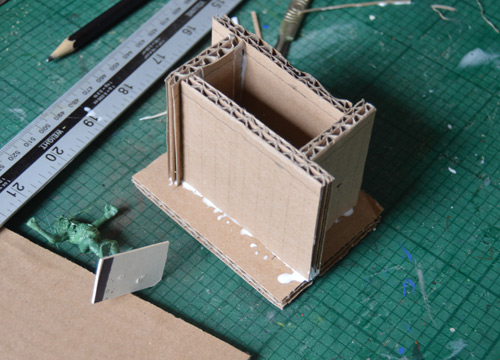
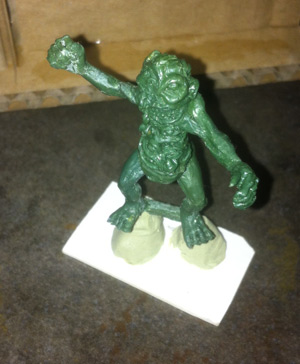
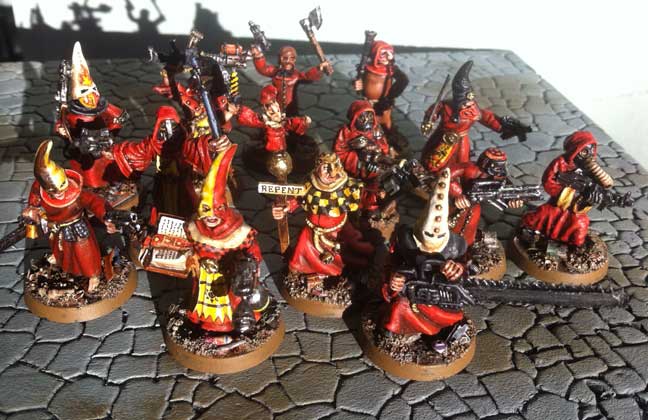
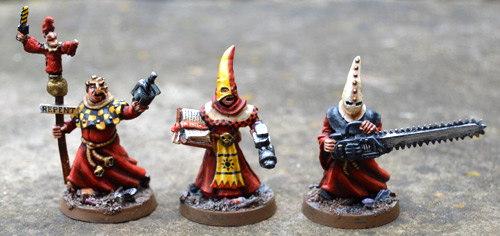
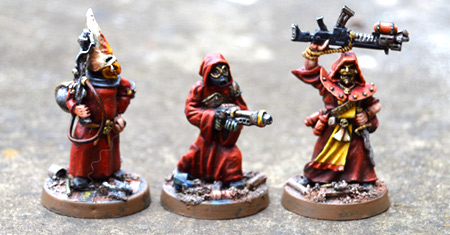
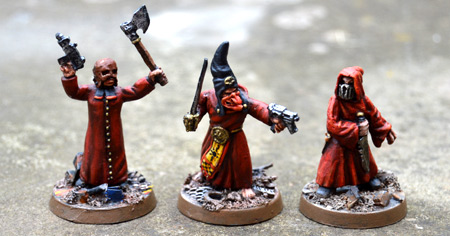
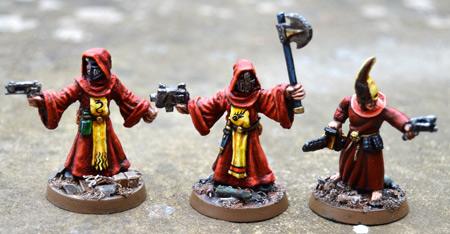
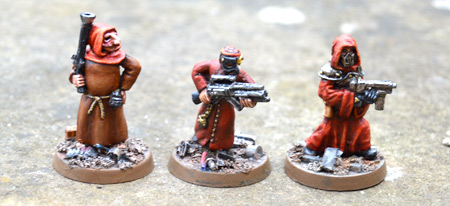
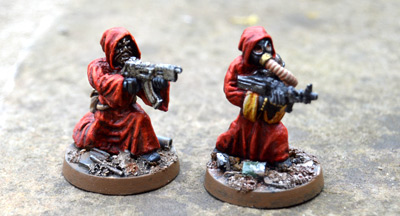
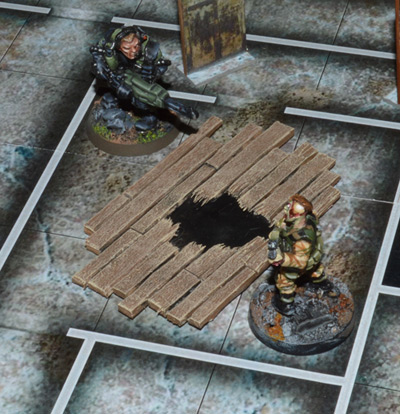
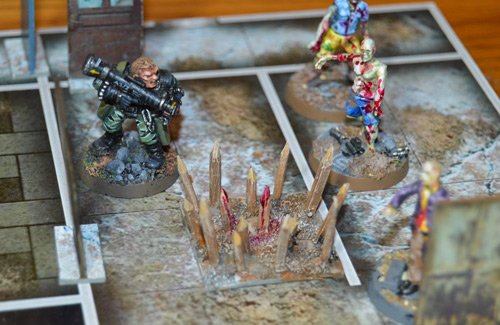
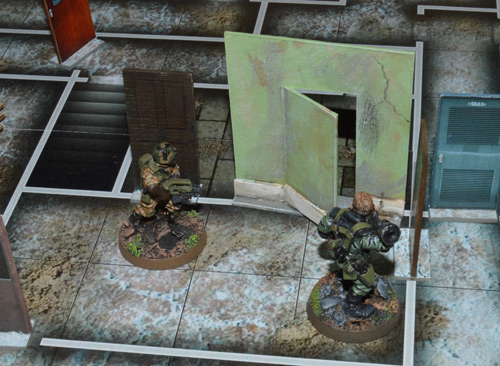
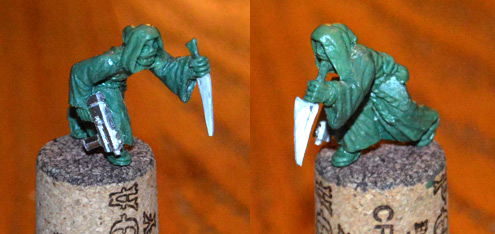
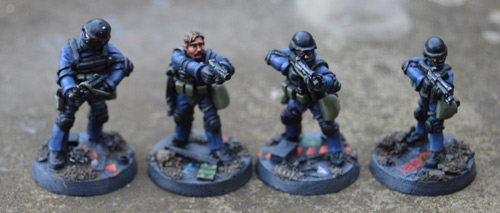
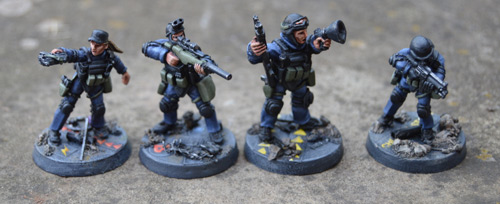
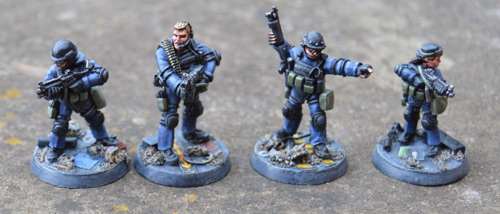
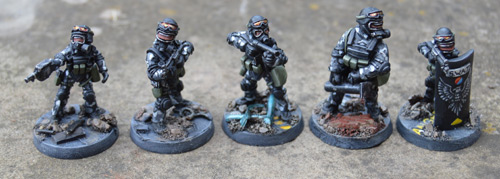
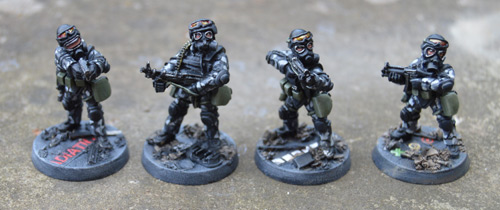
I’m going to make the casing for the mould from cardboard. Some people advocate using Lego. I’ve tried this, and it takes as long to build the casing as it does from cardboard. Not only that, you are restricted to the module of the brick stud, and also the rubber leaks between the cracks and takes ages to clean off the Lego bricks. The only advantage of Lego is that if you are doing more than one pour, the precision of fitting the bricks together enables you to locate two halves together just right. The pencil rectangle above represents the inside face of the mould. The mounting board base is deliberately a bit smaller; you’ll see why later on. Next I worked out how high to make it. Allow at least 10mm of rubber above the highest point of the model. If you cut it too fine then the mould will be liable to leak at that point, which will cause you a lot of trouble later. I made the cardboard another 5mm higher than that – you can see the level for the rubber as a pencil ‘tide mark’ round the inside of the mould. You really need to cut the cardboard with a scalpel and metal ruler to get it accurate enough. Any small cracks and the rubber will leak. I’ve used corrugated cardboard, but mounting board would probably be better because it can leak a bit at the edges of the cardboard. Note the walls are stuck in a sort of rectangular spiral, and I’ve been generous with the PVA to help seal it. The final preparation step was to form two cones of Milliput round the wire stuck into the base. This will form the two cavities to pour the metal into. I’ve used plasticene for this, but it’s quite hard to clean off the mould when you take the master out. Stick the base into the box with a dab of PVA. Stage 2 – Making the mould Once the PVA has set, you are ready to pour the rubber. I used Polycraft HT-3120 Heat Resistant High Temperature RTV Silicone. It’s a bit brittle – more so than some old moulds I made twenty years ago, so next time I’m going to try Tiranti. I measured each dimension of the box and multiplied them up to work out the volume (which came to 81ml) and added 20% for wastage and safety margin. I didn’t bother deducting the volume of the sculpt. To measure the rubber, I used a plastic cup – I poured 100ml of water into it to see where it came to. Apparently you shouldn’t get water in the silicone, so to avoid contamination I used an identical dry cup and poured the rubber in to the same point. This rubber is stained red (some rubbers are white with a coloured catalyst), which makes it particularly messy – it’s stringy, it’s sticky and it colours anything it touches. Move anything that might stain well away, and wear disposable gloves. Once I poured it, I left it for ten minutes for the bubbles to come out, and tapped it frequently. I was then ready to add the catalyst. A good way to work this out (and it only needed 10ml because it’s 10:1) is to use digital scales, but I don’t have any, so I measured it with a plastic syringe and squirted it on top. Then I gently stirred it in. As I don’t have a vacuum chamber to get bubbles out, it’s important to try to avoid putting any in to start with. I later found the very bottom of the leftover rubber never set, so next time I will use a plastic spoon to turn it over a bit more rather than just stirring. I then left it for a few minutes for bubbles to rise to the surface again before pouring it slowly into the mould. I poured it away from the model rather than over it, so the level rose slowly up until it was completely covered, as a way of avoiding trapping air bubbles. Once it has been poured, I tapped it for a couple of minutes to try to dislodge any bubbles and make them rise to the surface. Use white spirit to clean the rubber off hands, surfaces etc. Stage 3 – Cutting the mould open and preparing it Once the mould has been poured, leave it for 24 hours to ensure that it has fully set. (Yes, I know you are getting impatient). Peel away the cardboard casing and the mounting board base to leave a block of rubber. The next bit is the trickiest bit, but it has always worked for me, even if not perfect. Starting at the points where the base cones are, start cutting the mould open with a sharp scalpel. If you pull the halves apart with one hand you can stroke along the middle with the blade and part the rubber. You need to follow the centre line of the model as best you can to avoid undercut. This is difficult, particularly if you have lots of wiggly sticking out bits, but luckily the rubber is quite flexible and you can get away with a surprising amount (more than a vulcanised rubber mould as generally used in spin casting). This is one point where I’m aware that the Polycraft rubber is more brittle than the previous batch I had because it’s more prone to rip and tear. Keep going until it’s in two pieces and you can gently prise the master out. I slightly messed up the cutting in half on this one – on the far left you can see the arm goes into a hole rather than being open – luckily it can be pulled out through a slit in the rubber. Once it is in two halves, you will probably need to cut some air vents. Air tends to get trapped in the deepest dead ends of the mould, stopping the metal getting to the end, so you need to provide an escape route. In the left-hand half above you should just be able to see some fine tracks running from the arms to the bottom (which will be the top when casting). These were cut in with the tip of a fresh blade. Join them together in a sort of tree, and cut them to what will be the top, not the sides or bottom so that metal can’t leak down them. Because you have cut it in half from a single piece, the two halves will fit tightly together with no problems ‘locating’ the two halves together. To hold them when casting, I used two elastic bands. To give a bit of rigidity and stop them biting into the corners of the mould, I’ve cut two rectangles of corrugated cardboard slightly larger than the mould. Put the bottom elastic band on quite low down – you don’t want the bottom splaying out slightly and giving the metal an escape route between the two halves. Before putting them together, dust generously with talc and bang the two halves together to distribute it. If you don’t do this, the surface of the metal will be pitted, the edges won’t be as sharply defined, and it may not come out of the mould as easily – leading to mould damage. Note there is a recessed rectangle at the top where the mounting board base was. This is useful because it stops the metal dribbling down the sides of the mould when you pour it. Stage 4 – Casting the model Safety warning: Make sure the mould is absolutely dry – any water will be boiled instantly by the molten metal with explosive and devastating results as it is hurled back out through the hole you just poured it through. Sit your mould on something heat resistant next to the cooker. We’ve got tiled work surfaces, so these are OK if any spills but I wouldn’t like to see what happens to laminate. Now heat your white metal in a little pan (you can get these on eBay). I’m just holding it over the gas hob on a low setting. Swirl it around to encourage it to melt. Don’t melt too much at once – it solidifies almost instantly once you take it off the heat. Once it has all melted give it a few more seconds to make sure, and then pour it down one of the holes until it starts coming out at the top. Ideally get an assistant to gently tap the mould with something like a wooden spoon while you pour, to encourage the metal to completely fill the mould. If you don’t have an assistant, then either tap it yourself as soon as it is poured, or, if you are good at patting your head while rubbing your stomach then you might like to take on both jobs at once. Leave the mould for a few minutes and then take it apart. Be careful, the rubber will be hot, and the metal will be very hot. Use some long nosed pliers to take hold of the metal and ease it out of the mould. One half of the mould usually comes away more easily than the other, so do this one first. You can then extract one beautiful new shiny model and you are ready to melt the metal for the next one. Once the cast has cooled a bit, use some side cutting pliers to clip away the excess metal and put it back in the pan. Re-talc the mould in between each cast. Usually the first couple of casts aren’t quite as good – I think because the mould is heating up, so don’t worry if the first one isn’t perfect. If any extremities haven’t cast then consider cutting more air vents. I’ve also seen little triangular ‘reservoirs’ cut in to encourage the metal to the ends of weapons etc. That’s it! It’s incredibly satisfying to create a model from nothing, which compensates for the odd imperfection. I’ll post some pictures of the results from this casting soon. I just came across these previously unpublished photos from Bring Out Your Lead 2014. I took them at the end of the event on the Sunday afternoon. Things were quietening down, so we got out some scatter terrain and some assorted sci-fi for a quick skirmish. This collection of cultists/Redemptionists really got going last summer. At BOYL they were selling a variety of odds and sods at £1 each. I snapped up everything with a robe on and went home with 9 miscellaneous ‘jolly’ monks and priests. I also had a solitary GW Redemptionist from some bring and buy, and a couple of scratch built cultists who seemed appropriate. The first is a jolly monk with a crucifix, now wielding a Foundry grenade launcher. I gave him a putty half-mask, skulls on his belt ends, and turned the crucifix into a sort of standard. On the top of his standard is a Mr Punch effigy. This was mostly inspired by the novel Riddley Walker where the protagonist is a boy living in a post-apocalyptic Iron Age Kent. In this incredibly atmospheric book, written in a Clockwork Orange style patois, representatives from the primitive government (the Mincery) tour the villages with a Punch style show crossed with a medieval mystery play. The classic Punch has a pointy hat, red clothes and kills everyone he meets in a flurry of unreasonable violence – not difficult to see the Redemptionist parallels, and I imagined them with a similar travelling show, educating the illiterate under-hive. In the centre we have the leader of the gang (formerly Foundry jolly monk with book). He was given a flamer, bookmark, skull buckle, hanging down cloth (no idea what the proper name for that is) and a pointy hood all scratch-built in green putty. On the right is the Foundry jolly monk with his hands behind his back. I cut these away at the shoulder and hid the cut marks with some pouches on his back. The chainsword is built from three layers of plastic card with the inner cut as a saw tooth. A few bits of wire and green putty were used for the handle. I then sculpted a green putty hood and new arms. On the left is a converted monk with a blunderbuss. The blunderbuss has been converted to a primitive looking flamer connected to a big tank on his back. Another hood and grotesque mask, a bit of elbow armour (not sure why he’d choose to protect that – Achilles’ elbow perhaps), but I was just trying to ‘fancy’ him up a bit. The middle model is my first scratch build in a long time. I started him over ten years ago – did about 80% and then put him on one side, till I was inspired to finish him at the end of last year. He became one of the first batch to be cast up by Lancer, although this particular one I drop cast myself in a silicone mould. On the right is a Games Workshop redemptionist (unconverted). He has a one-shot flamer cartridge fixed under his autogun. On the left is some kind of Foundry Jesuit. He was waving a crucifix (now an axe hand), and the other hand was making some kind of benediction. I stuck on a Foundry machine pistol, an axe head from the bits box on a wire handle and gave him an executioner style putty hood. I wasn’t sure about the neck tie, but in the end I left it as I couldn’t think what else to use, and it was going to be difficult to cut away neatly. I really like the row of buttons – gives him a certain style missing from more generic baggy robes. The middle model had the rapier already. I added a decorative sash at the front, swapped his antique flintlock for a Mk6 bolt pistol and added the hood and grotesque mask with putty. He is barefooted, which must be uncomfortable among all that rubble, but that’s the flagellant mentality for you. The model on the right is another cultist from my Warfactory range. With just a big knife and some throwing daggers, he is perhaps a little under-gunned, but he values stealth and timing over raw firepower. The left hand model is a cast variant of the centre cultist – with just a pistol he is another of the more lightly armed. The centre is the leader from my cultist range. I also started him about ten years ago, and he spent that time as a barely fleshed out armature in a box. This one is another home cast, but the same sculpt is now available from Lancer. On the right we have some kind of Foundry Renaissance priest, originally with sword and flintlock. The flintlock got some green putty to bulk it up into a more modern firearm, I added a Foundry chainsaw and a green putty hood – in a vigilante super-hero/inquisitor sort of style. A couple of green putty grenades and he was ready to go. Another two Foundry monks. The first monk already had the blunderbuss, which worked well as it was. I just added a grenade to modernise him a bit, and then a green putty hood and mask. I was thinking Hieronymous Bosch, grotesque carnival style. The one in the middle had a Napoleonic rifle, which has been replaced with a plastic Warzone gun, and he sports a green putty mask. I wasn’t sure about the skull cap, but in the end I kept it and painted a pattern on it to liven it up a bit. The final one is from my cultist range. He was created as a variant of the flamer cultist further up. The model on the left is from my cultist range. He’s toting a 3D printed weapon, and has a skull like metal mask. The final model is another home cast cultist. The original flamer didn’t cast properly and was missing its end, so I cut it away altogether and replaced with a Foundry weapon. The gas mask was altered by giving it a pipe made from green putty wrapped round thin wire and then rolled on the teeth of a long pair of pliers to give the ribbed texture (quite fiddly, I had to do it several times before I got a neat one). I have been making a few extras for the Chainsaw Warrior game. By accessories, I don’t mean a tiger-stripe handbag; it seemed like a nice idea to represent some of the traps as actual elements on the board. First up, the Weakened Floorboards. These were made from sliced up lolly stick stuck to mounting board. If the model discovering them fails a roll, they can fall right through to the floor below – good luck catching up with your friends before the zombies get you. Next is a spiked pit trap. Adding insult to injury after falling in, a model (if he survives), must then climb out. This was made with sharpened matchsticks and cocktails sticks on a mounting board base. For strength they have been glued into holes in the board and then sliced off flush on the other side with a scalpel. Finally, a secret door. We had nothing to represent these with in the last game except a coin. This one has been made from mounting board and painted to resemble the illustration in the original game. These can be placed anywhere in the room they are found in, which can allow them to take a massive short cut. Another cultist sculpt is finished. I was pleased with his ‘creeping along’ stance – I think I’m getting better at making the poses look more dynamic. Soon he will be going to be moulded by Lancer with another four cultists and some other more novel additions to my Warfactory range. If you have bought any of these cultists, I’d love to get your feedback or hear what you would particularly like to see added to the range (heavy weapons, more medieval, more armour etc.) On a more technical front, for those who are sculpting themselves, he is built on an armature of 18 gauge florists wire. Some recommend thinner wire, but I find it needs to be quite substantial or it bends out of shape when I’m pressing the putty on. The gun is a metal casting from a 3D printed original, and the blade is cut down from a plastic blade in my bits box. The knife has a wire handle which was fixed to the arm with a blob of putty which became the basis for his hand. Originally the knife was much closer in to his sleeve, but it didn’t look right so I bent it further out. These are SWAT from Wargames Foundry Street Violence range. They make versatile troops for all sorts of near-future scenarios. I’ve done them all with olive-green webbing, black body armour and then half in dark blue fatigues and the other half in urban camo. They look similar enough to use as part of the same force, but equally could be used as opposing forces. Somewhere I’ve got at least one more pack of these, but I have never got round to painting them.
I particularly like the sniper above. The squad are packing a good range of weapons, with the basic MP5 being supplemented by a sniper rifle, two machine guns, two grenade launchers and two shotguns. One also carries a door ram, and another is taking cover behind a shield.
The urban camo was done by painting them white, painting on grey patches, and then a dark grey wash. Finally the black streaks were added. The goggles were painted gold and then given a little shading with translucent red glass paint. This effect is to imitate the reflective coatings like the ones on these paintball goggles.
The bases are in my ‘urban’ style. I start with a sheet of words (white on black background) and various line and markings that are simply printed on plain paper with an ordinary laser printer. These are stuck to the bare plastic bases and then lightly washed with paint to colour in the white areas. I then super glue some bits of debris to the base. Then some sand and fine stones are stuck on with PVA and finally it is painted. They are probably the most laborious basing technique I use, but they do help build atmosphere.
|
||||||
|
Copyright © 2025 WarFactory - All Rights Reserved Powered by WordPress & Atahualpa |
||||||

