|
|
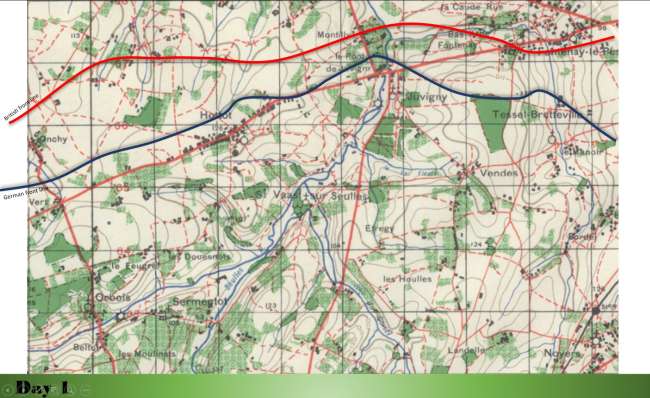
A short summary of Campaign Day 1 – I will post some more detail once the two remaining games have been played (3 & 4)
The day started with a British bombardment in the area of Juvigny (area 1), followed up by an infantry attack through the orchards north of the village at around 0630. A second attack began a couple of hours later by British infantry who had been mustering in the wood at 808662. They were preceded by a rolling bombardment which inflicted heavy casualties on a German coastal battalion located north of the main Hottot road.
The Juvigny game (area 1) has been fought out to a conclusion at dusk. The British have advanced on the village, but the centre of the village and the road bridge is still being held by the German defenders.
The Hottot game (area 2) has only reached about 1100 in game time, so another Day 1 battle (area 4) will be played to determine what happens next. The British have advanced about a third of the way across the battlefield with minimal casualties. The Germans are still holding the road, but have taken much more significant losses, particularly in their centre, and had to commit tanks from their reserve to avoid a collapse.
The east has been relatively quiet – the game to be played at area 3 represents a British recce probing forwards into the German forward defenses and observation posts.
Games 3 & 4 have not been played yet, but should be before Christmas. At that point, the two Commander-in-Chiefs will then make another round of map moves and decide on their orders for Day 2, with the Day 2 battles taking place in mid to late January.
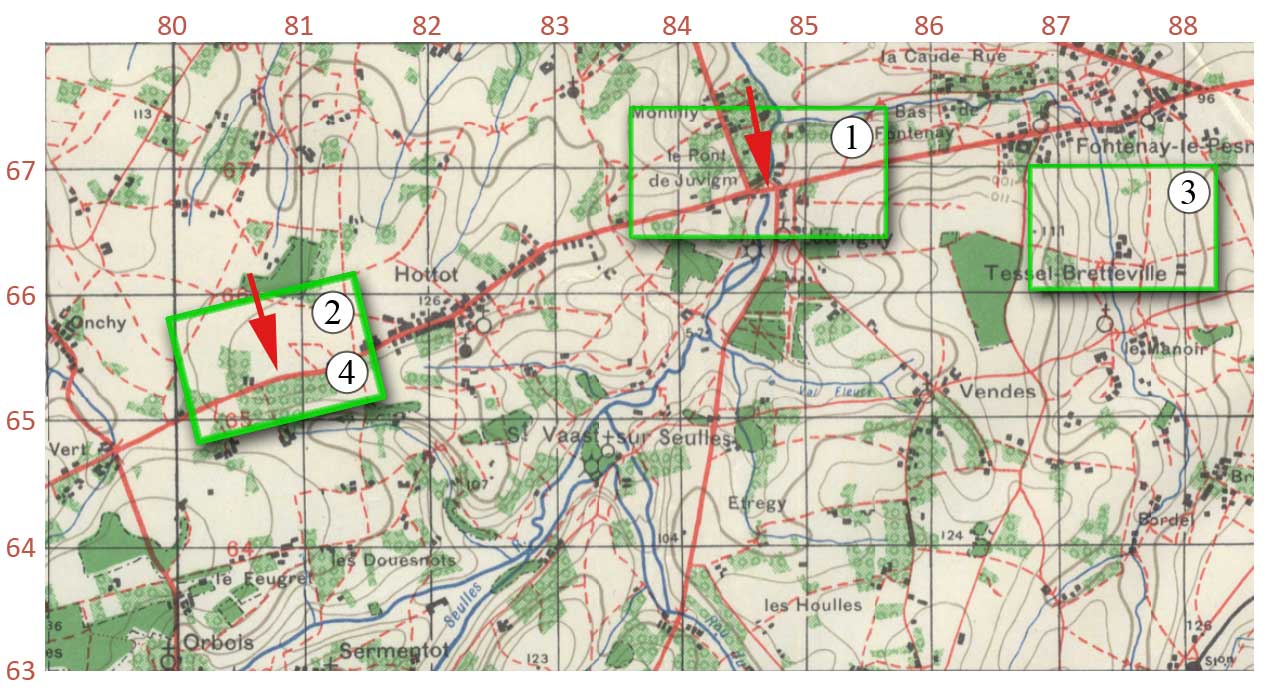
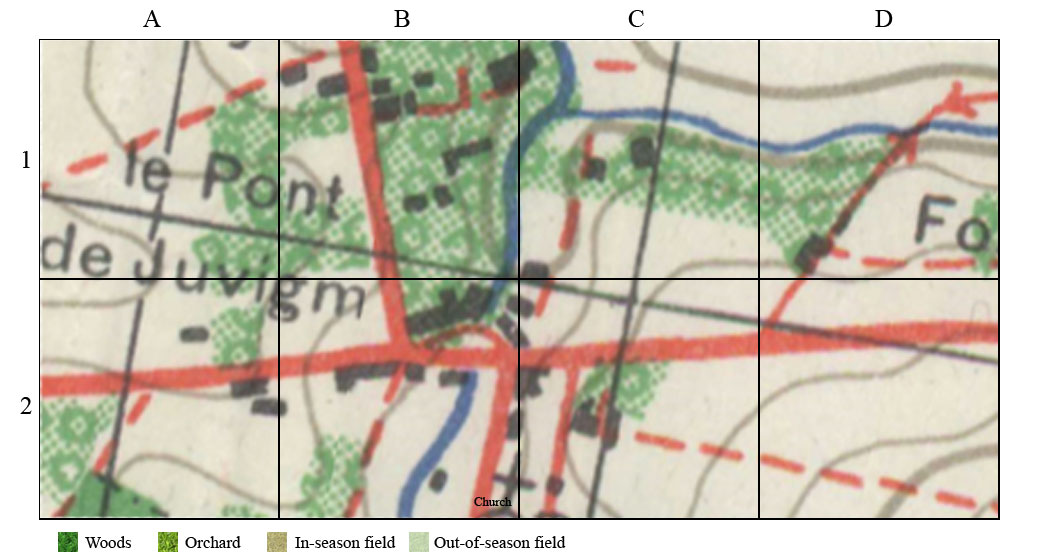
The green boundaries represent the extent of Crossfire tables.
In our new campaign, the Commanders-in-Chiefs have made their map moves, so it’s time for the first round of tabletop Crossfire battles.
It’s 04:30 18 June, and the night suddenly echoes to the roar of artillery. The 25 pounders of the Royal Field Artillery shell Juvigny and the surrounding area for over an hour and half. The Germans crouch lower in their entrenchments and wait for the wave of Tommies which will inevitably follow such a ‘softening up’. The bombardment finishes, and there is a brief respite before the first probing British rifle squads encounter German observation posts and forward defences in the grey light and damp of the dawn.
Perhaps unsurprisingly, the first attack is falling at dawn on the tip of the German front line, where the Germans are trying to hold the two bridges at Juvigny. The river is easily fordable, but with few major roads in the area, securing a decent crossing will facilitate the Allied advance.
We’re going to be staggering the games, probably playing around one a week in total, or one per month between individual players. This one should be played this Sunday (14 November).
The first will be a good sized battle on a 4ft x 8ft table. As it hasn’t happened yet, I can’t share much detail other than to post up the map. The grid is in 2ftx2ft squares. The British are coming from the North.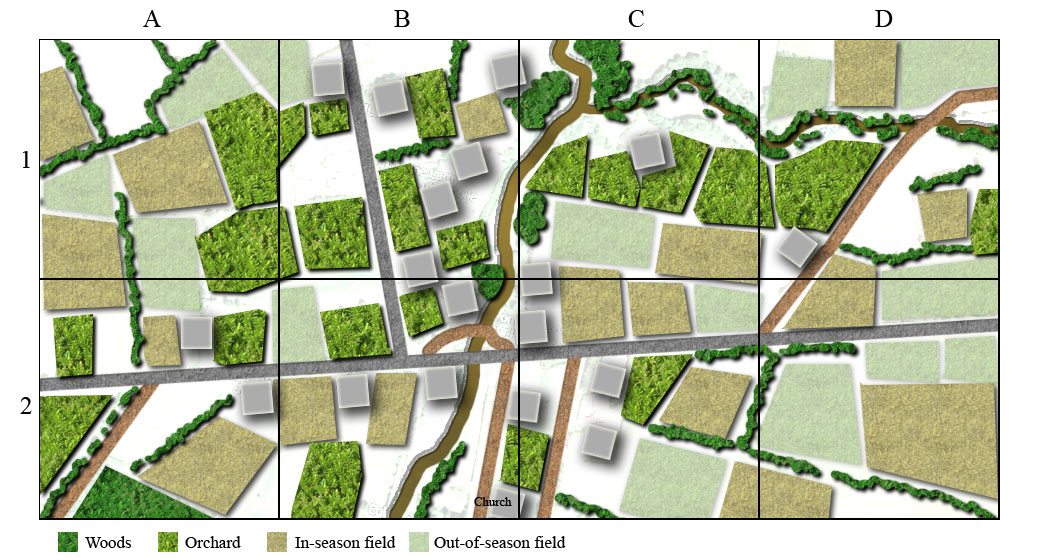
This based on this area of the 1940s 1:50,000 map
The map and the table don’t quite line up – mainly this is because when modern aerial photos are overlaid, it’s clear that the original map wasn’t all that accurate – some features are probably out by at least 50 to 100m, which could be a problem if you were calling in close-in artillery support…
In the current Crossfire campaign, the tabletop games will be fought on a layout that will mimic the real terrain as closely as possible. The process of producing these is as follows.
The battlefields will use a scale of 1000m to 4′ of tabletop, or about 1:833. Crossfire doesn’t have an explicit ground scale but this is in the mid range of plausible estimates based on troop frontages etc. Conveniently, it also means that a square on the 1:50,000 map is the same size as the width of a classic wargames table, making it easy to visualise how an area of the map might translate to the table.
For the purposes of this example, I’m doing a 4’x6′ layout of the area just north of Hottot. Players in the campaign should note that I have no specific reason to think this will be an actual battle location, I just picked it because I wanted to illustrate how a relatively empty looking area of map actually has plenty in it.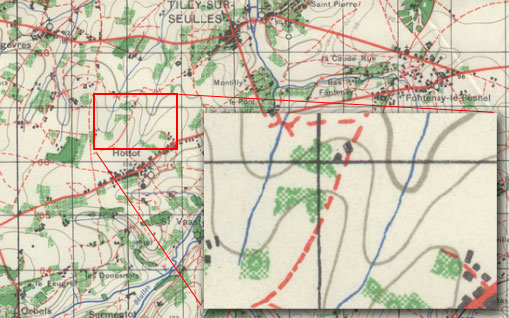 As the table is 4’x6′, that equates to a rectangle 1 x 1.5 map squares. This one is precisely lined up with the grid lines, but obviously they don’t have to be, and the direction of attack/major terrain features might imply a more appropriate orientation. As the table is 4’x6′, that equates to a rectangle 1 x 1.5 map squares. This one is precisely lined up with the grid lines, but obviously they don’t have to be, and the direction of attack/major terrain features might imply a more appropriate orientation.
Once I had that, I screengrabbed the Google maps satellite photo of the same area. Having done a few comparisons of these with WW2 1:25,000 maps (which show all the field boundaries), the fields in existence today are very similar, although there has been a loss of quite a few of the orchards and hedges. Here the map has been overlaid with a 2′ grid.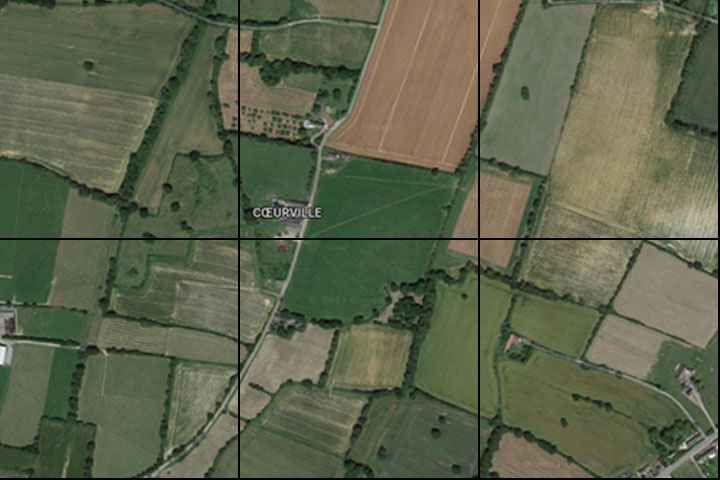
As you can see, even today the ’empty’ area of the map is full of small fields, hedges and ditches. Here’s a composite so you can see both together. They don’t align perfectly – the original map wasn’t completely accurate anyway. The light green map areas are orchards. They don’t appear to exist any longer, but the field boundaries seem to roughly align with the orchard locations, so we can see where they used to be.

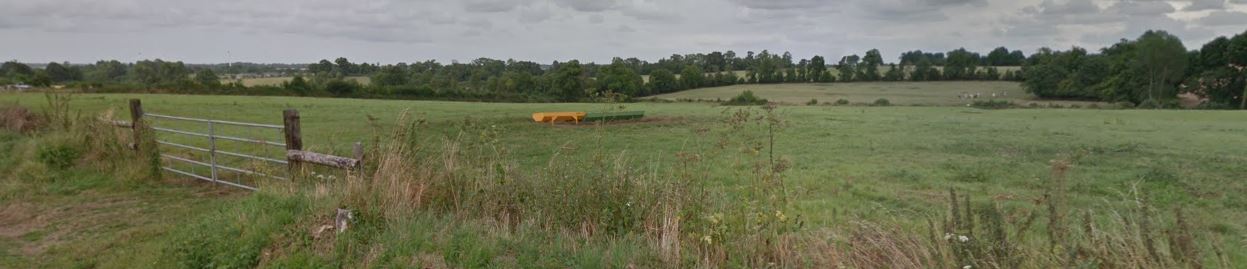
I then traced over it to create the ground in a “Crossfire” style. The streams here would be very small – barely more than ditches, so I haven’t bothered to depict them, other than putting a hedge down to represent the trees and scrub along the line of the stream. Likewise although there are some contours, I’m going to treat this as flat. Here’s a photo from the farm in the top-centre looking east towards the stream. Although the dip is perceptible and there is some ‘dead ground’ that can’t be seen because of the contours, I don’t think it needs a hill or contour line – the normal LOS rules would be sufficient to block this area.
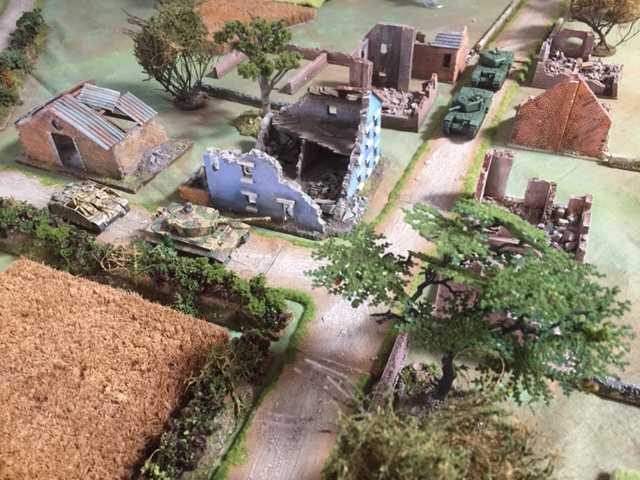
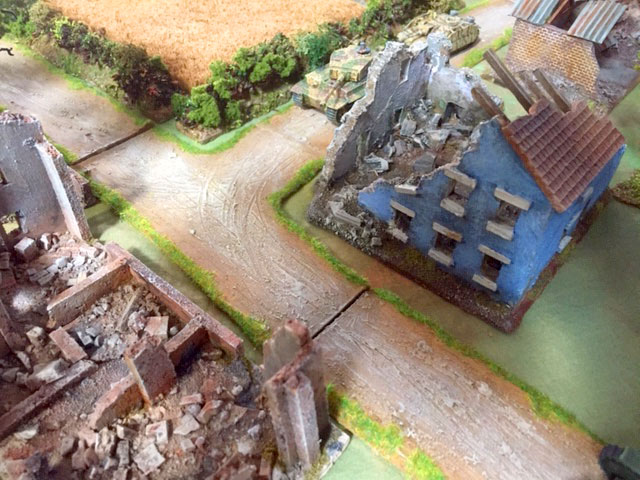
Here’s the final Crossfire map. It’s late June, so most of the fields have been counted as ‘in season’ which means they give cover and block LOS. The buildings have been translated into typical 3″ Crossfire building sectors. Each would represent, say, a farm and its outbuildings or a group of cottages and their surrounding gardens. Some of the villages were subjected to quite heavy bombing/artillery so some might be rubble instead.

After a long period of planning, I have finally kicked off a Crossfire campaign, set in Normandy 1944, consisting of rounds of connected Crossfire battles, each representing one day. The battles will be fought by five pairs of players, one British and one German, all at separate locations during each real world month. The results will be used to determine the progress of the campaign and what happens in the next round.
Crossfire is a WW2 game played at up to battalion level, usually at 15 or 20mm. It uses a flexible turn system, where one player keeps making moves until something goes wrong – a failed rally roll, incoming reactive fire etc, and then the initiative passes to the other player. This results in a very tactical game which avoids being a head-to-head grind like many rule sets.
The map being used is a 1:50,000 from the period. There’s an excellent scan available at this site Caen – Normandy War Guide. The location is about twelve miles west of Caen. It’s 18 June – 12 days after D-day and although the Allies have pushed in twenty miles from the coast, they’ve been unable to break the German defences in Caen itself, in spite of it being an early objective. The German coastal defenses were held by low quality infantry divisions which have been pushed back rapidly by overwhelming allied forces. In the last few days, some better quality panzer divisions, held in reserve, are beginning to stabilise the line. This map shows the two front lines on day 1 of the campaign.
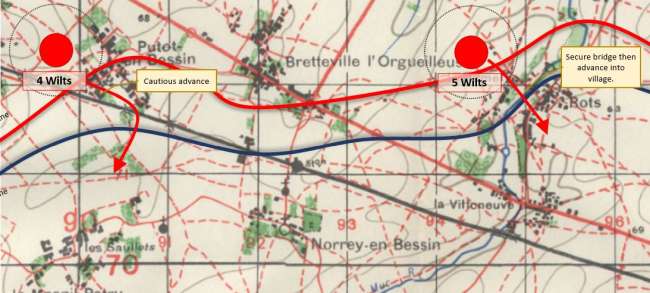
Below is an example showing how orders will be marked on the campaign map. To give an idea of scale, each map square will correspond to 4’x4′ on the table and each of the blobs an infantry battalion. The inner circle represents it being in relatively close order – the outer circle the maximum size of a typical frontage when attacking.
The previous post covered how to hunt out your enemy’s carrier and send the strike to it. So, what happens next? Strikes are either at low level with torpedoes or high level with dive bombers. The prepared defender will have some aircraft on Combat Air Patrol (CAP), which can also be at either level.
If the attacker has sent aircraft at both levels, then decide randomly which is resolved first. The attacker then has some choices. If they have any aircraft on the deck, they can scramble them. There’s two benefits to this – if aircraft are on the deck when the carrier is successfully bombed then it significantly increases the risk of fire, and some of the aircraft may be destroyed. The scrambled aircraft can also take part in the defence, although they automatically start ‘disadvantaged’ from the carrier, so it’s hard for them to get into position before it’s too late. Attacking bombers get +1 if there are no defending aircraft, so it’s probably worth throwing up a couple just to deprive them of this bonus.
The defender can also pull aircraft down from High CAP to defend a low level attack. They start in high cover which is good because they are advantaged, but bad because they effectively lose a turn. Low CAP can go to defend against a high level attack, but they will automatically be disadvantaged, and a high attack with no High CAP opposing will automatically be advantaged.
The attacker and defender place elements alternately. If the attacker has multiple bomber elements, they might decide to attack from opposite sides of the table to split the defending forces, or keep together in a tight pack and try to punch through. Once all are placed, if the attacker didn’t get a very good location roll, the defender can reposition their carrier up to 9″ in any direction.
Escorting fighters are generally used to tail and outmanoeuvre the defending fighters – by the time they could break them with boom chits, the bombers will have generally already succeeded or failed, so it’s better to try to reduce their effectiveness and stop them getting any shots in on the bombers.
Attacking bombers will want to dive to reduce the number of turns it takes to get to the target – however, diving too early means multiple turns at disadvantaged – increasing their risk of being shot down, whereas diving too late runs the risk that they will be outmanoeuvred by enemy planes, and their advantage levels will be wasted.
Defending fighters tend to attack recklessly – there are only a few turns to stop the bombers, so the risk of picking up boom chits is worth getting an attack in. However, Japanese fighters with the ‘vulnerable’ trait are at significant risk from tail guns – which go up from 1 to 2 dice, so head on or side attacks are preferable.
Laden bombers do not acquire boom chits in the normal way, so the defenders are going to have to shoot them down to stop them. The carrier is considered to be a 2″ diameter target, although we use a 1:700 model on the table to add atmosphere. A dive bomber has to pass right over the target to attack. A torpedo bomber has to begin its attack turn disadvantaged and pointing at the target within 6″ of it. Before an aircraft attacks, the carrier gets a d6 as AA defence. On a 6 it has automatically caused the attacking aircraft to miss, and the aircraft must make an agility check or be destroyed.
The attacking player can choose to break off the attack at the end of any turn, and the game ends immediately.
This post covers our search rules for the Blood Red Skies campaign. These are key to getting the right ‘historical’ feel to a carrier vs carrier action because of the importance of locating the enemy and the uncertainty involved. Working off some real world historical events, we wanted to include:
- Going after the wrong target. At the Battle of the Coral Sea, both sides sent strikes at what they believed were the enemy fleet carriers, but the IJN hit a US oiler, and the US planes struck the light carrier Shoho. This is reflected in the rules by dummy ‘location fixes’ – if you attack one of them, you are heading for disappointment.
- The chance of a strike failing to connect with its target. At Midway most of Hornet’s strike force failed to locate the enemy. The rules mean that even if you strike the right target, you have to make a roll based on your bomber leader’s skill, and the number of ‘fixes’ you have, to actually attack the enemy carrier.
- Aircraft starting to run low on fuel and deciding how much longer to keep looking. At Midway some of the aircraft had to ditch because they had spent too long trying to find the enemy before turning back. If you fail the roll in #2 above, you can decide to ‘push it’ and re-roll, but you may lose some of the returning aircraft.
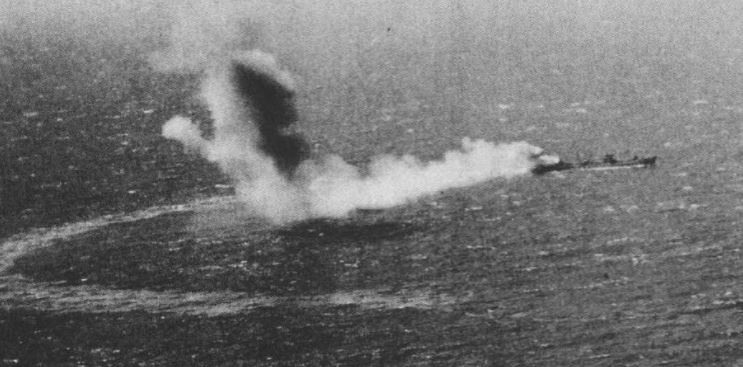 The USN oiler Neosho – initially identified as a carrier…
The uncertainty for both sides was also paramount. Neither side was completely sure whether either they had found the enemy, or whether their own position had been identified.
We stuck with the basic 3×3 grid from Ken’s rules, although in ours, all 9 squares are searchable locations representing the area where the enemy carrier is expected to be. At the start of each campaign day, each player secretly chooses a location for their carrier and writes it on their game sheet.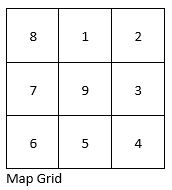
To determine the search success, each player has a pack of cards. Separate out all the diamonds and keep five of them. The other diamonds are not used in the game. Of these five diamonds, each player selects two to be dummies, and notes down their numbers. The three remaining diamonds are added to six random cards from the rest of the deck. This is the ‘correct square’ pile, containing three ‘location fixes’ and six ‘nothing founds’. The remainder of the pack (33 assorted non-diamonds plus two diamond ‘dummy location fixes’) is the ‘incorrect square’ pile.

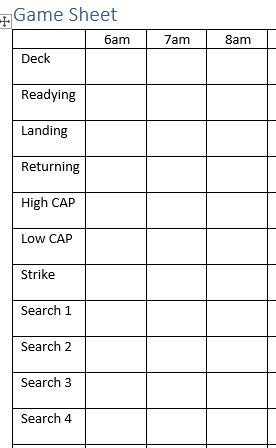 Part of game sheet Aircraft with multiple crew (generally the bombers) can then be used to search for the enemy carrier. All aircraft are allocated on the game sheet, which also includes CAP etc. They have enough fuel to search a map square for two turns of an hour each, and they can move to an adjacent square for their second turn of searching. You call out the squares that your aircraft are searching, and the enemy player gives you a card from either the ‘correct’ or ‘incorrect’ pile as appropriate (keeping secret which pile the card has come from). You don’t know if the ‘location fixes’ you find are real or dummies, and he doesn’t know if you’ve found anything yet. To simplify the game play, the pilot skill is not taken into account for the searching (as in Ken’s rules).
Once you have one or more location fixes, you can launch a strike. One is risky, two is adequate and three is ideal. The turn of your strike, you reveal which square you are attacking and how many ‘fix’ cards you have. You roll dice to locate the target – one dice for each skill level of your best bomber pilot, plus two dice for each location fix. If you get one 6, you have found it but the enemy player will get to reposition it during deployment, if you get two 6s, then it will be smack in the middle of the table. If you get no 6s then you can either return to your home carrier or go for a re-roll, but this will require pilot skill checks for returning aircraft, even if the second roll is also unsuccessful. Assuming you locate something, then enemy player will then reveal whether the location fixes were real or dummies.
Location fixes can also be obtained by other means – you get a ‘free’ one if your carrier is attacked, because the attacking aircraft will tend to give away the enemy position. Some of the carrier doctrines can also be used – for example ‘Submarine’ allows you to search a square each turn without aircraft.
In the next post I’ll cover the CAP and deployment.
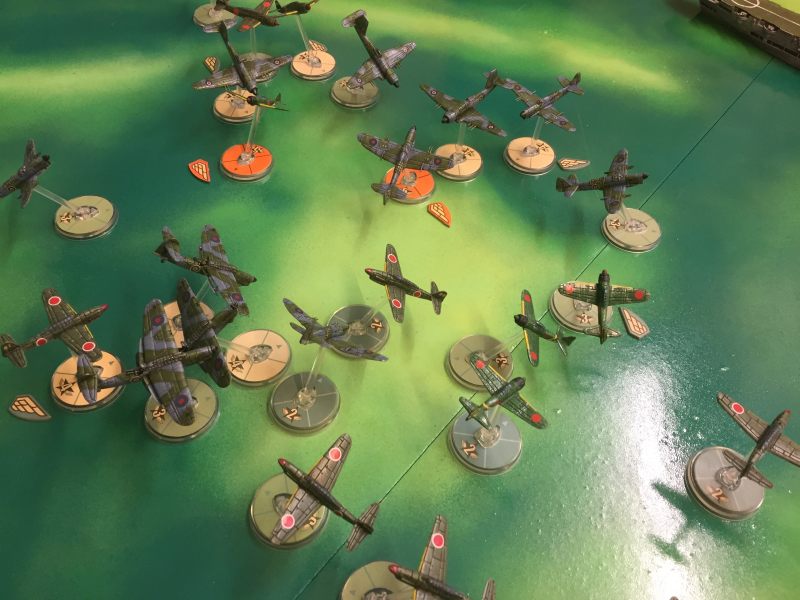
We’ve discovered that our favourite way to play Blood Red Skies, the Warlord WW2 aircraft game, is in carrier vs carrier campaigns. We started off with Ken Natt’s “Bath Tub” carrier campaign and have added a load of our home brew rules on top – this describes our combined rules.
Each player has a carrier and about 6 fighters and 12 bombers, and a campaign comprises of typically 3 to 5 games of Blood Red Skies – about a day’s play in all. The players have to allocate their aircraft to search out the enemy carrier and then launch strikes to destroy it, while simultaneously defending their own. A carrier can be sunk in a single attack, so every game feels important and tense. There are a multitude of competing priorities so players have to make complex decisions that align with the real world situations. Do you send your the aircraft that are now ready on their own, or do you wait to launch a larger strike? Do you send your fighters to protect the bomber strike, or do you hold them back to protect your own carrier? Do you keep arming your aircraft on the deck so they are ready to attack, or do you launch them to prevent an enemy bomb setting the whole lot ablaze?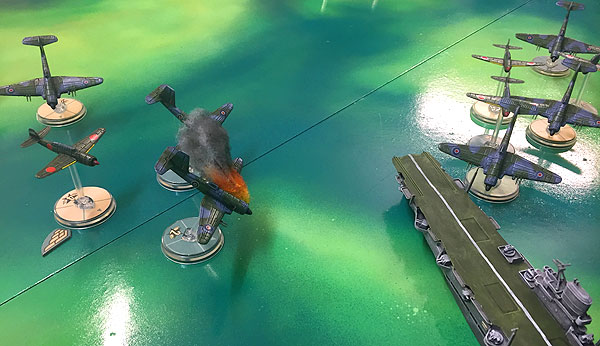
In wargaming it’s always difficult to get away from the chess style scenario where two equal and equivalent forces slog it out. Historical situations tend to be much more asymmetrical but that’s hard to turn into a satisfying game. In these, you get all sorts of different sizes and shapes of game, but set within the larger context of the campaign, they are still interesting, and the chance that a lone torpedo might hit home means that the underdog can snatch a victory.
We start by picking our forces. Each player has 1500 points (a typical BRS game is 500 points). They can spend it on fighters, bombers and carrier doctrines, there are no maximums or minimums because they arise naturally. You could only buy fighters, but then you could never win because you couldn’t damage the enemy carrier. You could only buy bombers, but unescorted bombers have little chance of success. The carrier doctrines represent specific aspects of different nation’s tactics and equipment – armoured decks, radar, AA cruiser escort etc. Points are based on the BRS standard ones, but we’ve tweaked them slightly to better represent their value in these campaigns.
Next step is to put your carrier into a square on a 3×3 grid, and allocate your aircraft. The allocations are marked on a sheet, so neither player knows what the other one is doing. To be used to search, an aircraft must have at least two crew, so suddenly the Fulmar (which is frankly a rubbish fighter) starts to make a bit more sense. Each turn represents an hour, and aircraft can search for two turns. We use a pack of cards to add uncertainty into the search. Each player has a ‘correct deck’ with a number of ‘location fixes’ and an ‘incorrect deck’ – mainly ‘nothing found’, but with a few false positives. Their opponent calls out the squares they are searching (a bit like Battleships), and they get a card from either deck, depending on whether it’s the right square or not. You don’t know if your opponent has received a ‘fix’ or a ‘nothing found’, even if they are searching the right square. Once you have at least one ‘location fix’, you can launch a strike, but if you have only one, your planes might well not find the right target, or will expend too much fuel searching – the fixes from ‘wrong squares’ are dummies that will result in a wasted strike. Better to get another fix, but that will take longer. You could divert more aircraft into the suspected square, but then the other player will know you are on to him as the air activity intensifies. With two fixes, you’ve got a good chance of your strike being on target. Three is better, but can you afford to wait? With half your aircraft out searching, you might not have much to launch a strike, and there is the risk that your enemy might find you first.
Once a strike is launched, the attacking player rolls to locate the enemy. The roll is based on how many fixes you’ve got and the skill of your senior bomber pilot. If you are unlucky or are attacking one of the dummy locations, then you might find nothing, and have to return to base for the lengthy cycle of landing and rearming. If the roll is failed, you can choose to keep searching, but your planes will be running out of fuel, and you risk losses on the way home.
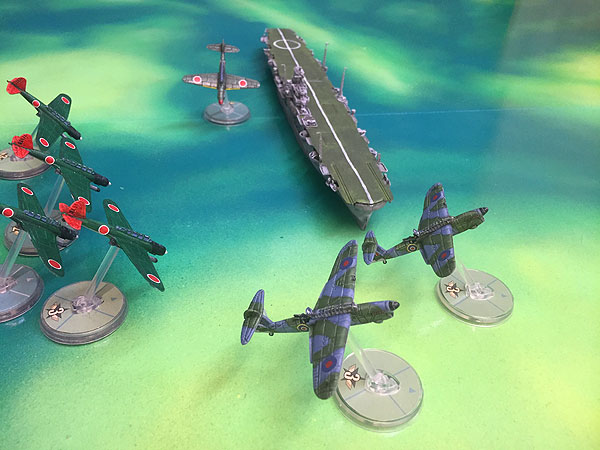
Assuming you locate the carrier, and there are available defenders then a Blood Red Skies game is fought on the table. The defender can bring any planes on Combat Air Patrol (CAP) and also scramble any available on deck, including using bombers in a last ditch attempt to protect the carrier. The carrier can take three damage points, but a single torpedo can do two if you are unlucky, and special damage can occur, such as fires or hull breaches that limit your carrier’s ability to fight and can even cause additional damage.
Fighter losses are typically light – the attacker won’t have many escort fighters and often they will be expending most of their effort in outmanoeuvring and disrupting the attacking fighters rather than actually shooting them down. It’s much more dangerous for the bombers – losses are typically one to two thirds of the attacking force, but it’s all about the hits on the enemy carrier. You might lose all your bombers, but if you get a couple of hits in, that’s a victory.
In the next post, I’ll go into more detail of the rules.
 Two Churchills about to get a nasty surprise I’m planning a WW2 Normandy campaign using the Crossfire ruleset, and I’ve been collecting up the required models and scenery.
Last week I made some dirt track roads, which were surprisingly successful in that they were very quick, very cheap and look great. Altogether there’s about 8ft – enough for most layouts. They could be used for anything from 15mm up to about 28mm without looking odd.
First I cut up an old bit of hardboard into 2″ wide strips with a jigsaw. Then I cut off the edges at a roughly 45 degree angle with a sharp knife. These were deliberately a bit irregular and jagged. To texture the roads, I used “Decorators’ Caulk”, which is a rubbery gap filler sold in a tube for a sealant gun. I was a bit worried that this might cause the hardboard to warp, so I smeared it on very thin with an old credit card, and then roughed it up a bit with my finger. Each section used about a small teaspoonful. I also scratched in a few wheel ruts, mainly with my finger nail. The longer sections were left to dry with something heavy pinning down each end, to reduce the chance of warping.
They were then painted with brown emulsion, drybrushed with a cream coloured emulsion (1/2″ brush) – I deliberately put more on centre to give it more visual interest. The sections were finished off with static grass at the edges. In total they probably took less than two hours from start to finish.
 Close up of road texture
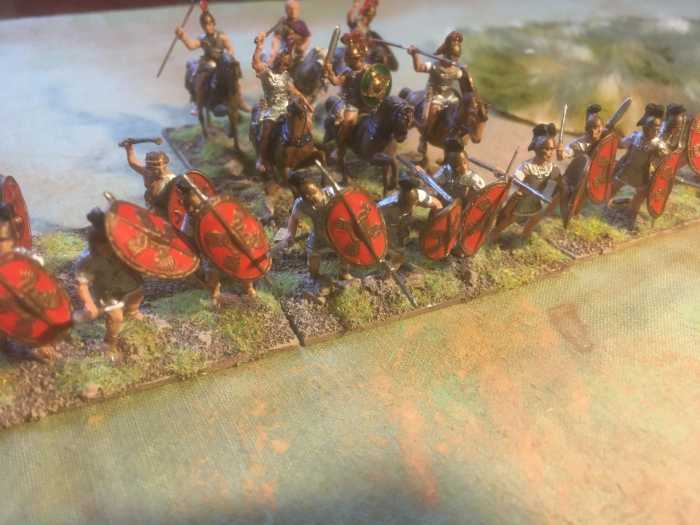
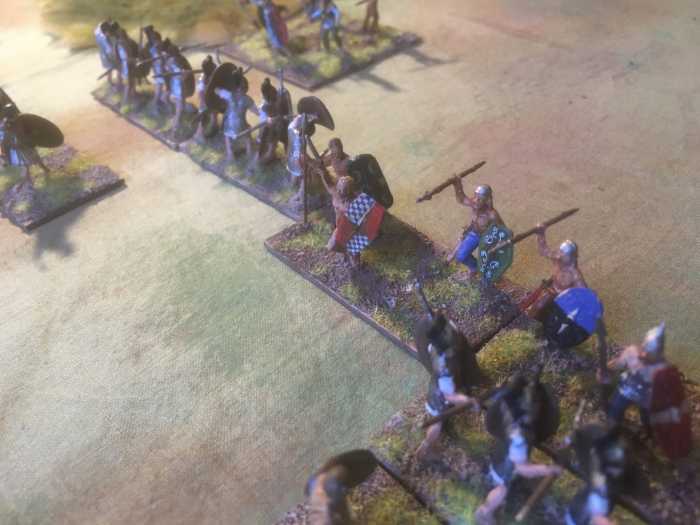
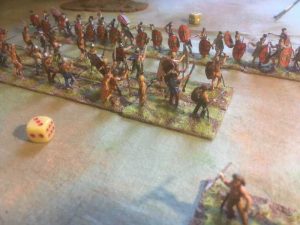
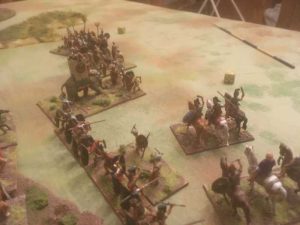
Gallic vs. Marian Romans
we had another game of DBA yesterday evening depicting Caesar’s invasion of Gaul. I ended up playing the Gallic force while Aidan took the Romans. The Romans were again on the defensive as the Gauls launched a sudden attack aiming to crush the core of the Roman army.
 The Roman Army Caesar himself was guarded by a formidable line of 8 blade units. It would take a fanatical charge to break through these heavy infantry, made especially hard as the supporting psiloi will boost the blades to +6 on a D6 against warband.
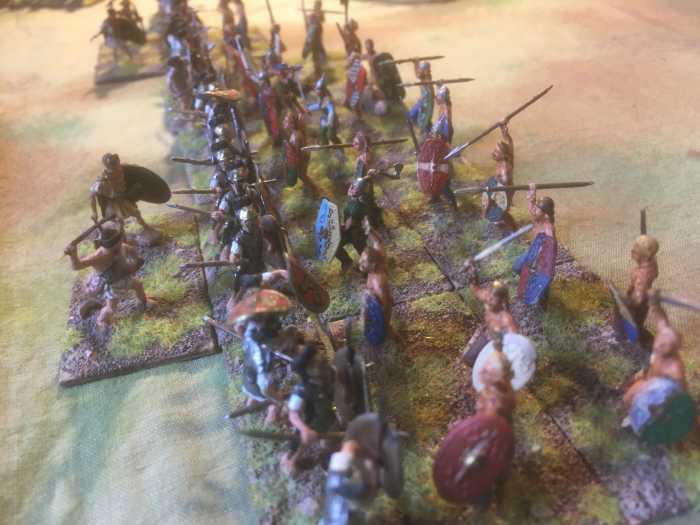
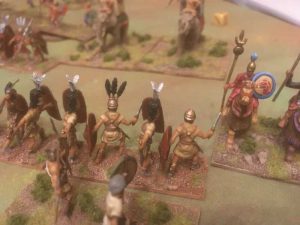
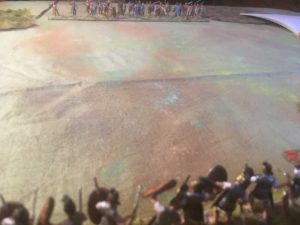 Figures appear from the darkness… A large hoard of Gallic warband begin to materialise. They have a major disadvantage in the opposed roll against the blades but will kill a unit of blades by only beating them rather than having to double their opponents as the Roman do. These warband fought in double ranks boosting them to +4 against the Romans’ +6, still at a disadvantage but a large improvement over +3. The main threat for the Romans would be having their line split up. If this happened, the warband could make use of flank bonuses to rapidly shred through the blades.
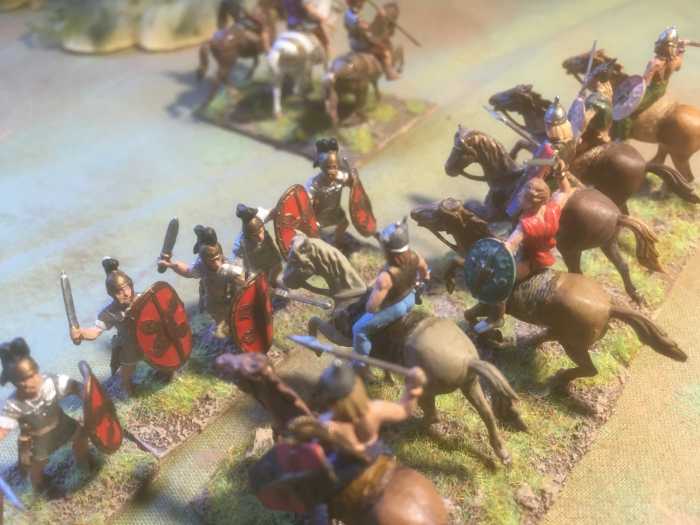
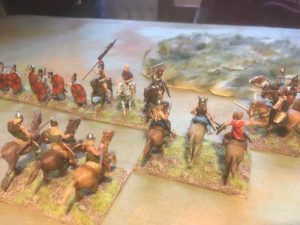 Gallic cavalry flank the Romans To start the attack, the Gauls quickly moved up their large numbers of cavalry, catching the Roman cavalry in a pincer movement and destroying them. This left Caesar himself exposed on the flank and at risk from suffering the same fate. The legionaries moved in to protect Caesar, causing the enemy cavalry to back off.
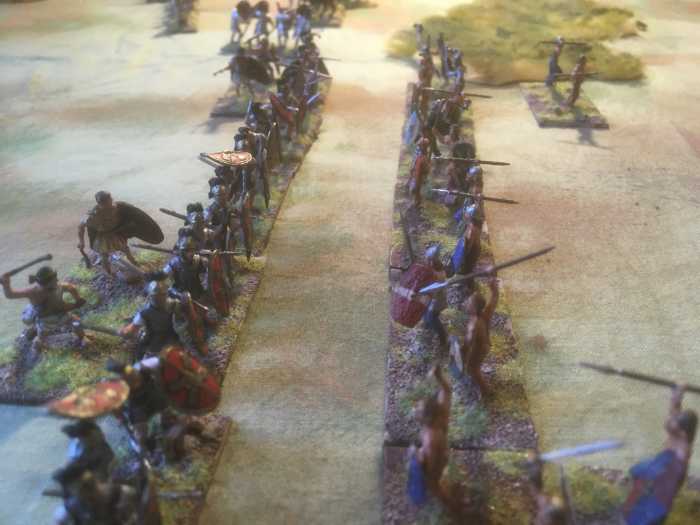
 Frenzied warband charge the Romans At this point the two lines clashed as the Gallic forces aimed to break through the much longer Roman line. The results were less than impressive with every single unit of warband being repulsed and the psiloi that were left to join their flank sent fleeing from the oncoming legionaries.
 An unsuccessful attack The warband fought on another turn but were again pushed back by the Roman legions. The warband were lucky not to have had any units lost but were still failing to make a breakthrough.
 Gallic cavalry manoeuvre away from enemy blades At this time the Gallic forces rolled 5 PIPs which allowed them to re position their forces. The cavalry on their right flank retreated from the legionaries and looped around to face Caesar’s cavalry. One unit was also able to close the door on the enemy general’s flank, meaning any failure on his part would mean death and the loss of the battle. While being on equal terms at +3, Caesar’s cavalry were able to push back the Gallic horsemen. The Roman army would fight on for now.
 Gallic warband begin to falter The next turn, disaster struck the warband as the blades finally managed to double and defeat a warband unit. This caused the loss of 2 Gallic units as the rear rank was supporting the warband at the time it was killed. The Gauls managed to avoid complete collapse by using their superior speed to quickly bring their second rank to the front, stopping the formation becoming flanked by the blades. At this point the Gallic line had retreated so far they were in serious danger of colliding with their own psiloi who had fled on the first round of combat.
 The breakthrough! As the warband fell back again another unit was killed, bringing them within 1 more loss of having their force break. Despite this, a stroke of luck allowed them to finally defeat a unit of enemy blades, the Roman line was now in a perilous position. While collapse seemed imminent for the legionaries, a fateful roll of 6 vs 1 allowed the now isolated blades to defeat another warband just as the line broke next to them. This caused the Gallic army to rout and secured victory for Caesar’s legions.
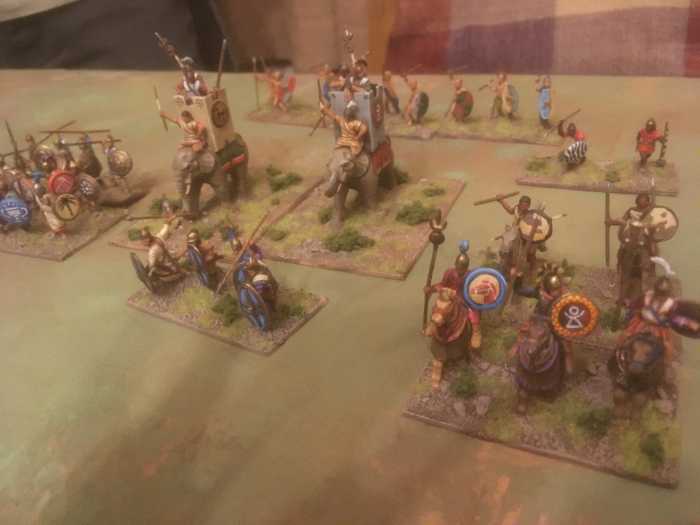
Carthaginians vs. Polybian Romans
After a very long pause, Aidan and I are finally back to playing some games of De Bellis Antiquitatis. Our first significant game was set in the 2nd Punic War between Carthaginians and an army of the Roman Republic. We diced for sides and I ended up playing the Romans. The Carthaginians began the game as the attackers with both sides lined up fairly evenly against each other.
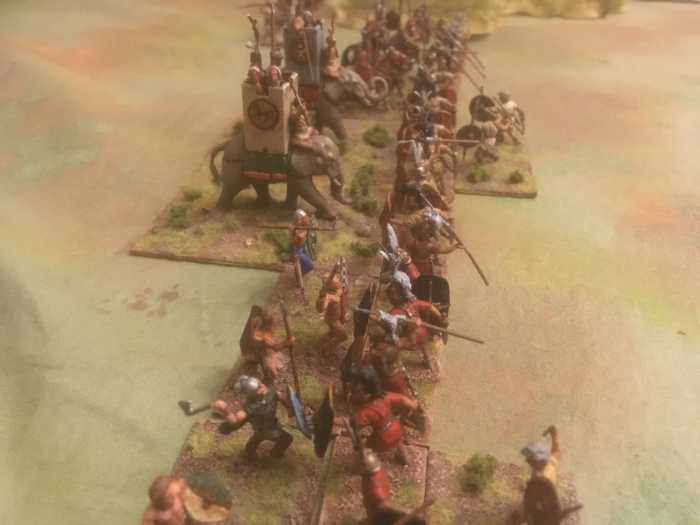
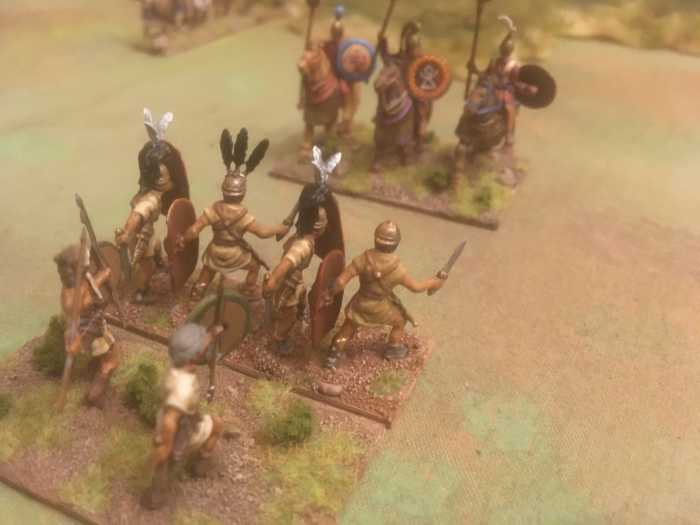
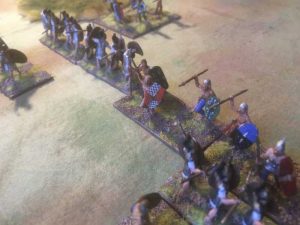
 The Carthaginian Army The Carthaginian army relies on a large mix of units. A small number of auxilia (Ax) and spears (Sp) can fight off most light infantry while the elephants (El) and warband (Wb) are the troops most effective at breaking through the powerful Roman lines. A small amount of mixed cavalry including the general can also be used to skirmish with the enemy. It is critical this commander is kept safe as the battle is lost as soon as he falls.
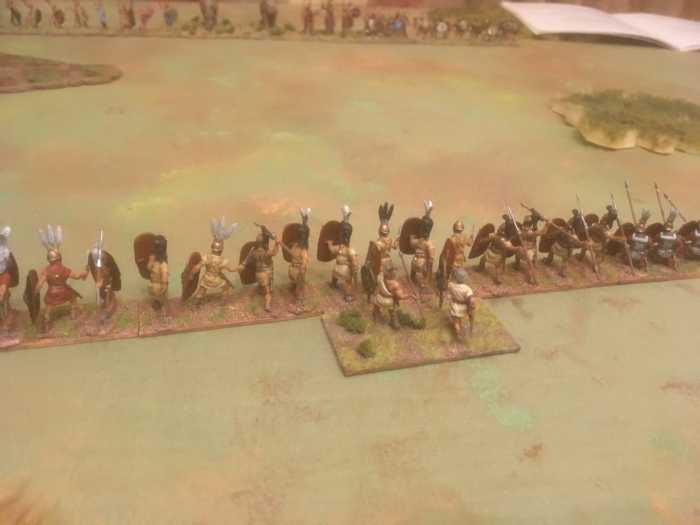
 The Roman Army The Roman Army is made mainly of blades (Bd) that formed a solid line across the centre. The blades are capable of defeating almost any infantry toe-to-toe and can be supported with lighter psiloi (Ps), allowing them to fight against mounted opponents with reasonable success.
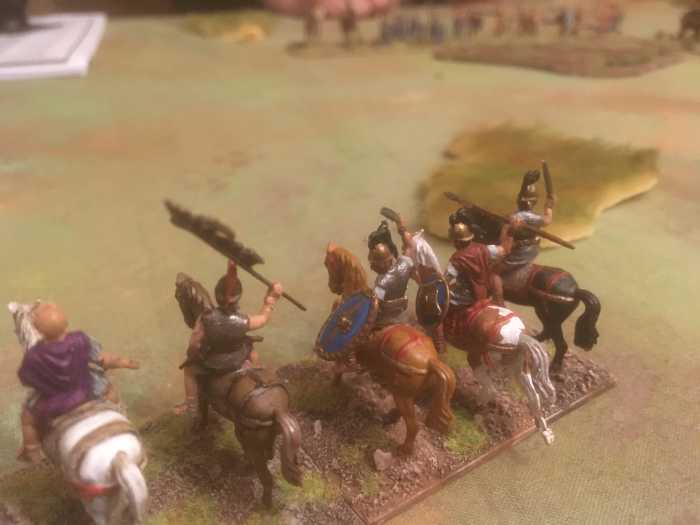
 The Roman command advance on the flank Like the Carthaginians, the Roman general was mounted on horseback and immediately began to move around the side to attack the warband which are particularly vulnerable to cavalry.
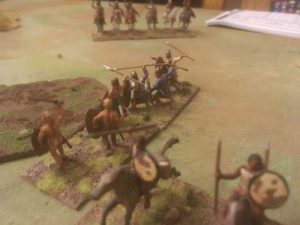 Light infantry run for the forest! This could have proved a major threat to the Carthaginian line as being pushed back with an enemy unit directly on a unit’s flank will instantly destroy it. However, with quick manoeuvring, the auxilia were able to make it to the forest. The Roman cavalry would not be able to attack without engaging them in the forest so chose to instead break off the attack.
 The two lines clash The two major forces collided with each other at this point with the warband on the Romans’ left flank and the elephants in the centre. While The Romans were able to kill one unit of warband and drive the other off, they were put in danger as the spears guarding their right flank were lost to the enemy general. This would allow enemy cavalry and spears to sweep around the side of the Romans and decimate their blade line.
 The elephants are repulsed Luckily for the Romans, the Carthaginians rolled only 1 PIP, meaning they could not move enough troops to capitalise on their advantage. At the same time, the blades that were now on the flank drove off the elephants, relieving the pressure on the line.
 Roman cavalry race to the rescue The Romans killed one of the elephants as it returned to battle, leaving a large hole in the Carthaginian line before immediately being set upon by the enemy general. The Roman cavalry shot back across the Blade line, forcing legionaries to dive out of the way as they passed. Despite this, it was clear that they would not make it in time. This would be a fight between the Carthaginian general and the unit of blades that needed to keep the Roman flank secure.
 The final blow! At this point, a lack of PIPs for the Carthaginians had left their warband stranded in the forest while the spears were regrouping at a crooked angle behind the general. On the fateful dice roll, the Carthaginian general was sent recoiling into the side of their own spears, breaking the unit apart. With a third of its units now lost, the Carthaginian army was forced to retreat, leaving a narrow victory for the Romans.
|
|