We’ve discovered that our favourite way to play Blood Red Skies, the Warlord WW2 aircraft game, is in carrier vs carrier campaigns. We started off with Ken Natt’s “Bath Tub” carrier campaign and have added a load of our home brew rules on top – this describes our combined rules.
Each player has a carrier and about 6 fighters and 12 bombers, and a campaign comprises of typically 3 to 5 games of Blood Red Skies – about a day’s play in all. The players have to allocate their aircraft to search out the enemy carrier and then launch strikes to destroy it, while simultaneously defending their own. A carrier can be sunk in a single attack, so every game feels important and tense. There are a multitude of competing priorities so players have to make complex decisions that align with the real world situations. Do you send your the aircraft that are now ready on their own, or do you wait to launch a larger strike? Do you send your fighters to protect the bomber strike, or do you hold them back to protect your own carrier? Do you keep arming your aircraft on the deck so they are ready to attack, or do you launch them to prevent an enemy bomb setting the whole lot ablaze?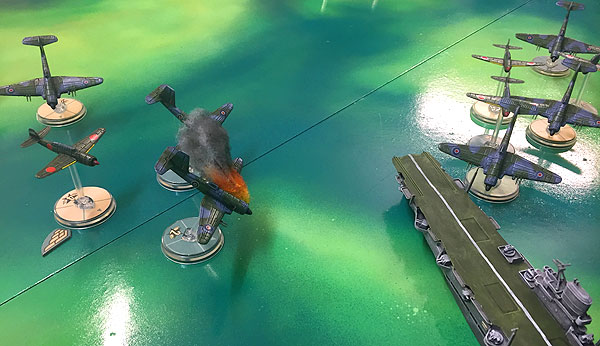
In wargaming it’s always difficult to get away from the chess style scenario where two equal and equivalent forces slog it out. Historical situations tend to be much more asymmetrical but that’s hard to turn into a satisfying game. In these, you get all sorts of different sizes and shapes of game, but set within the larger context of the campaign, they are still interesting, and the chance that a lone torpedo might hit home means that the underdog can snatch a victory.
We start by picking our forces. Each player has 1500 points (a typical BRS game is 500 points). They can spend it on fighters, bombers and carrier doctrines, there are no maximums or minimums because they arise naturally. You could only buy fighters, but then you could never win because you couldn’t damage the enemy carrier. You could only buy bombers, but unescorted bombers have little chance of success. The carrier doctrines represent specific aspects of different nation’s tactics and equipment – armoured decks, radar, AA cruiser escort etc. Points are based on the BRS standard ones, but we’ve tweaked them slightly to better represent their value in these campaigns.
Next step is to put your carrier into a square on a 3×3 grid, and allocate your aircraft. The allocations are marked on a sheet, so neither player knows what the other one is doing. To be used to search, an aircraft must have at least two crew, so suddenly the Fulmar (which is frankly a rubbish fighter) starts to make a bit more sense. Each turn represents an hour, and aircraft can search for two turns. We use a pack of cards to add uncertainty into the search. Each player has a ‘correct deck’ with a number of ‘location fixes’ and an ‘incorrect deck’ – mainly ‘nothing found’, but with a few false positives. Their opponent calls out the squares they are searching (a bit like Battleships), and they get a card from either deck, depending on whether it’s the right square or not. You don’t know if your opponent has received a ‘fix’ or a ‘nothing found’, even if they are searching the right square. Once you have at least one ‘location fix’, you can launch a strike, but if you have only one, your planes might well not find the right target, or will expend too much fuel searching – the fixes from ‘wrong squares’ are dummies that will result in a wasted strike. Better to get another fix, but that will take longer. You could divert more aircraft into the suspected square, but then the other player will know you are on to him as the air activity intensifies. With two fixes, you’ve got a good chance of your strike being on target. Three is better, but can you afford to wait? With half your aircraft out searching, you might not have much to launch a strike, and there is the risk that your enemy might find you first.
Once a strike is launched, the attacking player rolls to locate the enemy. The roll is based on how many fixes you’ve got and the skill of your senior bomber pilot. If you are unlucky or are attacking one of the dummy locations, then you might find nothing, and have to return to base for the lengthy cycle of landing and rearming. If the roll is failed, you can choose to keep searching, but your planes will be running out of fuel, and you risk losses on the way home.
Assuming you locate the carrier, and there are available defenders then a Blood Red Skies game is fought on the table. The defender can bring any planes on Combat Air Patrol (CAP) and also scramble any available on deck, including using bombers in a last ditch attempt to protect the carrier. The carrier can take three damage points, but a single torpedo can do two if you are unlucky, and special damage can occur, such as fires or hull breaches that limit your carrier’s ability to fight and can even cause additional damage.
Fighter losses are typically light – the attacker won’t have many escort fighters and often they will be expending most of their effort in outmanoeuvring and disrupting the attacking fighters rather than actually shooting them down. It’s much more dangerous for the bombers – losses are typically one to two thirds of the attacking force, but it’s all about the hits on the enemy carrier. You might lose all your bombers, but if you get a couple of hits in, that’s a victory.
In the next post, I’ll go into more detail of the rules.

Leave a Reply