|
|
 Laser Pointer
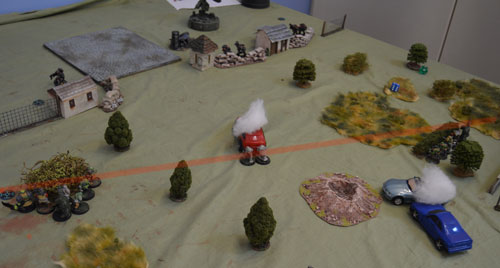
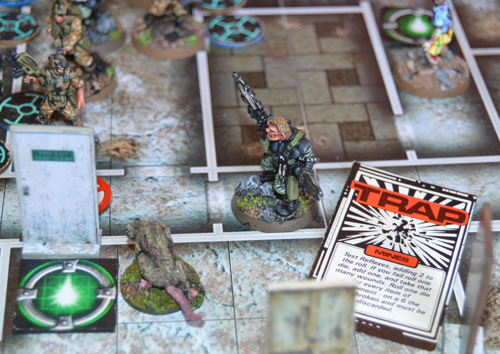
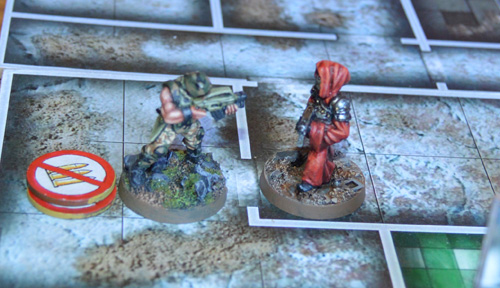
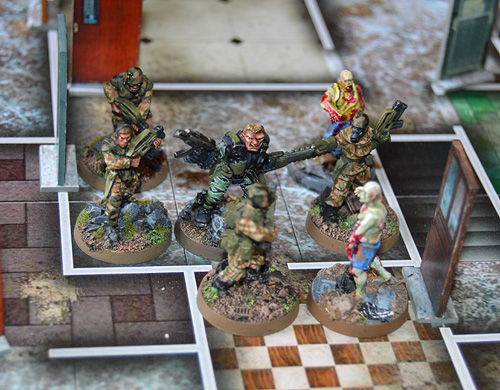
Having seen someone using one at BOYL last year, I realised how very handy it is to have a laser pointer for checking whether one model has line-of-sight to another. This might be very old news to most people but I haven’t done a lot of gaming for a while, so maybe it isn’t. Anyway here is one I picked up for £2 on eBay and it seems to do the job quite nicely.
Here it is in action modelled by some Wargames Foundry SWAT models. Yep – can definitely see him.
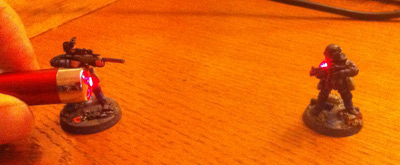 Checking LOS from a sniper
I’m putting together the final parts of my Chainsaw Warrior-Space Hulk mashup and one of the key elements is the Meat Machine. For those who are not familiar with Games Workshop’s classic game, the Meat Machine was a two-wheeled cyborg zombie, which to a great extent defies categorisation. Like everything else in the game there’s a lot of atmosphere, but very little in the way of detail or explanation. Quite what the Meat Machine is, who made it, and why it has turned up in a derelict building only minutes before the apocalypse is left to our imagination. What we do have is two images, one is just the head on the card, and the other is this rather more useful illustration from the rulebook.
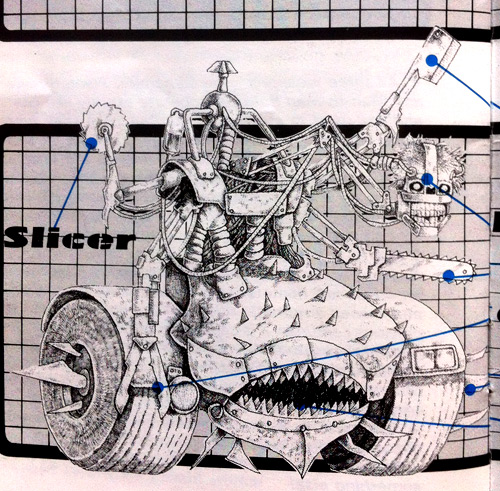 Meat Machine illustration I’ve started turning it into a model by rummaging through the bits box. So far, I’ve come up with this. I’ve gone for the whole skeleton torso rather than just the head, because I think a skull would be more or less lost on the tabletop, and part of the mood of this thing is the mixture of machine and corpse. In addition, if you scaled it precisely, it’s actually pretty small – look how big the skull is compared to the rest of it. It wouldn’t stand as high as an average person, and I think it needs to be more imposing. The main body of mine is an old 80s clip together motorbike kit turned upside down and stuck onto the wheels, which gives it some bulk, and a pleasing, looming-over sort of aspect.
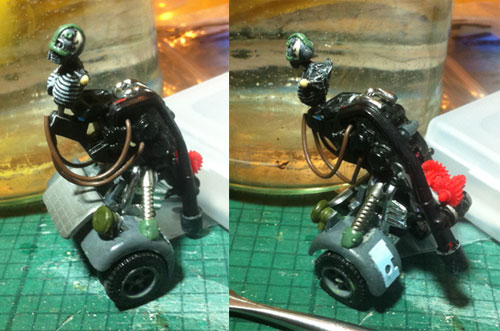 Meat Machine in progress The wheels are from an old 105mm WWII german gun. I originally bought some cheap cars from a pound shop, but they turned out to be too big and they didn’t have the mudguards. These wheels are proportionally smaller than in the illustration, but I don’t mind that. They remind me of wheels from some kind of Harley trike, resonant of the one Carl Critchlow drew himself standing by in the back of the first Thrud collection, and together with the body it’s building up a grungey biker aesthetic.
I left the shark mouth off, it just seemed a bit too weird, and too difficult to model. Next steps are to attach some more dieselpunk gubbins to the engine, spikes on the front and wheels, and tackle the arms. Again, looking at the proportions of the illustration, the weaponry is very small, a modern GW cyborg would have a buzzsaw about five times bigger. I’m going to beef it up a little bit, but nothing too cartoony. I’ve got a couple of arms made up out of wire – one with a meat chopper and one with a chainsaw, but I’m struggling with where to attach them. The skeleton’s shoulders bring them too far forward, but they look odd sprouting out of the main body. I might try building up the shoulders with extra struts.
Rather like dinosaurs we don’t really know what colour the Meat Machine is. The card shows red eyes, metal coloured struts and that’s it. I’m imagining a sort of very dusty weathered black for the mudguards and the rest oily metal, like a bike that’s been all the way down Route 66 and back, but I’m open to ideas – how do you imagine it?
A month or so ago, a grand plan formed in my mind. Inspired by “Operation Crossfire“, I’m hoping to organise an event this autumn where lots of separate games are played simultaneously as part of a single campaign. As many games as possible will be organised to occur on that day in remote locations. There is a single overall commander for each side, and the players can contact them, in real time (via a website), to report on their progress and to request reinforcements or support. The commanders will have to balance the various objectives and the progress reports that they are getting and commit their limited reserves to assist whichever battle seems the most important. As the scenario progresses, models may move off one table and move on to a different table somewhere else.
Do please contact me if you are interested in playing in this (post a comment here or on the Oldhammer forum).
The scenario I’m working up is the infamous attack on New Rynn City, where a small number of Crimson Fist marines and Planetary Defence Forces desperately attempt to hold off hordes of Ork attackers. This battle was fought as a playtest – partly to see exactly how long it took, partly to see just how much the odds needed to favour the attackers and partly to try out some support fire rules.
So lets see what happened…
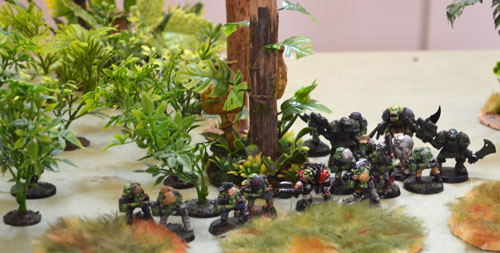
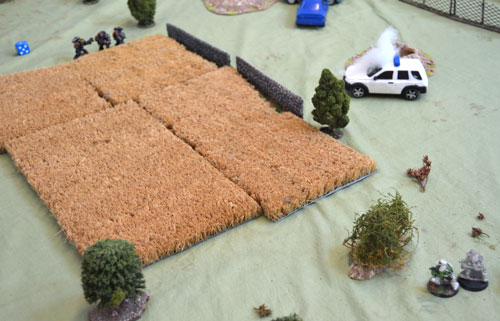
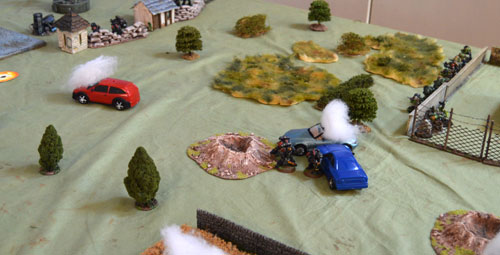
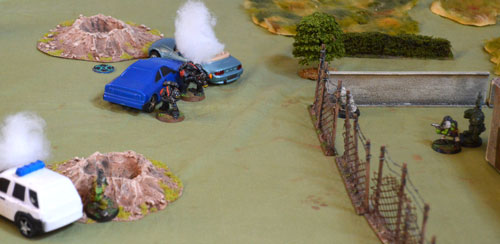
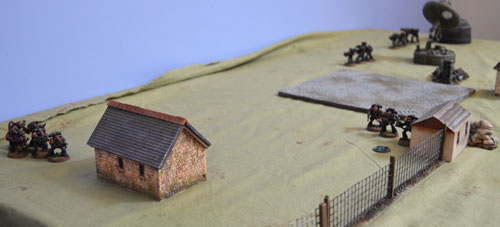
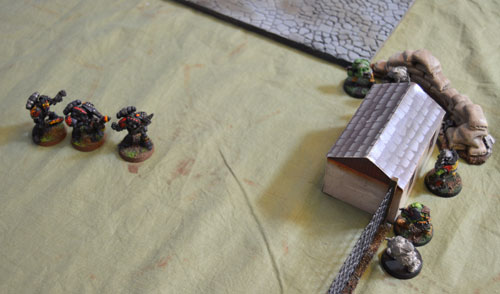
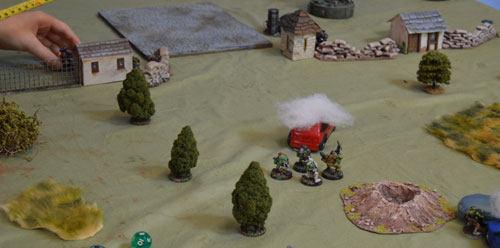
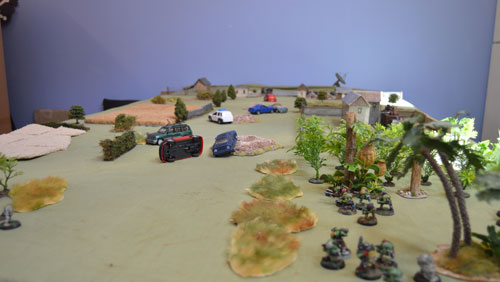 New Rynn City awaits The curtain rises as a motley bunch of orks creep through the lush tropical vegetation that abounds on Rynn’s World. A highway runs up the middle of the table (I didn’t have any tarmac, so you’ll have to use a bit of imagination). It’s littered with craters and burning vehicles, victims of a strafing attack by an Ork gunship.
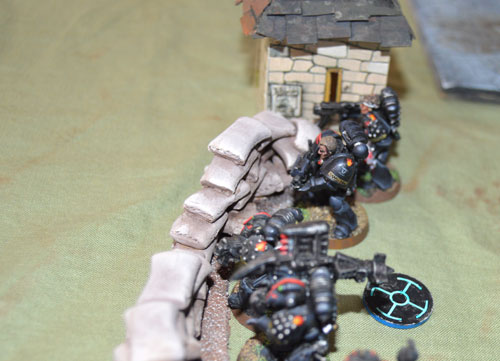
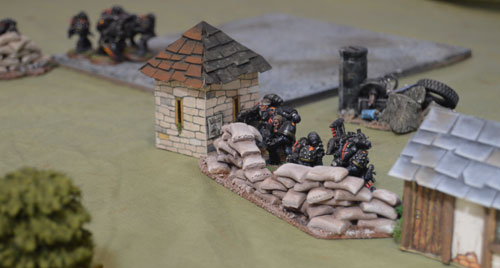 Marines man the defences Facing them at the entrance to the city are two 5 man squads of marines, dug in behind improvised barricades. Rynn’s world is a primitive agri-world with basic stone buildings rather than towering metal skyscrapers.
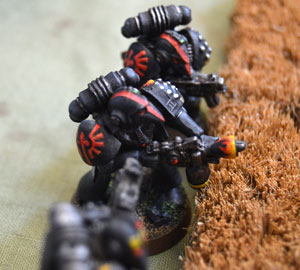
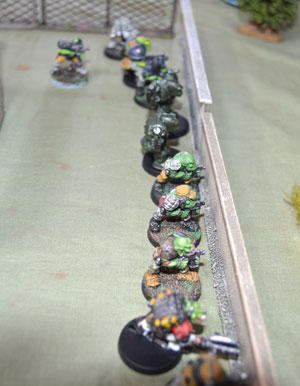
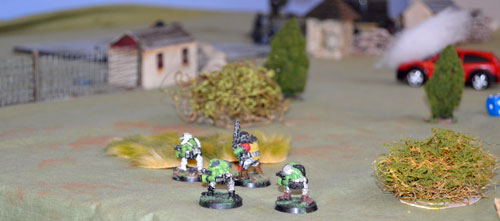
 Strolling through the woods “Sergeant, I don’t believe it, some of those orks aren’t even painted”. The grizzled veteran shook his head. “Is there no limit to the barbarity of these alien scum?”
My space ork collection is not exactly extensive. There are a few painted gems but here I’ve had to make up the numbers with completely unpainted ones, and also some Space Crusade ones, and being completely fair to these early plastics, are crude and unappealing sculpts.
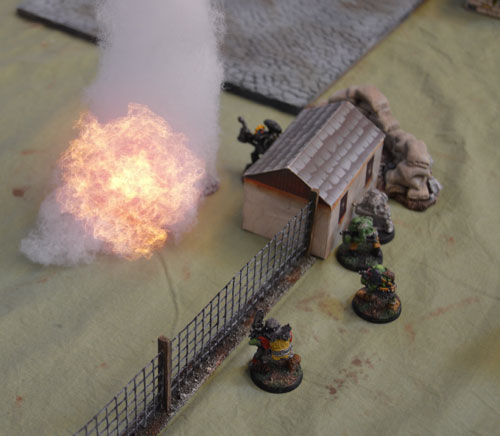
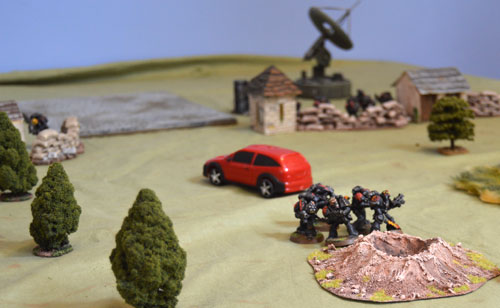 Sallying forth Bit of an unexpected development at this point, as a party of marines came out through the main gate and headed up the highway. Clearly “knowing no fear” has an influence on their tactics, or perhaps they are hoping to make friends. Also another half squad came in by the sand bags.
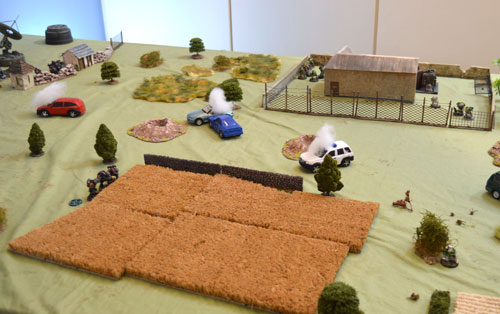
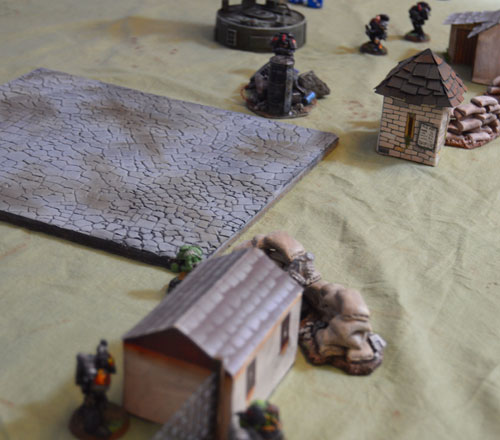
 Orks heading for the compound Most of the orks headed for an industrial building surrounded by high walls, which offered an opportunity to get near to the city without being exposed to marine missile launcher fire. Others, including a missile launcher ork took up positions behind the burned out vehicles and prepared to give covering fire.
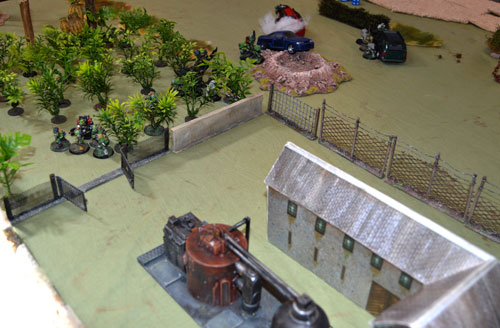
 Cornfield face off
 Just how much protection does corn provide from bolter shells?
On the opposite side of the highway to the compound was a large cornfield. The advance party of marines headed for this, but two of them were cut down by some incredibly lucky skilled heavy bolter fire from an ork at the corner of the compound. (You try killing more than one model with the old Following Fire rules). So far, so good, for the orks. They jeered and waved their weapons “Hur, hur, itz gonna be easy to mash up these humies”.
The orks rushed through the compound, taking up positions behind the wall.
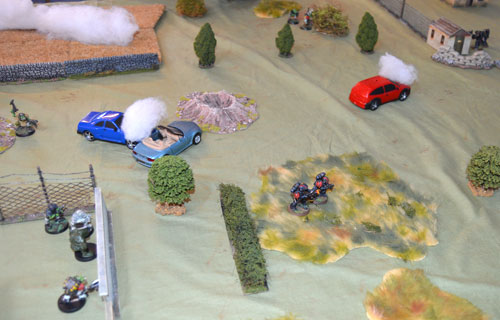
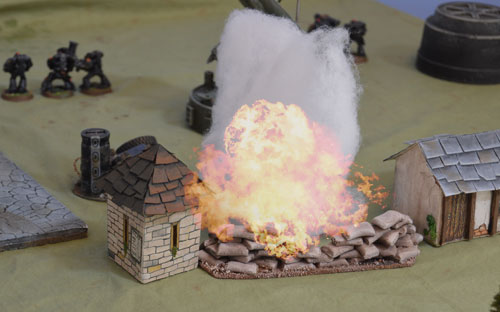
 The battle develops Threatened by outflanking with more orks in front, the marines torched the cornfield. It’s not in the rules, but I’m pretty sure that a field of ripe crops would be pretty easy to set light to. We ruled that it would block LOS and any model walking through it would take an automatic S2 hit each turn.
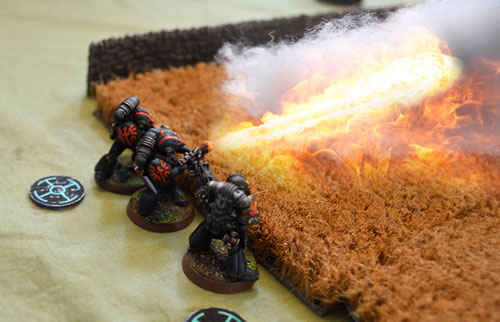 Scorched earth policy in action
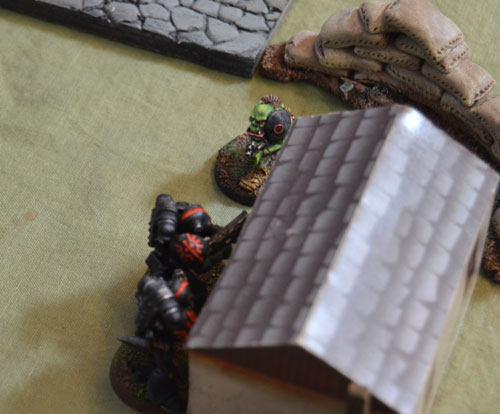
 “Right lads, when I blow the whistle…” Meanwhile the Orks were lining up behind the compound wall. The marines were just out of bolter range, so all they had to do was climb over the wall, rush across open ground and gun them down where they were cowering in their heavily emplaced positions.
Can anyone guess what happened next?
With hindsight, yes it was a bit reckless, but these were orks, they’d just killed a couple of marines, and the clock was ticking – their mates were relying on them to bust a hole in the marine defences, so they weren’t going to hang around behind a wall waiting for the marines to die of old age.
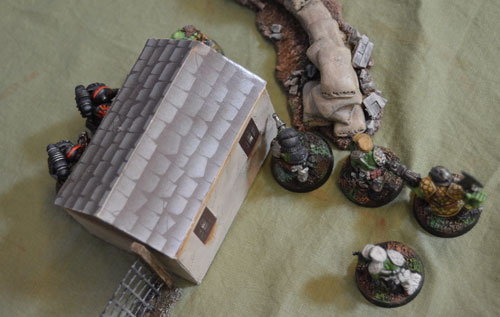
 “Unbelievable. These orks are as stupid as they are badly painted” It seemed worth a go and they were more of them than the enemy, so over they went. A couple of orks with heavy bolters stayed behind the wall giving covering fire. Note the marines sneaking up behind the cars.
 Over the top Over they went, bolters blazing. The marines in hard cover returned a lethal volley of fire, cutting down about half the orks in a single turn. The chastened survivors climbed hastily back over the wall. At this point disaster struck again. A single ork with a bolter had been keeping an eye on the marines behind the car while the frontal assault was in progress. Seizing their chance, the marines went in and fried both ork heavy bolters to a crisp.
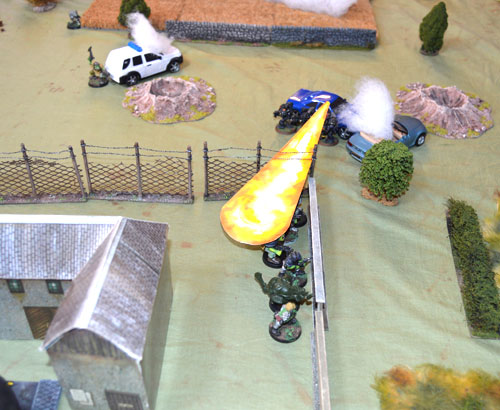 A crafty flamer strikes The furious orks returned fire and killed one marine (which considering everyone was in the open was a bit unimpressive).
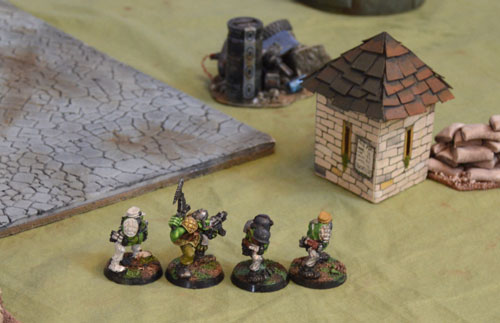
 Surrounded by orks Over on the other side, a squad of orks that has crept down the side of the burning cornfield makes a break for it.
 Orks seize their chance The two marines by the cars were now surrounded by orks and taking fire from all sides. They decided their only chance was to run for the safety of the barricades – it was a fateful mistake, and less than half way back they were shot down.
 Marines in a brisk tactical withdrawal It was now about two hours into the game, and it was time to go back to real life. After a two week break (yes, really), we got a chance to finish the battle.
The orks’ problem at this point was a sheer lack of numbers. Although they had killed a 5 man squad’s worth of marines, the marines had received reinforcements and were back up to 15, including two missile launchers. To push the attack home across the almost completely open ground in front of the marines’ entrenchments really needed a 2 or 3 to 1 advantage, whereas actually they were about even numbers. Their only heavy weapon was a missile launcher who was lurking around at the back taking ineffective potshots at the marines. A stalemate had developed.
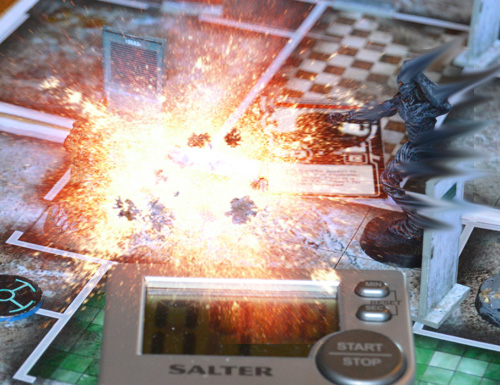
Things were about to get interesting, because this time we had support rules. Lacking the environment of a larger series of battles, we set a series of 15 minute intervals as alarms on a phone. Each time the alarm went off, whatever point in the turn it was, we wrote down what we wanted next time, and applied last time’s request. You could request artillery, an air strike or a new squad, needing a roll between 3+ and 5+ depending on what it was and which side you were on.
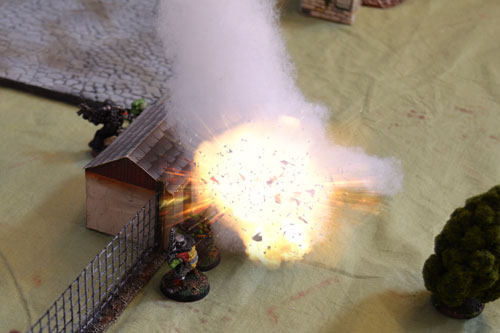
 Marines retreating We rejoin the battle just before the first arrival of support. The marines have a strong hunch that something nasty is about to land on them, and have executed a brisk double move away from the barricades. We wrote down the co-ordinates (in inches) of where we wanted the fire, and I had requested artillery for (20, 20), which turned out to be the exact centre of the toll booth hut. It automatically deviated 2d6, which in this case took it neatly into the centre of the adjoining position.
 Artillery lands As everything within 6″ would have taken a S5 hit, it would have been devastating if they had still been there. Even being within 12″ they run the risk of shrapnel, but none are killed.
The marines call in support of their own but to little effect. Their next call is for reinforcements (5+ required) which they get – the marines arriving to plug the hold on their left flank.
 A fresh squad arrives behind the hut The use of support fire is certainly disrupting the marines cosy digging in, with even the threat of it making them manoeuvre. The orks bring in an air strike but with relatively little effect. Air strikes hit a 12″ strip between two requested co-ordinates, each automatically deviating 3d6″. Models within this area are hit on a base 4+ with a S4 hit. At this point, the marines’ position was really looking very good. They had approximately equal numbers and were still well dug in. There was about 1.5 hours left, and although the orks were relatively close, they still had a long way to go. We thought that if this had been the campaign game at this point the marines might have released a few troops to go to another battlefield.
 Strafing run right across the orks The marines managed to bring in an air strike a little off target but well placed enough to hit almost every ork on the battlefield. However, few were hit and only a couple were killed. Ork toughness was a real asset to keeping them in the fight.
As the two forces were less than 24″ apart, the support fire was becoming a danger to the other side. In the next air strike it came in slightly skewed and a marine was caught by his own fire.
The orks were pressing hard. One squad had crept forward (using the hiding rules) from the compound to take up positions behind a hedge – just close enough to use their bolters. The others crouched behind a large bramble bush. The three marines nearest to them had been driven round the corner of the hut by the threat of the ork missile launcher who was still taking potshots from the back.
The bramble bush squad rushed forwards – one lot of marines were hiding, the others were occupied in a firefight with the orks behind the hedge. They reached safety behind the hut. I was starting to worry at this point – not expecting to have advanced so far, I had called in artillery on this hut 15 minutes ago and there was now a very real risk it could land smack on top of my own orks. To my immense relief, it deviated a little away from the hut, but near enough to catch all three marines in the blast, killing two. No orks were harmed in spite of two being in range of the shrapnel.
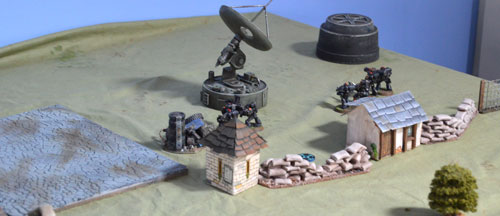
 Right on target With the orks surrounding the hut, it is short work to gun down the surviving marine, leaving them free to take control. The reinforcing squad of marines rush forward in an attempt to salvage the situation with a flamer blast.
 Marine counter attack Unfortunately for them the orks are a bit more capable once shooting at short range at targets in the open, and only the rear marine survives. From the shelter of a stone shed the last two squad members pour in fire.
 The rest of the squad With a dangerous breach developing in their line, the surviving marines move down in attempt to seal it off. Fortunately the orks they had been facing behind the hedge have been killed by a combination of small arms fire and a strafing run. One marine missile launcher has already been killed, and the other is still behind the sandbags.
 Marines rush across The marines finally have a bit of luck at the hut when a shell lands right on top of the attacking squad, killing all but one of them. It wasn’t even correctly targeted, it just deviated on to them. The marine is also killed in the blast, but with 5 orks facing him, his chances were pretty limited anyway.
 Artillery shell lands right on the orks The marines are now down to the two by the stone shed, and a missile launcher behind the sandbags on the other side of the gate. They are facing a lone ork at the hut, and another fresh squad which has been making its way down the highway for the last half hour.
 The last survivors The marine missile launcher is hit by the ork heavy bolter, but saves – his return shot with a krak missile is right on target.
 Face off between ork and marine Back at the hut the lone ork tries to gun down a marine at point blank range and misses with a 1. He survives the return fire, only to roll yet another 1. Pathetic effort, but help is close at hand.
 Looking dangerous The orks take cover behind the sandbags and a volley of bolter fire dispatches the two marines.
 Short range shoot out The turns are coming so fast now that there is no time for supporting fire. Less than 20 minutes remain on the clock, but the orks close in on the surviving missile launcher as he hides behind the toll booth. A few minutes later and it’s all over. The four orks are left in sole possession of the battlefield, and the way into the city is open.
 Orks close in on the last marine All in all it was a good fast paced battle. It was very small – 15 marines reinforced by a further 10, with 20 orks reinforced by a further 10 on the other side, but your sense of importance becomes scaled to fit. A simple 5 ork squad charging up the table at the end of the game became a formidable force. The supporting fire greatly spiced it up. It was potentially very powerful, but the need to select and book it 15 minutes in advance, only to risk it not turning up at all or deviating on to your own troops meant that you couldn’t ignore the ground war and just sit back and wait for the artillery to do the job for you.
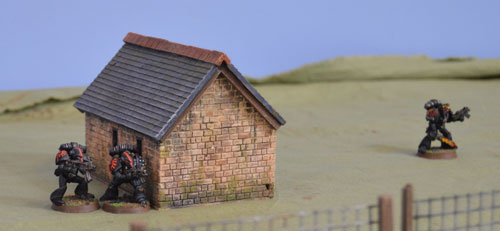
Digging around in some old boxes, I came across a few treasures, and this is one of them. Rogue Trader aficionados will recognise it instantly. Yes, it’s the ruin from Battle at the Farm. It has been lightly customised with a few burnt matchsticks and some reindeer lichen for that proper eighties feel.
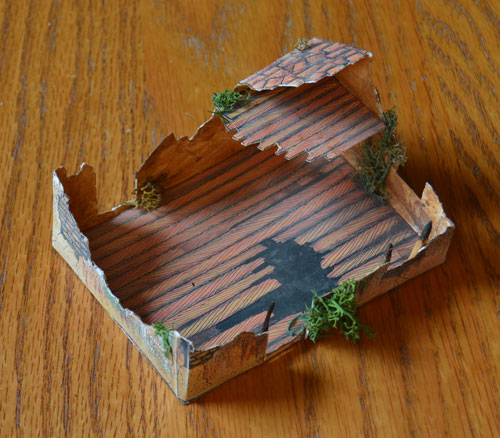 Ruin from Battle at the Farm I got this from the Warhammer Townscape set – which was a collection of all the card buildings they had released to date, but the ruin originally featured in Bloodbath at Orc’s Drift. The graffiti below is a bit of a pointer that it didn’t originate from Rynn’s World – or perhaps “Pulp the Stunties” is a sign that anti-Squat feelings are running high.
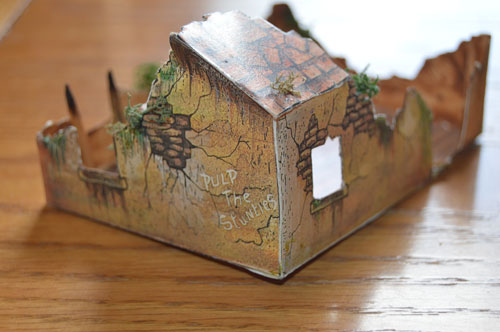 Detail of ruin
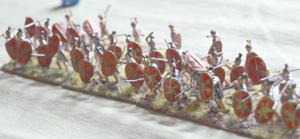
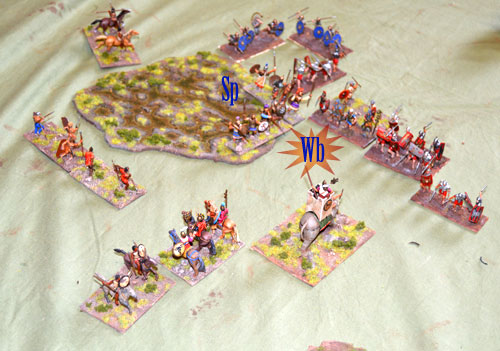
A couple of weeks ago, my 11 year old and I clashed in a game of De Bellis Antiquitatis. We played the Big Battle variant from 2.2, which is essentially 3 normal DBA armies on each side for a total of 36 elements each. This was stretching my model collection to its limits, so some of the armies got a bit anachronistic. At the top, in the red, we have a Marian Roman army, an Early Imperial Army and a Celtic Army with a few Roman blades making up the numbers.
At the bottom, in the blue, we have Carthaginians (on the left flank), with their Hellenistic allies – a block of Pike and some lighter Auxilia (Ax) and Psiloi (Ps) led by Knights (Kn), and finally the Spartans – traditionally armed as a big block of Hoplites (Spears = Sp). We diced for sides, and he got the Romans. The field was 4′ x 8′ and the models were 1:72 plastics so were mounted on 40mm wide bases instead of the more typical 25mm DBA bases. The field was fairly open with a scattering of gentle and steep hills with a couple of marshes in the middle. The isolated trees were just decoration and had no effect on the battle. I was defending, so the Romans were able to tailor their deployment – the main change being shuffling their warband to face my spears.
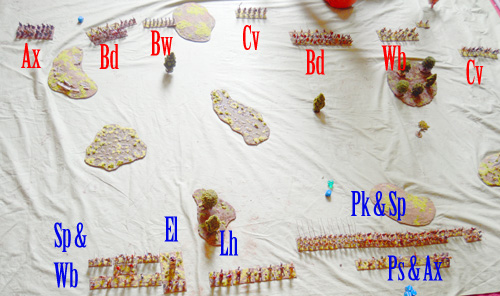 Initial deployment In Big Battle DBA, there are three commands. At the start of the turn each player rolls 3 PIP dice and the same command always gets the highest, the middle and the lowest. I made the Carthaginians (inc. Light Horse) the high command, the big block of pike and spear the middle command and the Ps & Ax led by a single Kn the low command. The Romans were more evenly split into thirds.
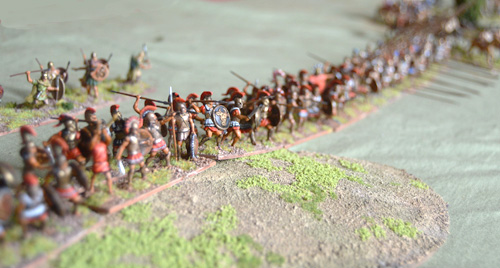 Spartan hoplite battleline Apologies for the photo quality, there was very strong light from one side and some a rather shadowy in spite of my best Photoshop efforts.
 Roman blades backed by psiloi Here are some Marian Romans – these are classed as blades which are probably the best all round infantry type in DBA. They are adequate against cavalry, particularly when supported by skirmishing psiloi, and they can beat almost any other infantry in a straight fight.
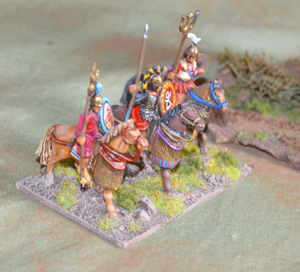 Carthaginian Cavalry Command My largest command on the left flank was led by the Commander in chief – these Carthaginian cavalry. If your main command breaks then the battle is lost. This command also received the highest PIP dice each turn, which they would need due to the number of different troop types and the elephants.
The first action was on the left flank. I used the speed of the Light Horse to rush them from the middle of the field on to the left flank where they closed in on the Auxilia. My son had forgotten how weak they are against cavalry and using the speed of the horse I was able to hook round on to their flank. In DBA an element which is flanked in this way is extremely vulnerable and is killed immediately if pushed back by the element to its front. One Auxilia fell and the rest fled to the steep hill to their rear where the Light Horse could not follow.
 Spartan spears repulse Gallic cavalry Over on my right flank there was also some success. Some Spartan spears broke off to face the Gallic cavalry, which they strongly outclassed particularly with psiloi support. It was at this point that I realised that I should have attached the psiloi to the spears as it was an unnecessary PIP drain to move both (1 PIP for spears and 1 PIP for psiloi instead of 1 for both).
The problem for the spears was that although they got +5 to their dice to the cavalry’s +3, however wide the margin they won by, they could only force the cavalry to flee. The only way to actually kill them was to wrap round their flank, but they got some good PIPs and managed to manoeuvre to do this. The rest of the cavalry fell back and waited while the Roman blades and warband advanced.
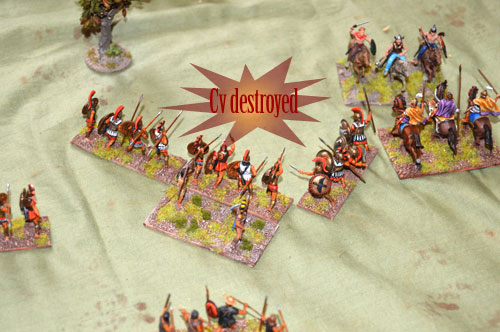 Cavalry destroyed by spears So far it was going well for the Carthaginians and their Greek allies, but it was all about to unravel. The Auxilia had retreated in confusion but instead of firmly pinning them with a reinforced force, I thought them beaten and turned my attention elsewhere, giving them an opportunity to regroup and come back down off the hill in good order. Although I was rolling good PIPs the Carthaginian command was in total disarray. The swamp in the middle was incredibly awkward and I hadn’t really thought about how I would manoeuvre round it. Some spears went up to support the Light Horse against the resurgent Auxilia. Others had to advance through the swamp (not a good place for heavy infantry) to avoid facing off against the blades, the cavalry general wisely moved away from the back of the elements (danger of being trampled to death if the elephants were pushed back), but then got in the way of the warband who were trying to get into position in front of the blades. 5 or 6 PIPs per turn were going nowhere.
 Confusion in the marshes While all this was going on, the main blocks of infantry were gradually closing in the middle, pikes and spears on the Greek side facing Roman blades and warband.
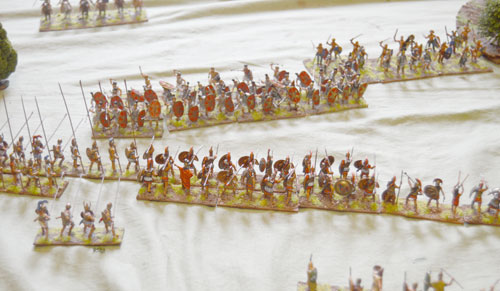 Heavy infantry close in the centre The Carthaginians continued to lose their grip on the left flank. One of their spears were surrounded and hacked down, Roman blades killed their Auxilia. This middle period of the game was characterised by the Romans repeatedly rolling terrible PIPs (lots of 1s and 2s), so they struggled to manoeuvre but when it came to combat, the situation was reversed with the Romans rolling very well.
The climax of the left flank was when two units of Carthaginian warband managed to line up against the Roman general. The odds were good – the warband had 3 + 1 for being supported = +4 and the Romans had +5 + 1 for Psiloi support and -1 for being unsupported on one flank = +5. Although that gave the Romans a slight modifier advantage, they would be killed if the warband scored higher, whereas they had to double the warband’s score to kill them. That gave the Romans a 2/36 chance of killing against the warband’s 10/36. If either were destroyed then their command would break. I rolled a 1 and the Romans rolled a 6. With the Commander-in-chief’s command broken, the Carthaginian side had lost the battle.
 The critical moment We decided to play on, to see what happened across the rest of the battlefield. As a broken command, the Carthaginians could only retreat, with PIPs being able to be used to hold them in place. As this was the high PIP command this meant that the other two active commands were getting the worst two out of three rolls, so I wanted them off as quickly as possible.
The Roman flank facing the routed command slowly regrouped while the battle raged in the centre. The Greeks manoeuvred and fought well, managing to kill off a few elements and certainly holding their own. Heavy infantry fights in DBA tend to be a slow slogging match – it’s very unlikely to get a kill, so they tend to just push each other back and forth. The pikes scored some success, having a slight advantage against the blades and the Spartans did well too – in DBA they are just ordinary spears so this was due to luck and manoeuvre rather than their Spartan qualities.
 Romans on the left swing round the end of the Greek line However, the clock was ticking for the Greeks as the unopposed Romans regrouped and marched around their left flank. Although losses had rendered most of the commands on both sides very fragile (they can only afford to lose a third of their elements before automatically breaking), this ended in a clear Roman victory, as the Romans were able to attack the pikes from behind and break the main Greek command.
Last weekend we had another game – same rules and layout with a few minor tweaks. Specifically:
- We wrote out exactly what each trap did, took out the not applicable ones and made a “room deck” of about half “Empty”, a quarter traps, a quarter supply dumps and a handful of zombies. On the Third Floor a deck was made up of 24 cards (one for each room), including Darkness.
- A model could salvage a weapon or clip from a fallen model for 1 AP. The Reaper got 1 spare clip.
- The medi-kit had a 4+ chance of saving an ordinary trooper if he had been killed that turn (otherwise they were only useful for the two Chainsaw Warriors who had 3 wounds each). As they cost 4AP to use it wasn’t easy to take advantage of this. Each squad had one medic.
- The Meat Machine and the Mutants were not reshuffled into blip pile – other blips were. We also introduced a few blips with 2 or 3 zombies, not just singles.
- Unconverted blips only get 2 APs (compared to 4 APs for everything else). This was mainly to encourage conversion, as placing more models makes the game look better.
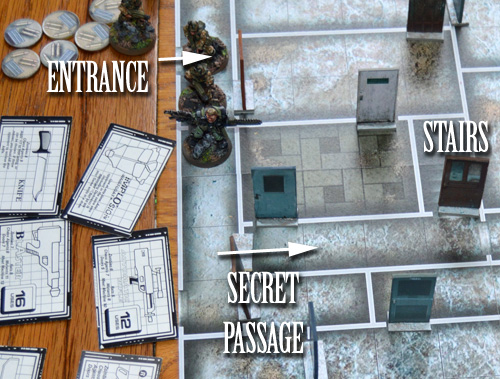
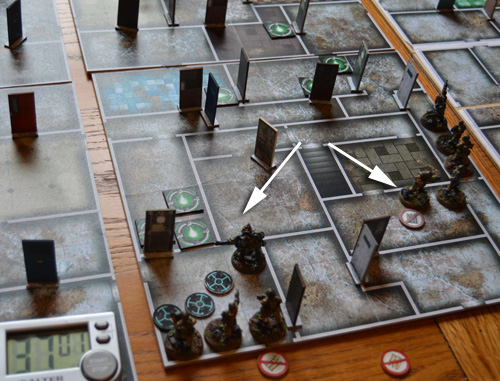
This time I took the forces of Darkness. The troops made a good start, with Squad Chainsaw finding first a sub-machine gun (handy) and then a secret passage which led almost directly to the first staircase.
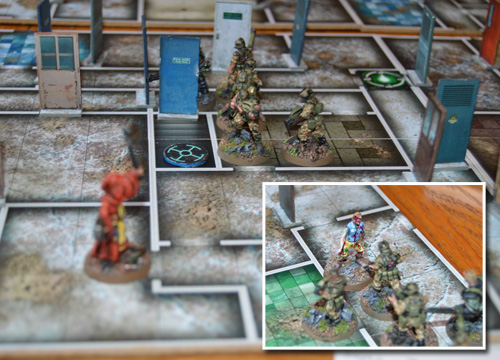
 A lucky find On the other side of the map, the other squad advanced steadily. There were a handful of zombies which were soon dispatched.
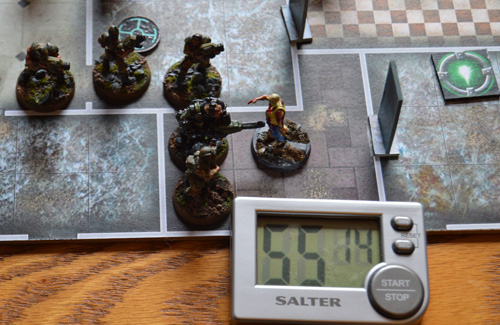 Zombie meets Reaper Their good fortune continued when they found that the staircase wasn’t blocked. They were through to the second floor after less than 7 minutes with no casualties. It was looking as though it was going to be a walk in the park.
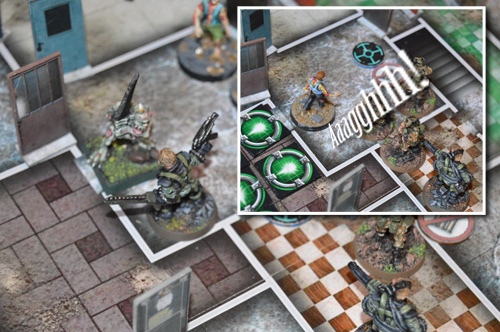
 First squad ascends the stairs Moments later tragedy struck. A soldier on overwatch had a bit of bad luck and fell victim to a sudden surge of zombies.
 Zombies about to claim their first victim on the First Floor The second squad reached their staircase and also found it to be passable. This created a slight rules difficulty because previously we had played that when they went up to the Second Floor they came out at the one immediately ‘above’ and then had to make their way to the other stairs to go up to the Third Floor. In this case both stairs from the First Floor were in use. We ruled that both First Floor stairs would lead to the same Second Floor staircase (some kind of off-board connecting passageway).
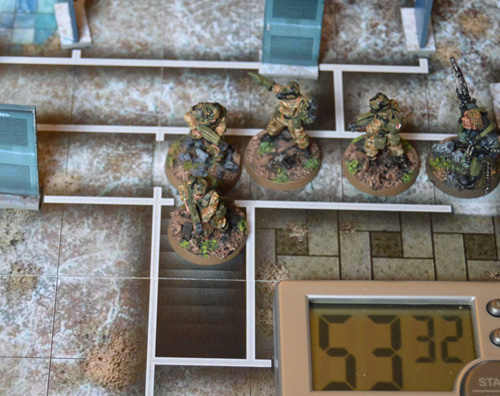
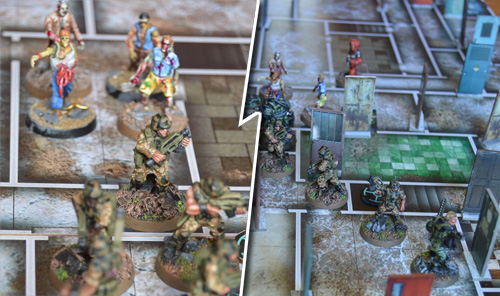
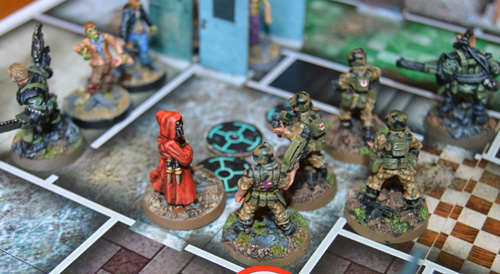
 Reaching the Second Floor As in the previous game, soldiers took the lead, making their way in single file from the stairs to the first room. So far so good, but it was about to turn nasty. A line of blips blocked their way and I was saving some real stinkers for them.
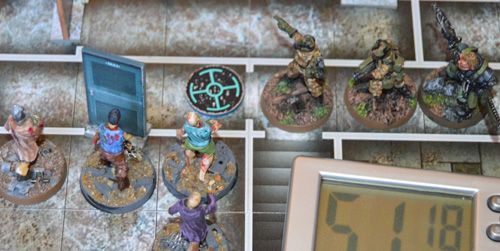
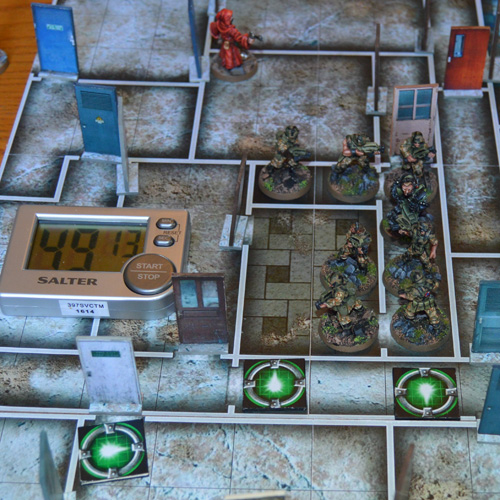 Filing on to the Second Floor A Chaos Agent had been lurking for some time, playing the long game and waiting for an opportunity. He closed in on the Chainsaw Warrior who was bringing up the rear and lunged, completely bungling it with a roll of 3. Bzzzzzzzzzzzzzt.
 Chaos Agent blows his chance A bermuda shorts wearing zombie (strength 6) followed the squad up the stairs, but using what little brains remained in its rotting head, it lurked at a safe distance from the blade and its rotating teeth. Up front the squad had the room secured with plenty of overwatch.
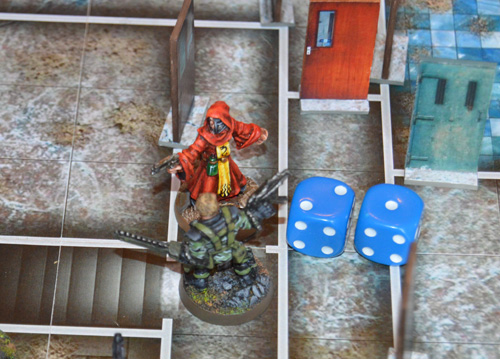
 Zombie shows sensible respect for the chainsaw The troops push on into a corridor packed with blips. Two are revealed as the martial arts Chaos Agent (strength 11 = nasty) and the blue mutant (strength 16 = very nasty).
 The real fight starts The Chaos Agent is shot down as he springs into the doorway to attack, but the mutant is tougher and meaner. The soldier goes to low ammo as he fires desperately, before being struck down in close combat; the second casualty has fallen to the forces of Darkness.
 The mutant strikes They weren’t just facing attacks from the front. The tight warren of rooms are ideal for creeping up and it is easy to overlook a threat from the sides or rear. A Chaos Agent managed to close with the medic, but was killed in close combat.
 A medic sees off a Chaos Agent It was following a similar course to the last game – an easy First Floor, soldiers take the lead on the Second Floor and take casualties due to lower fire power. Another soldier went down at the front before the Chainsaw Warrior pushed through to the front and started mopping up. He made short work of the remaining zombies, but the flip side of leading from the front was soon revealed when the corridor was full of mines. He took a wound and then had to roll for each item of equipment – luckily none were destroyed.
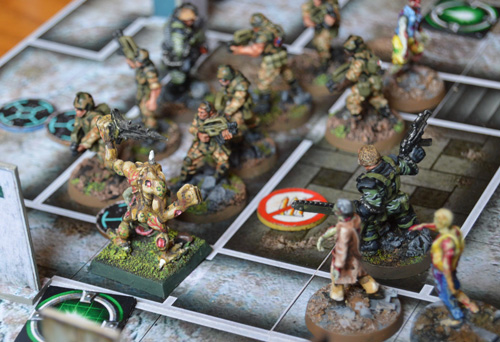
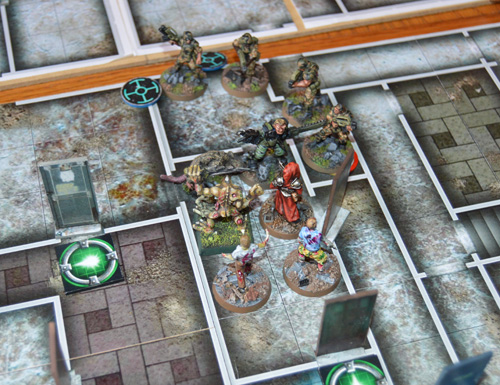
 Chainsaw Warrior steps into a minefield After his close shave, the Chainsaw Warrior hacks through another host before revealing the Meat Machine (still represented by a minotaur).
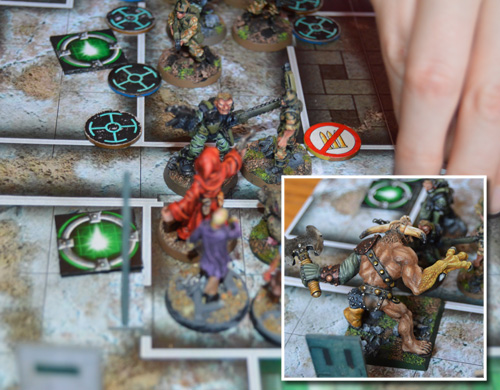 Another horde The Meat Machine was stronger than even the Chainsaw Warrior and had two wounds, but luckily rolled a 3 before being shot to pieces in the following turn.
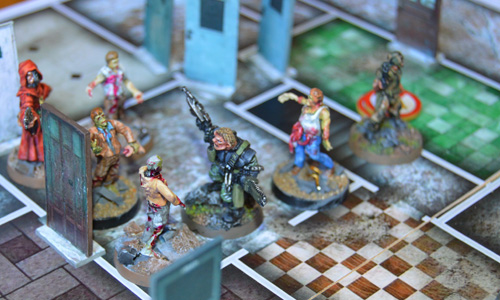
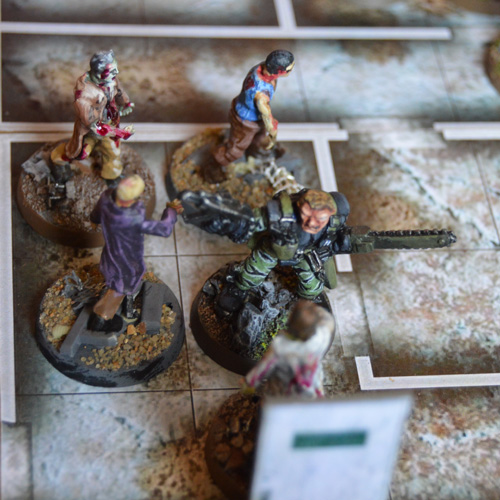 Beset on all sides The Chainsaw Warrior pushed on single handed. Here he reveals the secret to clearing a room full of zombies – basically you walk in and chop them all up.
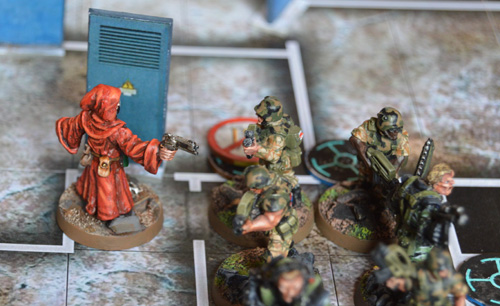
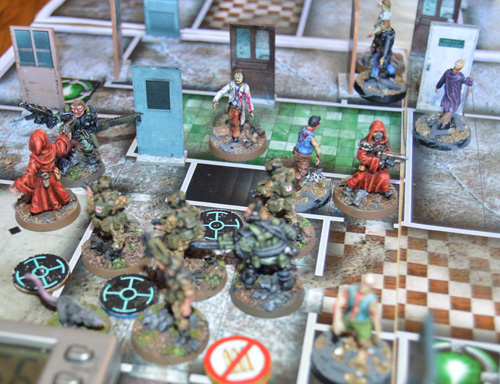
 Follow the leader Pursued by a horde of zombies, the squads filed after their leader into the gathering gloom. At the rear an unlucky soldier fires off his last few rounds before being felled by the Chaos Agent’s blade.
 Chaos Agent claims a victim Yet another squad member was down, but they were on to the third and final floor. Enemy activity steps up to 3 blips per turn, and a mutant lurks at the top of the stairs.
 Chainsaw Warrior reaches the Third Floor The Chainsaw Warrior hacks through them and pushes on (frankly recklessly) into another room of zombies. This breakneck pace could be cut off short at any moment with a bad roll….
 Yet another room full of zombies …but it isn’t. Down they go, one after another. Handily the warrior can make a 90 degree turn for no point cost in response to each move, so it’s hard to sneak up on him.
 Chaos Agent faces off against Chainsaw Warrior He kills them all, but they are piling up at three blips a turn, and every room is becoming a tough fight. The ammo situation is becoming increasingly critical, with only a couple of spare clips.
 Martial artist attacks A moment of extreme peril as the martial artist Chaos Agent springs out of a doorway, but is cut down before he can strike a fatal blow. The soldiers follow the Chainsaw Warrior as he pushes on, the Reaper bringing up the rear. There are about 17 minutes left, but they have only searched a quarter of the top floor, and are fighting for every room.
 Pushing forward There are a couple of dead end rooms in the bottom right hand corner, and the Reaper goes on his own to check them out. A couple of zombies are soon dispatched, but then disaster strikes when the final room contains a net trap. With no wirecutters and no help, he must expend 6APs to free himself, and the command point rolls are dismal for 2 turns in a row. Unable to free himself he fights off a strength 6 zombie (his score is base 12, – 1 for darkness, -2 for net = 9). He beats it but is wounded. Next turn another a strength 8 zombie attacks. With barely better than even odds, he beats that too and hurries to join the others, but down to his final wound.
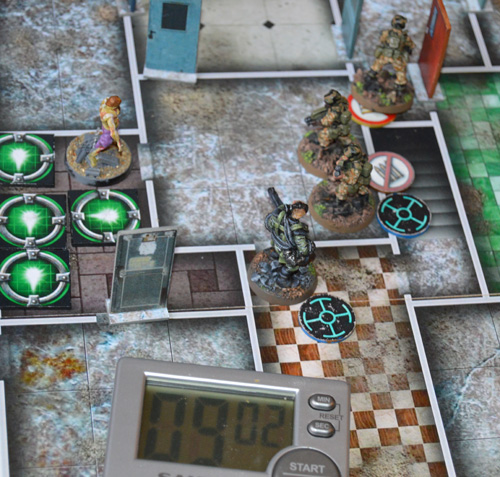
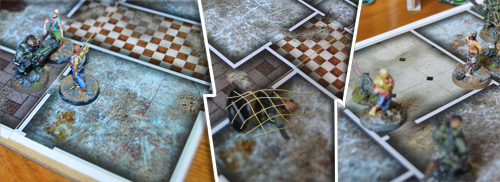 Near disaster for the Reaper With zombies attacking all around, the squad winds its way deeper into the building. A combination of spreading out to search and poor command points result in another two soldiers being killed. Ammo is becoming critical as there is a single spare clip remaining, and some are having to go on to low ammo.
 Slow progress A worse disaster strikes when a strength 6 zombie (who nearly didn’t bother attacking due to his poor chances), gets a lucky hit on the Reaper and he loses his final wound. It’s now just two soldiers and the Chainsaw Warrior with ten minutes on the clock. A stroke of luck at last – the next room contains Darkness.
 The Chainsaw Warrior finds Darkness With actions and command points, the warrior looses off his laser lance, firing all 3 shots but without a single hit. With no reload, he has little choice. “Guess I’m just going to have to take you with me”, he grits before triggering his implosion waistcoat. With 9 minutes left, he secures a minor victory – destroying Darkness by sacrificing himself.
 Darkness returns to the void
Since the first batch was cast, I’ve been beavering away on the next batch of sculpts, and here are some progress photos of them. From left to right, top to bottom, we have:
- A hideous mutant demon thing.
- A cultist assassin
- An energy weapon toting variant of the spaceship crewman
- A rifle wielding cultist
- A kneeling cultist with a grenade launcher
and there are more that I haven’t even photographed yet….
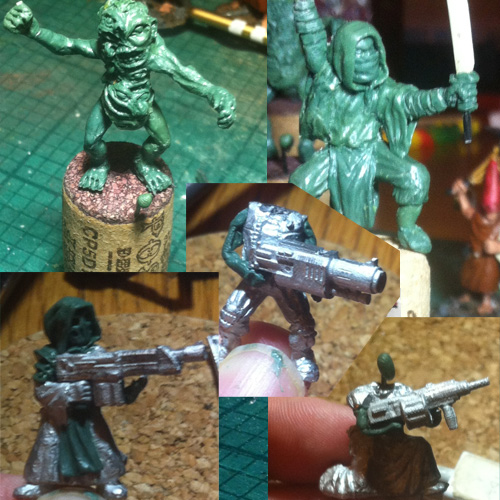 WIP green putty sculpts
My 11 year old has been practising his sculpting and the nurgling on the right is his first scratch built model. It’s made entirely from green putty on a wire frame – he also painted it himself. If you look closely, you can see that it’s holding a loop of its own gut (ugh). The arms are formed around fine 28 gauge wire, with a thicker section through the middle of the body and looped over to form the head.
A really good job – he’s moving on to the second which promises to be equally disgusting.
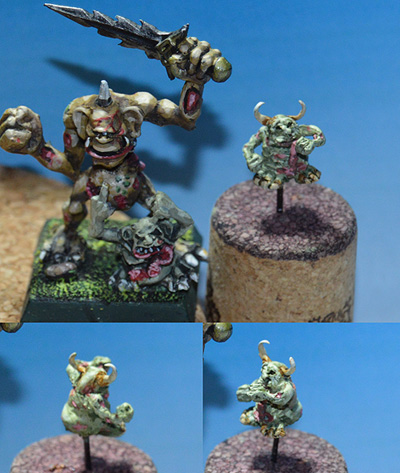 Scratch built nurgling
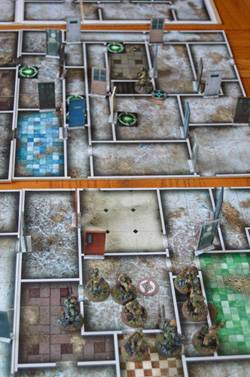 Ready to assault the second floor  This link contains the images to print out two different Chainsaw Warrior boards, as used in the playtest. Each board comes in 4 pieces so it can be printed on an A4 printer (irritatingly, you can’t quite fit them on to 2 prints, because the length of a print is 29.7cm minus about 1.2cm for the print margins – i.e. not quite 30cm). This link contains the images to print out two different Chainsaw Warrior boards, as used in the playtest. Each board comes in 4 pieces so it can be printed on an A4 printer (irritatingly, you can’t quite fit them on to 2 prints, because the length of a print is 29.7cm minus about 1.2cm for the print margins – i.e. not quite 30cm).
These should be stuck on to 30cm hardboard squares. Most large B&Q stores have a free timber cutting service. Buy a 1.2 x 2.4 metre hardboard sheet (that’s 4x8ft) and have them slice it up for you. There’s just enough to get 32 squares, which isn’t bad at for £7.85 for the lot. I then used a scalpel and metal ruler to slice off the unprinted borders from the prints before sticking them down with spraymount. If you cut them carefully then the joins are just about invisible.
You will need two boards for each floor. We had 6 altogether, but you could get away with 4 by recycling the first floor as the third while they make their way across the second.
I am working on versions of the blips, doors etc. and will make them available for download, along with the rules. Come back soon!
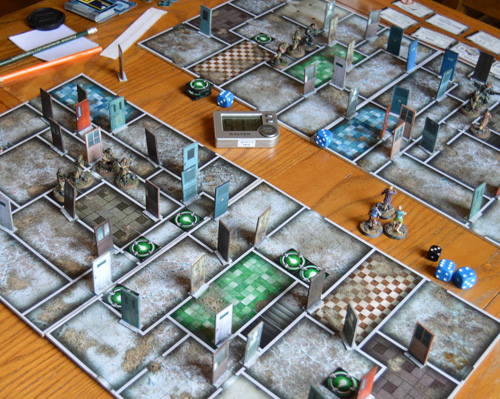
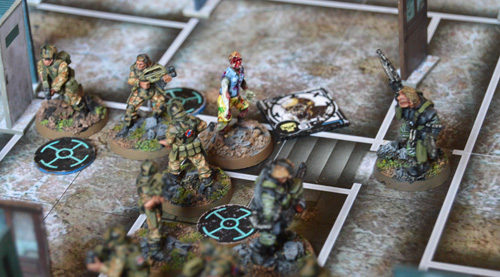
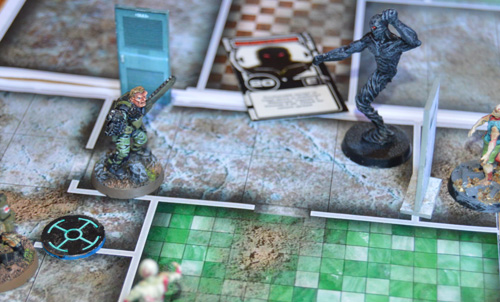
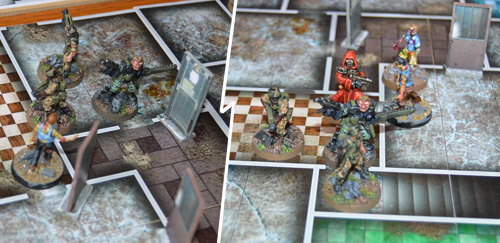
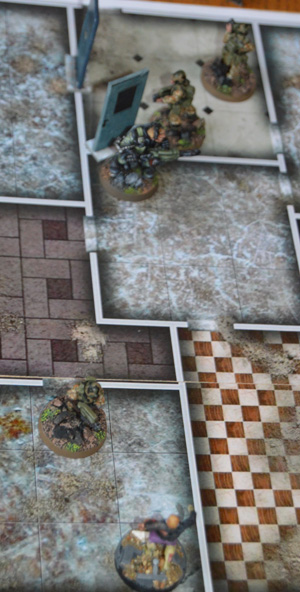
We’ve just had our second playtest of Chainsaw Warrior using Space Hulk rules. A lot more of the proper models were available, some new and improved board sections and some important rules tweaks. Playing against the clock I had 60 minutes to save New York and… I won’t give the ending away but let’s just say it was a typical result for the original board game.
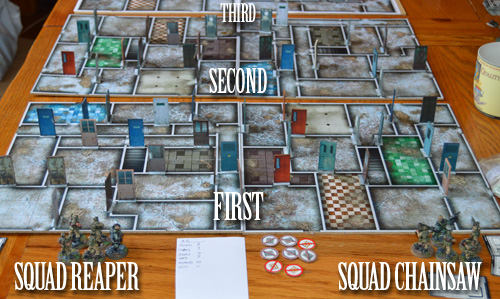 Chainsaw Warrior Board This time round the map consisted of three pairs of 1′ x 1′ boards (each 10 x 10 squares). These represented the First, Second and Third floors (yes, I know that the “First floor” should actually be the Ground floor, but this is the USA, and they don’t call it that). Each board had one stairwell which they could use to gain access to the next level. Assaulting the lair of Darkness were two squads of troopers with Automatic Rifles, each led by a Chainsaw Warrior. Squad Reaper was led by the Chainsaw Warrior with a Reaper, the other by a close combat specialist with the Chainsaw. Both had a laser lance, and each squad had a medic.
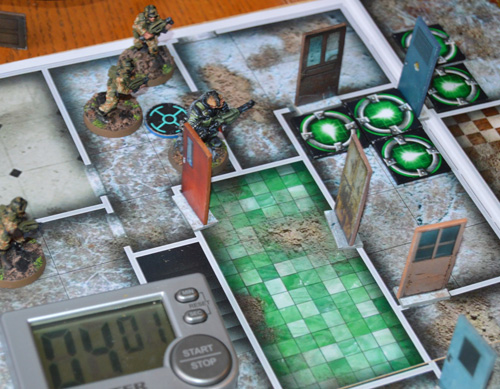
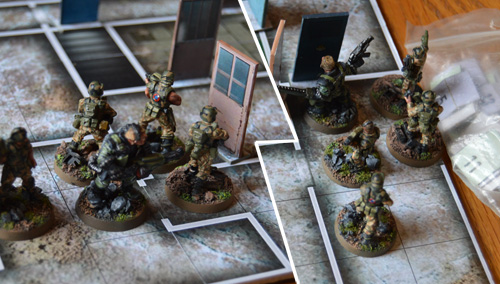 Troops enter the gloomy building The forces of Darkness were bringing on two blips a turn from either one of the doorways round the edge or a stairwell. Normal Space Hulk lurking rules applied – if a soldier was within 4 squares of an entry point, it had to lurk for a turn. It was easy enough at first, but then the nasties started closing in.
Squad Reaper soon fought its way through to the first stairwell but found it blocked, Squad Chainsaw was making slower progress, gunning some down at point blank range.
 Good progress on the first floor 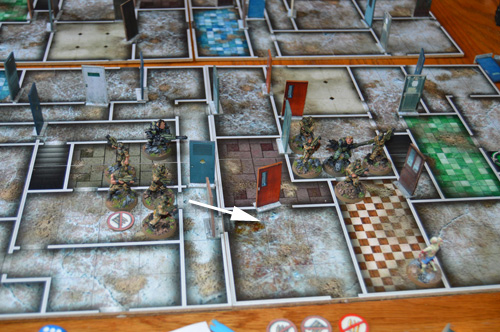 Squad Reaper make their way across to join the other squad With no casualties it was all good so far. The Chainsaw Warrior turns were cumulatively timed with about 15 minutes on the clock so far, and 45 minutes left. It was taking about 2 minutes per turn to move both squads.
Here a couple of zombies try to stop Squad Chainsaw reaching the second stairwell, but are soon blown to bits.
 Zombies make a futile attack Ready to assault the second floor They had encountered relatively little opposition so far, with the only significant mishap occurring when a lunatic stole one of the soldier’s rifles, but blips were already massing on the floor above. This was where I made my first significant tactical mistake. There were blips all around on the second floor and some close quarter fighting ahead as they came up the stairs. Four troops took the lead, and it should have been one of the Chainsaw Warriors.
The two squads grouped together before pressing forward, with the riflemen charging up and into the lurking nasties.
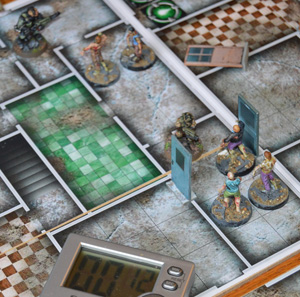
Each time a new room was entered, we turned over a card. These were mostly empty, traps or a supply dump. This trooper was immobilised by a net trap. The net trap immediately ended his turn and this zombie swiftly polished him off, in spite of having half its guts hanging out.
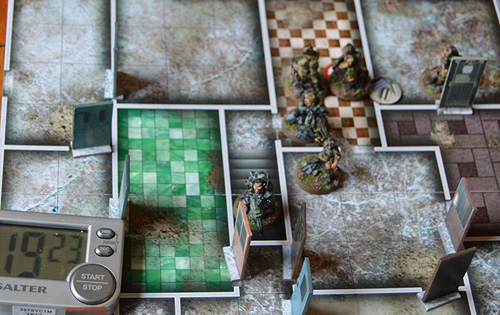
 First casualty In spite of this unpleasant mishap, the troopers blasted their way through the zombies and agents and began to work their way across to the other stairwell so they could get up to the top floor where darkness was waiting. The layout forced them to take a particularly long route. 37 minutes on the clock, and it was starting to get dark…
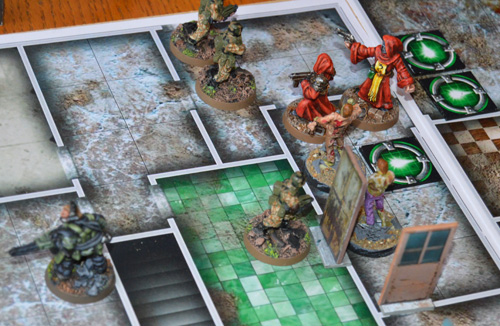
 Squads split up and wind their way through the building After this there was a fair sized ambush which yet again was blasted to pieces. It was all going very well for the warriors until we noticed how much ammo they were burning through. They were approaching the stairs to the Third Floor without further casualties. Here the Chainsaw Warrior takes the lead to remove a particularly unpleasant collection of creatures: zombies, mutants, Chaos agents and a giant rat.
 “Stand aside, this is a job for a chainsaw” One of the troops had run out completely out of rifle ammunition, and the squad had no spare clips. Focused on the path ahead, they failed to guard against a zombie and a Chaos agent approaching from behind. The luckless soldier knocked down the zombie but was no match in close combat for the Chaos agent, especially as it had now got dark and their hand-to-hand rolls had a -1 modifier.
 Zombies in front, Chaos Agents behind At the front of the squad, they had found a convenient secret passage and another zombie met his death (again) with a point blank blast from a rifle.While all this was happening darkness was gathering a HUGE force around the stairs on the Third Floor and a big fight was about to commence.
The first soldier through the secret passage became entangled in wire, and met his death in a re-run of the net incident. His comrade gunned down the zombie and they pressed on, reaching the stairwell, hampered only by the sudden appearance of a Chaos agent accompanied by yet more zombies.
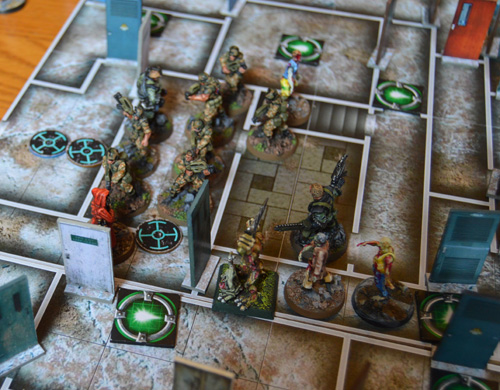
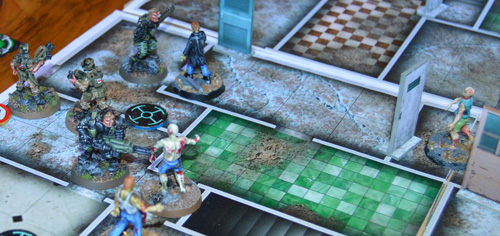
 Increasing pressure on Squad Chainsaw With Darkness massing its forces on the Third Floor, the two embattled squad re-grouped at the stairs. This time the two Chainsaw warriors took the lead. Although four soldiers had been killed and another was down to his sidearm, they still had a third of the time left, so it was looking hopeful.
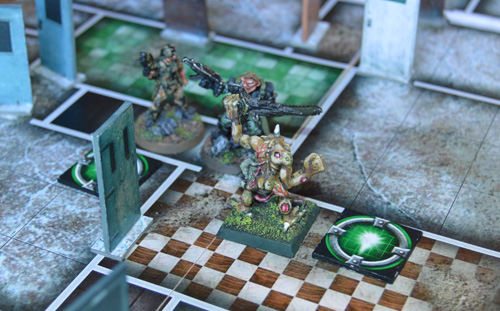
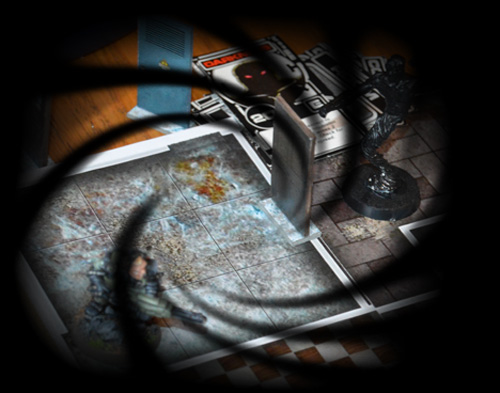
 Second floor clear. On to the third! The two squads had to pass through a room full of blips – the “Reaper man” took the lead and his fellow Warrior threw open the door to reveal the Meat Machine (being represented by an imposing, but completely inappropriate minotaur), who was immediately cut down with a hail of fire.
 The Meat Machine is cut down by the Reaper With only an entire room full of evil critters standing between them and Darkness, they pressed on. Taking the lead, the Chainsaw Warrior charged in and killed a “mutant” (Plaguebearer), but a humble “strength 6” zombie killed him when he rolled a double one.
 The Chainsaw Warrior is killed by a humble zombie Things were now worsening rapidly. The Chainsaw Warrior was down, two of the soldiers were “low ammo” – one double roll away from running out completely and the “Reaper man” was rapidly using up his precious ammunition. There was only 9 minutes left on the clock.
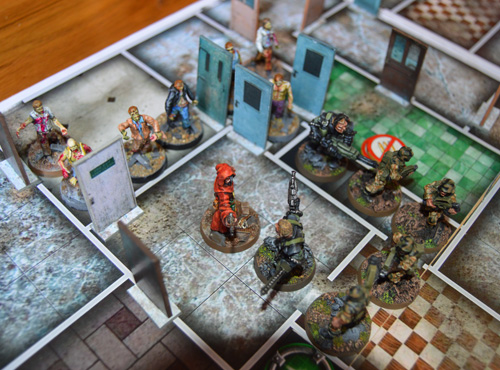
 The squad braces for the attack The squad killed all their attackers, but at the cost of almost all their remaining ammunition. The soldiers were all down to their sidearms, and the reaper had only 2 bursts left. Worse still, there was only enough time for a few more turns. Reduced numbers had brought the turn time down to about a minute, but they had barely started to search the Third Floor.
 A trooper finds a zombie but not Darkness Recklessly rushing into the last room on that edge of the map, a soldier found a zombie instead of the Darkness he was hoping for. In a hairy few moments he gunned it down with his pistol and raced after the others.
 To look for Darkness, they would have to break through them While the rest of the squad push on against agents and zombies, armed only with their pistols, the Reaper turns back to deal with a mutant that is coming up behind. It’s the last couple of minutes before Darkness wins.
 A last desperate effort A couple of agents are killed, but two more soldiers go down. The Reaper turns back and shoots his way through the zombies, using up a couple of the precious laser lance rounds. The surviving soldier fought his way through one zombie and into another room – no Darkness, just another three zombies. He went down and it was just the Reaper left, with 12 seconds on the clock.
 12 seconds until Armageddon In a final heroic effort, the Reaper shot his way through the zombies and into one more room, but the turn of the card revealed no Darkness. It was zero hour and he had failed. Looking at the remaining cards, we discovered that Darkness was the very next card. They had come so close, but the relentless attacks and desperate shortage of ammo had secured their fate.
 The end is nigh
|
|
