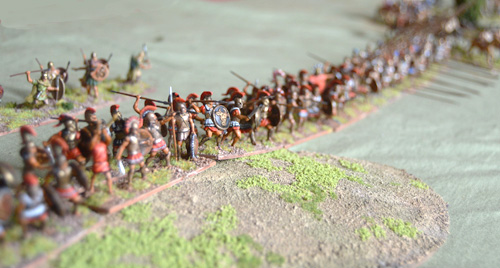
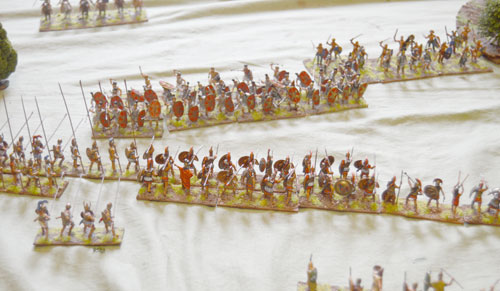
A couple of weeks ago, my 11 year old and I clashed in a game of De Bellis Antiquitatis. We played the Big Battle variant from 2.2, which is essentially 3 normal DBA armies on each side for a total of 36 elements each. This was stretching my model collection to its limits, so some of the armies got a bit anachronistic. At the top, in the red, we have a Marian Roman army, an Early Imperial Army and a Celtic Army with a few Roman blades making up the numbers.
At the bottom, in the blue, we have Carthaginians (on the left flank), with their Hellenistic allies – a block of Pike and some lighter Auxilia (Ax) and Psiloi (Ps) led by Knights (Kn), and finally the Spartans – traditionally armed as a big block of Hoplites (Spears = Sp). We diced for sides, and he got the Romans. The field was 4′ x 8′ and the models were 1:72 plastics so were mounted on 40mm wide bases instead of the more typical 25mm DBA bases. The field was fairly open with a scattering of gentle and steep hills with a couple of marshes in the middle. The isolated trees were just decoration and had no effect on the battle. I was defending, so the Romans were able to tailor their deployment – the main change being shuffling their warband to face my spears.

Initial deployment
In Big Battle DBA, there are three commands. At the start of the turn each player rolls 3 PIP dice and the same command always gets the highest, the middle and the lowest. I made the Carthaginians (inc. Light Horse) the high command, the big block of pike and spear the middle command and the Ps & Ax led by a single Kn the low command. The Romans were more evenly split into thirds.
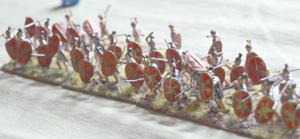
Spartan hoplite battleline
Apologies for the photo quality, there was very strong light from one side and some a rather shadowy in spite of my best Photoshop efforts.
Roman blades backed by psiloi
Here are some Marian Romans – these are classed as blades which are probably the best all round infantry type in DBA. They are adequate against cavalry, particularly when supported by skirmishing psiloi, and they can beat almost any other infantry in a straight fight.
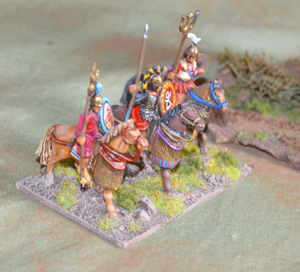
Carthaginian Cavalry Command
My largest command on the left flank was led by the Commander in chief – these Carthaginian cavalry. If your main command breaks then the battle is lost. This command also received the highest PIP dice each turn, which they would need due to the number of different troop types and the elephants.
The first action was on the left flank. I used the speed of the Light Horse to rush them from the middle of the field on to the left flank where they closed in on the Auxilia. My son had forgotten how weak they are against cavalry and using the speed of the horse I was able to hook round on to their flank. In DBA an element which is flanked in this way is extremely vulnerable and is killed immediately if pushed back by the element to its front. One Auxilia fell and the rest fled to the steep hill to their rear where the Light Horse could not follow.
Spartan spears repulse Gallic cavalry
Over on my right flank there was also some success. Some Spartan spears broke off to face the Gallic cavalry, which they strongly outclassed particularly with psiloi support. It was at this point that I realised that I should have attached the psiloi to the spears as it was an unnecessary PIP drain to move both (1 PIP for spears and 1 PIP for psiloi instead of 1 for both).
The problem for the spears was that although they got +5 to their dice to the cavalry’s +3, however wide the margin they won by, they could only force the cavalry to flee. The only way to actually kill them was to wrap round their flank, but they got some good PIPs and managed to manoeuvre to do this. The rest of the cavalry fell back and waited while the Roman blades and warband advanced.
Cavalry destroyed by spears
So far it was going well for the Carthaginians and their Greek allies, but it was all about to unravel. The Auxilia had retreated in confusion but instead of firmly pinning them with a reinforced force, I thought them beaten and turned my attention elsewhere, giving them an opportunity to regroup and come back down off the hill in good order. Although I was rolling good PIPs the Carthaginian command was in total disarray. The swamp in the middle was incredibly awkward and I hadn’t really thought about how I would manoeuvre round it. Some spears went up to support the Light Horse against the resurgent Auxilia. Others had to advance through the swamp (not a good place for heavy infantry) to avoid facing off against the blades, the cavalry general wisely moved away from the back of the elements (danger of being trampled to death if the elephants were pushed back), but then got in the way of the warband who were trying to get into position in front of the blades. 5 or 6 PIPs per turn were going nowhere.

Confusion in the marshes
While all this was going on, the main blocks of infantry were gradually closing in the middle, pikes and spears on the Greek side facing Roman blades and warband.
Heavy infantry close in the centre
The Carthaginians continued to lose their grip on the left flank. One of their spears were surrounded and hacked down, Roman blades killed their Auxilia. This middle period of the game was characterised by the Romans repeatedly rolling terrible PIPs (lots of 1s and 2s), so they struggled to manoeuvre but when it came to combat, the situation was reversed with the Romans rolling very well.
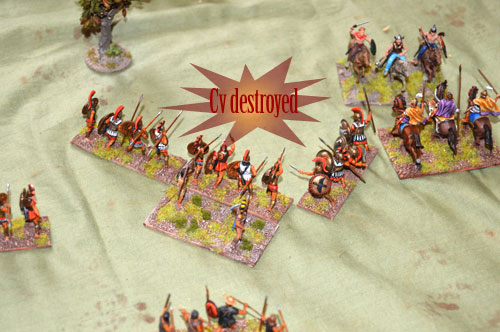
The climax of the left flank was when two units of Carthaginian warband managed to line up against the Roman general. The odds were good – the warband had 3 + 1 for being supported = +4 and the Romans had +5 + 1 for Psiloi support and -1 for being unsupported on one flank = +5. Although that gave the Romans a slight modifier advantage, they would be killed if the warband scored higher, whereas they had to double the warband’s score to kill them. That gave the Romans a 2/36 chance of killing against the warband’s 10/36. If either were destroyed then their command would break. I rolled a 1 and the Romans rolled a 6. With the Commander-in-chief’s command broken, the Carthaginian side had lost the battle.
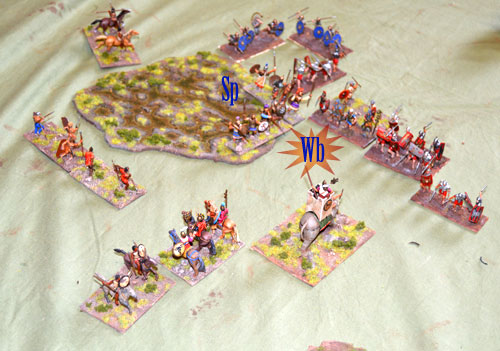
The critical moment
We decided to play on, to see what happened across the rest of the battlefield. As a broken command, the Carthaginians could only retreat, with PIPs being able to be used to hold them in place. As this was the high PIP command this meant that the other two active commands were getting the worst two out of three rolls, so I wanted them off as quickly as possible.
The Roman flank facing the routed command slowly regrouped while the battle raged in the centre. The Greeks manoeuvred and fought well, managing to kill off a few elements and certainly holding their own. Heavy infantry fights in DBA tend to be a slow slogging match – it’s very unlikely to get a kill, so they tend to just push each other back and forth. The pikes scored some success, having a slight advantage against the blades and the Spartans did well too – in DBA they are just ordinary spears so this was due to luck and manoeuvre rather than their Spartan qualities.

Romans on the left swing round the end of the Greek line
However, the clock was ticking for the Greeks as the unopposed Romans regrouped and marched around their left flank. Although losses had rendered most of the commands on both sides very fragile (they can only afford to lose a third of their elements before automatically breaking), this ended in a clear Roman victory, as the Romans were able to attack the pikes from behind and break the main Greek command.

Leave a Reply