There is a possibility that this one might turn out to be more about learning from mistakes, although I hope there will be some ideas in here for some people.
Most laborious element of this is about adding cork and grit for texture, painting the rockwork black and highlighting it. Fairly comfortable with what I intend to do with the top of the piece, but not yet sure about the sides. With hindsight I don’t think I would have made it as tall, and I should have given more thought about how to position troops on the side of it. However, making the sides steep makes the positioning issue trickier, but it does make for a smaller footprint for the piece and so we don’t end up with too much wasted space.
Putting bits of cork on there is time-consuming and makes painting take longer. Looking back I think I would have done better to use a number of thinner sheets of polystyrene and used my hot-wire table to make them very irregular, then I could have made some stepped areas which troops could sit on. If I try something similar again I’ll do it that way, so a useful lesson learnt.
Going to try the molten metal effect in silver for the crater. I’m going for a surface effect rather like lava, where the consistency will mainly be fairly gloopy, but the hotter it is the more runny the consistency.
I mixed some filler powder – Polyfilla is the UK brand name, with a bit of Gorilla white glue, some cheap craft silver paint, and some water, resulting in a thinnish paste. It continued to thicken, because of the filler, while I was working with it. I poured it into the crater and worked it around the crater edge, the big bubbles, and had it flowing down the smaller exit crater with a kind of waterfall effect. I wanted an undulating effect on the top rather than a flat surface that a more fluid surface would produce. Adding water to the paste in the mixing pot, I used the brush to put drops on the surface to try and give the effect of hotter bubbles of metal pushing up through the surface. A day later and it still isn’t dry, so patience is required. I’ll wait until it is fully dry to see what I do with the surface finish – I want it glossy.
Meanwhile, what to do to make the sides more interesting? First try involved using 2mm plastic tile spacers, available from tiling shops or diy stores. These are small tubes, about an inch long. There is a small variation in the length of them. I am trying to make it look like they are crystal outcrops, so attached groups of them at an angle to small pieces of clear plastic sheet using a hot glue gun. I painted them blue and sprinkled turquoise glitter on them in the hope that if they are lit up from below with leds, they would look like crystal. To me, looked like a reject from My Little Pony’s garden, so discarded them.
These were fiddly and not worth the effort. Rather than bore you with the details, if you want to know ask through the comments box I’ll tell you what I did – you might find them useful for scratchbuilding multi-barrel weapons for 40k, Epic or BFG. Following pic shows the basic construction. I’ve left out any painted pics on humanitarian grounds.
Failure 1 left me with a few holes in the side, which I could light with leds. Next attempt was to take pieces of sponge in different colours, place these in the holes and then use different leds to see what the effect was. It’s possible that a good effect might be achieved, and it doesn’t help that the configuration of the led set restricted what colours could be used where so it’s just a bit too multi-coloured for me. I should apologise at this point for my failings as a photographer – especially when it comes to photographing lights. Contrast and true colour-rendering were a bit too much of a challenge. Following pic illustrates this stage, although one of the green holes has a plastic green crystal in it rather than sponge, to see if that looks better. Not enough of an improvement for me, unfortunately, so that made failure 2.
Decided that I would have pockets of lava in these holes instead. The lava effect will then tie in with the lava on some of the other scenery pieces so that when they are out together there is more integrity to the landscape. While I’m feeling a bit philosophical about such things, I may as well make the observation that model scenery, or even units when you mix figures come to that, looks better to me when there is some kind of consistency about it. One obvious aspect of this is basing – if your figures, scenic items and playing surface have bases that largely match, they look better. If you throw lots of ideas together then even if each idea is individually good, there is a danger that it just looks like a lot of random stuff thrown together and the overall effect is not consistent. That doesn’t mean that they all have to be the same – just not different in every respect. Most buildings in an area will probably have some aspects in common, such as brick walls, tiled roofs, but might differ in colour. Some famously picturesque Scottish or Italian harbour towns have buildings that have been painted different colours, but the style is consistent and you can see they belong together.
I used a cheap craft knife to cut slots in the sides so that a piece of clear plastic sheet can slide in over each hole. The following pic shows one being put into lace, and shows the highlighting of the grit and cork surface with a mix of blue and white. Bits of cork were fiddly but I’m actually quite pleased with the effect.
Painted these with the lava style I used on the tree pieces, then used grit, cork and black paint to disguise the edges. Result is in the following pic. It might seem so, but in this shot the led underneath has not been turned on – the contrast with the black rocks means that the white shows up as much brighter than it does to the eye.
Happy enough with them, but I might add other features to the sides – perhaps crystalline ‘vegetation’, around the lava pools, if I get the time and inclination.
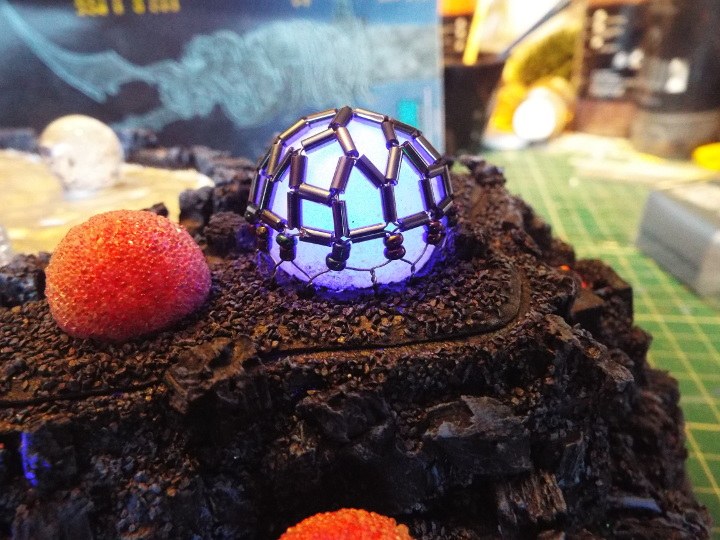
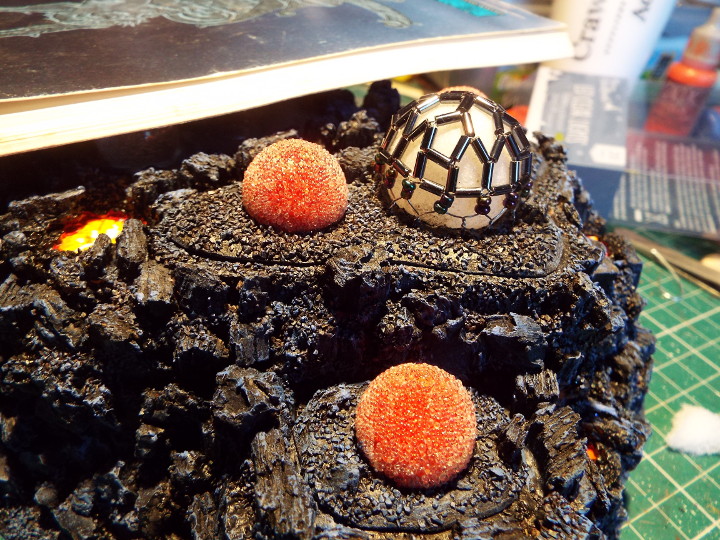
Back to the domes on the top of the piece. Happy enough with the smaller red domes, but wanted to add something to the bigger white dome. Came up with the idea for some kind of exoskeletal structure on the outside, using 2 types of beads and some fine wire. A sort of Geodesic dome arrangement. The wire is fine enough to allow 2 strands of wire to go through the beads. Fiddly and time consuming, and sometimes I had to rework a bit to get it to sit fairly snugly around the dome. Ideally I’d have got a very regular pattern, but variations in bead size, and probably because it was a first attempt, meant I didn’t manage that. Close enough for me, anyway. Once I got around half-way down the dome all round, I put 2 smaller beads onto each pair of wires, then brought one strand from one pair of beads and twisted it with a wire from the pair next door. You can see this as a Y shape in the picture below. I then drilled holes in the mdf base with a pin vise, and brought each twisted pair through its own hole. On the underneath of the base, I twisted a wire from each pair together with a wire from both its neighbours which tensioned these anchor wires into the base. Overall this took time, but I like to put in some little details like these to try and lift a piece. The first pic has the led under the dome turned on – the other has no added lighting. The lava pool on the left looks like it is underlit, but that is a trick of contrast.
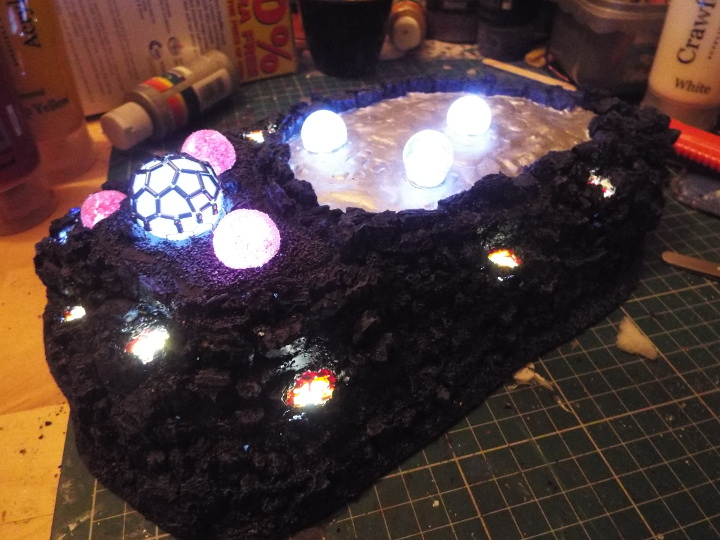
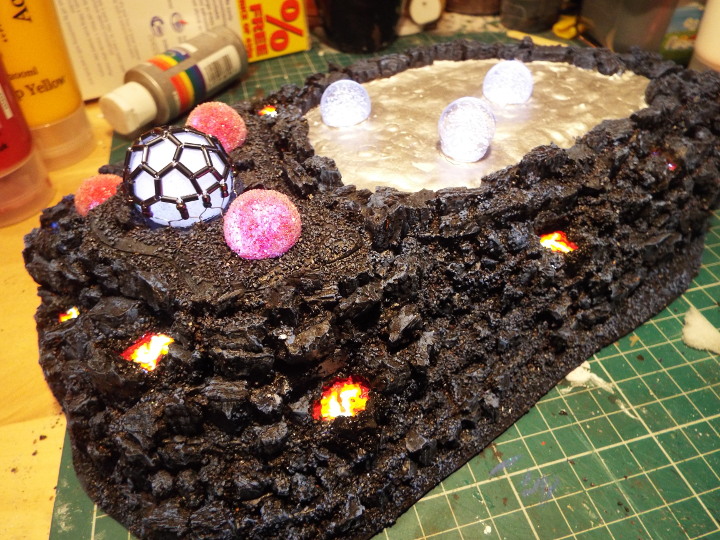
Then it was a matter of deciding how I wanted to light the base. The following 2 pics show it lit with a set of clear white leds, the first with dimmed room lighting. The eye handles the contrast much better than my photography.
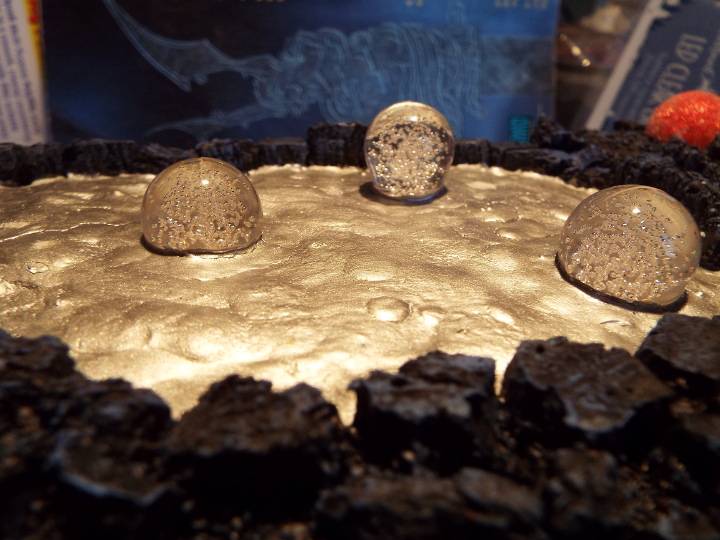
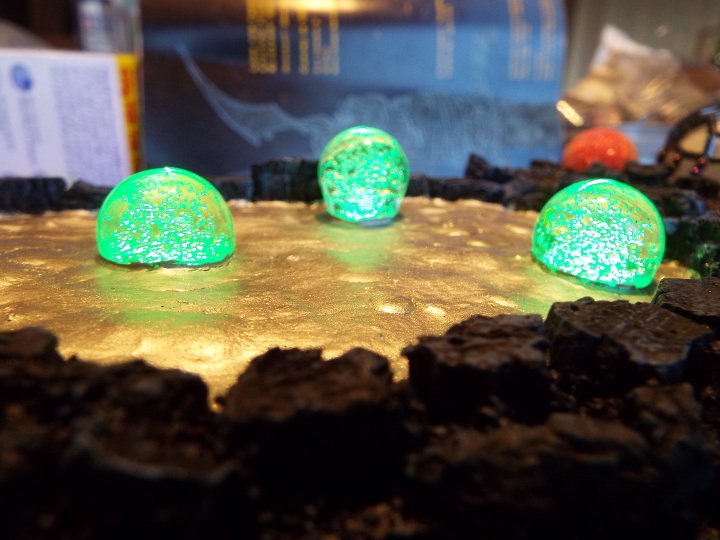
The following pics show the bubbles rising from the molten metal in the crater. I shot them from a lower angle to try an cope better with the surface reflection. I think there is a bit of curvature coming from using the camera very close up – the one on the right is not really on a slope. First one is unlit, the second has green leds under each bubble. Blue looks good with the silver as well. I think if I change it to a more conventional lava effect, then red or yellow leds might be a better option.
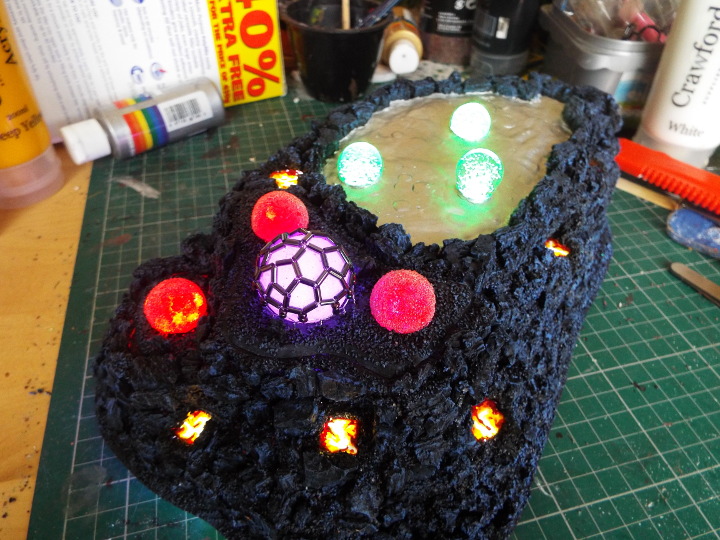
On the final pic I have 2 led sets in use. White leds are under the lava pools, while the spherical bits have coloured leds. I’m going to get some coloured cellophane, probably from some sweet wrappers or similar, and cover some of the white leds to see if they give me the colour I want. That way it will only need a single led set, costing 1 whole £.
I started out with the idea of having 2 further small bases to match those with the red spheres on them, but with plant-like things on them which I can underlight. I have started constructing these, but to finish these I’ll probably pick up some cheap Christmas decoration which have fibre-optic strands in them which I can reuse. If I did that, I could postulate that the bubbles emerging from the crater surface are natural phenomena and that the feature has not been developed. With the configuration above, I could claim that they are floating extractors that are part of the mining complex/research station or whatever.
Even if the overall piece is not of interest, hopefully there are a few bits in there that could be useful in some way.

Leave a Reply