Next bit is to take advantage of some cheap led lighting sets from Poundland. Other stores such and Poundstretcher and The Works also have sets, and I suspect that if you bother to look into led lighting more then there are a host of other sources which allow you to have exactly the number of lights and colours that you want, as well as avoiding the AA battery backs that are a bit bulky and mean that you have to make the pieces a bit bigger than you might want.
One thing to bear in mind. Many of the cheap sets come with decorative mould in plastic or metal around each bulb. On the Poundland sets these are easily detached to expose the bulb. On some of the others they can be glued on, which can mean that they are useless unless you actually want a set with those mouldings on. I recommend you check this out before you buy if it matters to you.
I selected 2 sets from Poundland which had moulding that I thought I could use. Here is a pic where I have substituted or meddled with the moulding.
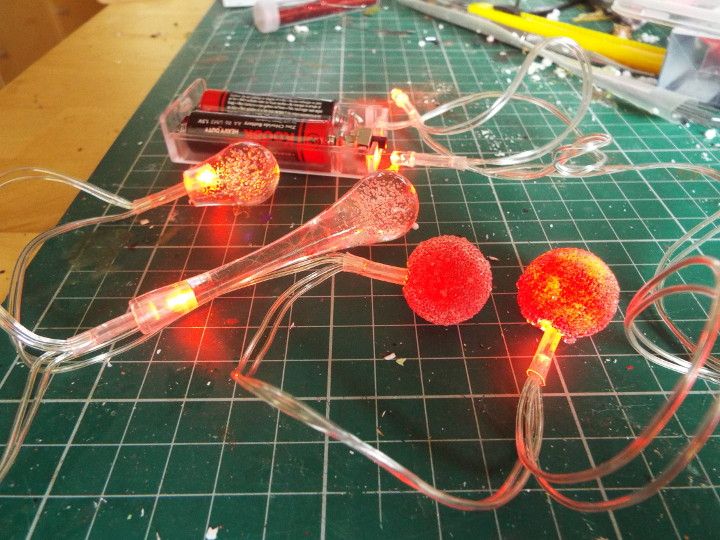
The LED bulbs are red, and in the pack they come with the spherical red moulds. In the other pack, which has violet LEDs, the moulds supplied are the elongated ‘drops’ as per the second from the left. In those, the bulbous area at the end have a lot of bubbles and these are underlit by the bulb. For my purpose these were too long, so I used a razor saw to shorten it, then drilled a new hole into which the led bulb can be pushed. I wanted 3 of these for the terrain item. I also wanted 3 of the spherical ones that came with the set. As supplied these are spheres of expanded polystyrene which have been coated with a red plastic layer, to which a lot of tiny clear spheres have been glued. The filling cuts down much of the light showing through, so I have used a dentists tool to carefully extract much of the filling. As you can see by comparing the 2 in the picture, the one on the right shows more light coming through as a result.
The idea behind the piece is to have a raised crater filled with either molten metal or lava, through which large bubbles of material are slowing pushing through the surface. For the molten metal I am torn between silver or lava. There is an outflow from the crater where the liquid disappears down a smaller hole.
On the raised area to the other side of the crater I am planning to have either domes or some exotic vegetation. The idea is that I can swap a couple of bases over depending on which one the scenario requires. Both are intended to be underlit for effect. The sides of the crater will have some tubular outcrops – although who can say if these are innocent extruded rocks, or a cunningly designed missile/laser defense system!? I’ll break up the bare rock with some crystalline growths of some kind.
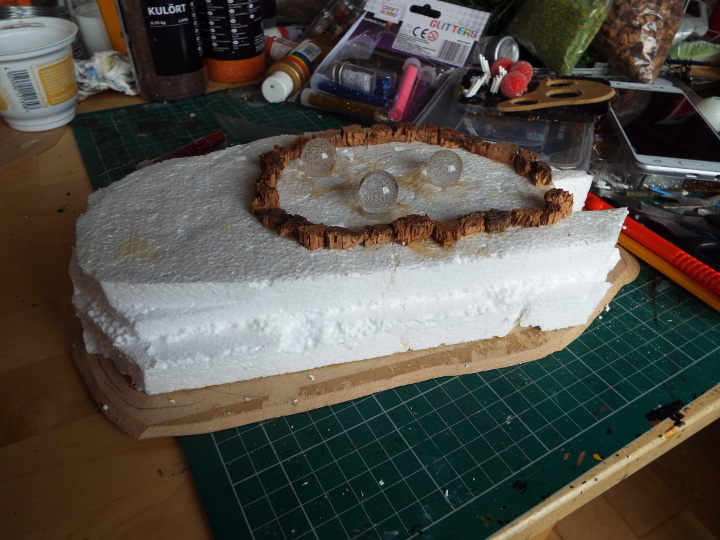
The following 2 pics show the emerging bubbles glued into the crater surface, with some cork pieces outlining the crater edge. The slot in the second picture is where the outflow hole will be.

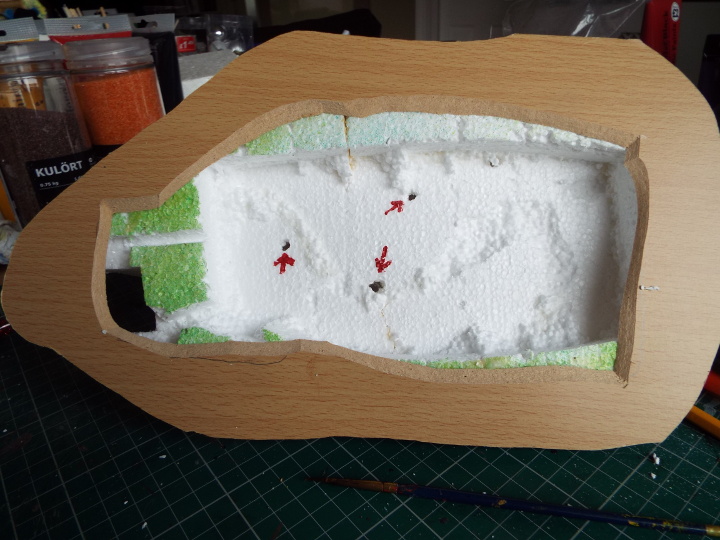
The following picture shows the underside hollowed out to hold the wires and the battery pack. The arrows show where I have made the holes through which the Led bulbs will get into the bubbles on the surface.
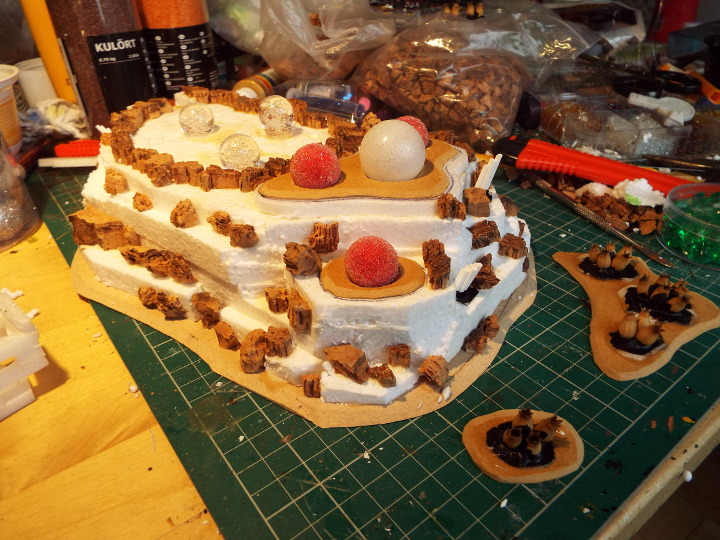
The next pics show where I have cut a paper template to give me the size and shape of the swappable bases. I didn’t allow quite enough room for the third smaller dome, so you can in the second pic where I have reduced the base size to avoid wasting that space. The bigger white sphere is from a cheap set of small Christmas baubles. The second pic shows a piece of foam sheet on which the bases will sit and which creates more space underneath the bases in case I need room to adjust the positioning of the bulbs when I swap them over. It also shows where the bases have had holes cut in them to let the bulbs shine through where they need to. On the right are the spheres, and on the left, some seed cases from the garden which will be my exotic foliage. They have holes at the bottom as well as the top, and have been attached to pieces of clear plastic sheet with a hot glue gun, which dries clear. Black paint has been applied to the bases when the cases have been glued in place so that the light only comes up through the centre of the seed case.


The following pic has a few more cork pieces for texture, and the sharper-eyed will note a few clusters of tubes sticking out at angles. At this stage I realised that it would be easier to paint it before putting lots of small bits of cork on there to avoid having bits of white polystyrene showing.
Next instalment soon, I hope.

Leave a Reply