As part of a clearout I dug out a pile of epic 40k stuff and put it up for sale on the Oldhammer site. Not sold yet, unfortunately, but I made the cardinal mistake of looking at some of the posts on the subject. Not so dumb in itself, but given that I don’t have a great deal of time left to live, so will never play a game with it, deciding to have a go at some ideas for some alien scenery seems a bit daft. I quite enjoy trying to come up with ideas, so thought what the hell.
Still need to get rid of the epic stuff though, so if anyone is interested let me know. I’ll probably throw in my scenery attempts as well.
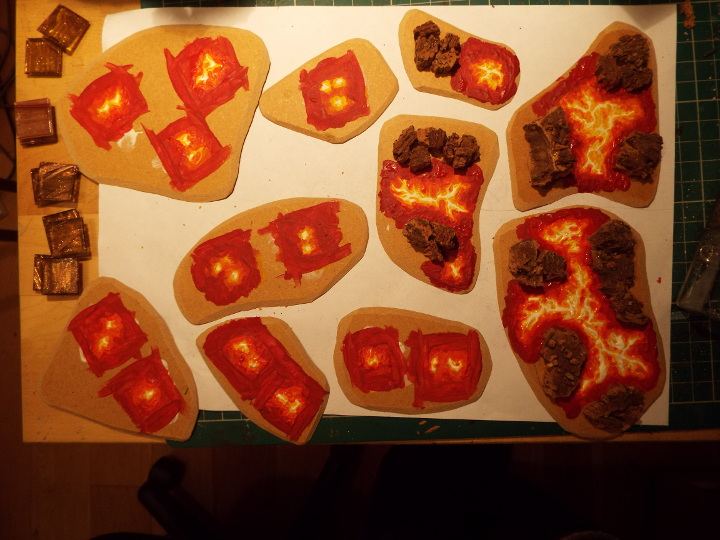
Anyway – on to the ideas. A load of grit picked up from an IKEA sale, tubes of acrylic paint and packs of beads and crystals sourced from the Works, some chopped cork pieces, and perhaps some led light sets from Poundland gave me some vague theme around a hot planet with crystalline/inorganic planty things, maybe coral-like, and pools of lava or molten metals.
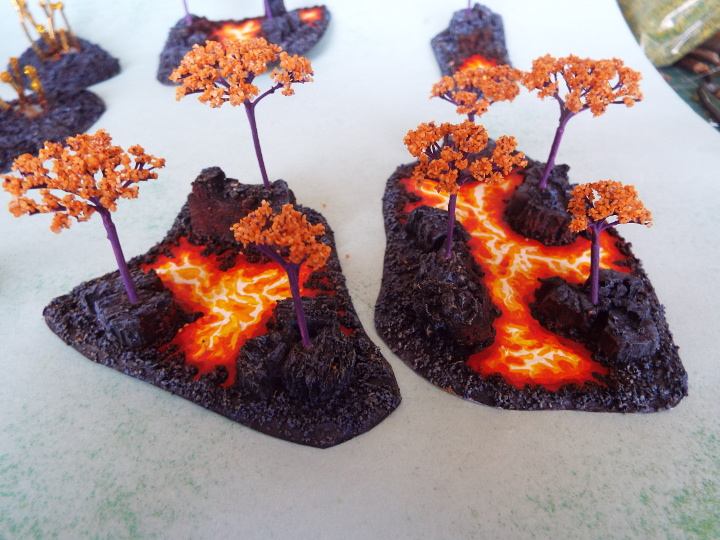
Started with some dried flower heads which I used to create trees for my 10mm WW1 East Africa project. They are on a separate post on this site. To go for a more alien look I decided that the ‘tree’ trunks and branches would be purple, and that the ‘foliage’ would be some small orange grit from IKEA. The grit is angular with flat faces so it looks a bit crystalline.
- trim off the flower heads with a small sharp pair of scissors.
- Using a pin vise and a very fine drill bit say – .7mm – gently drill out the stem. Not as hard as it seems because the centre is pithy rather than wood.
- Insert a short length of fine wire, coated in a pva type glue, which leaves a short length of wire sticking out of the bottom of the tree. I recommend that you try and get the wire up the length of the trunk as it will make the tree trunk more robust. The bit sticking out of the bottom will be pushed into some cork to fix it to the base.
- Paint the trunk and branches white. Let it dry.
- Paint the trunk and branches purple, or any other alien tree colour of your choice. You could phone the Royal Horticultural Society for advice on suitable colours but I suspect they will put the phone down on you. Let it dry.
- Dip the tips in pva or another suitable glue, and then dunk it in the grit, and set aside to dry.
- Create the base in the material of your choice. I use thin mdf. It cuts very easily if cut at an angle using a craft knife. Remember that you cut even easier, so be careful.
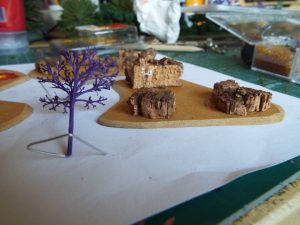
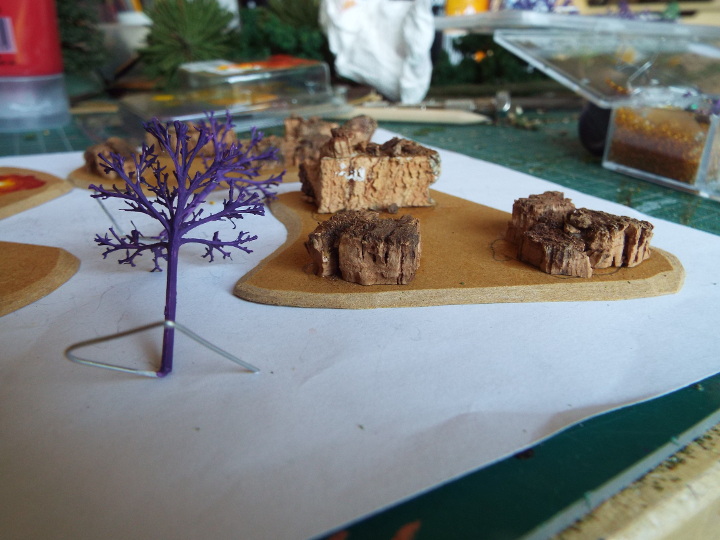
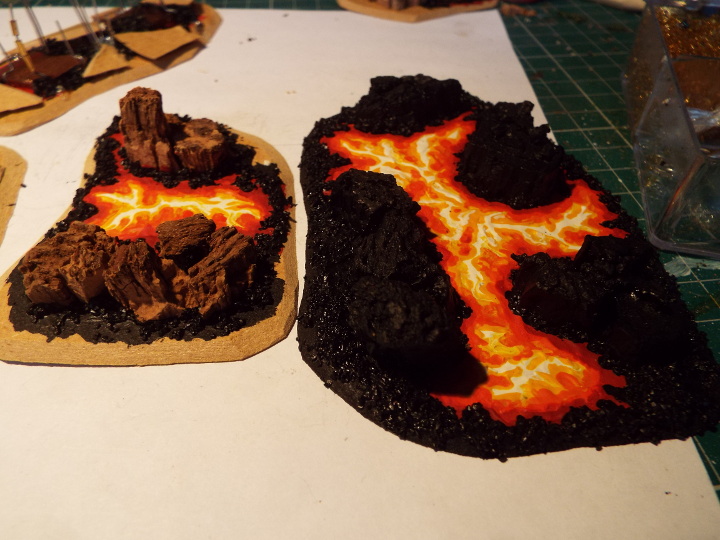
- I decided that my trees would grow from outcrops round lava pools. The outcrops are small pieces of cork which have cut edges which I stick to the surface of the mdf in an arrangement of my choice. The mosaic tiles and the painted bases relate to the terrain idea below.
- Next paint in the lava. I applied cheap acrylic to create some undulation in the surface. Hottest is white in the centre, then yellow, orange then red, darkened towards the edges where it will be coolest. Blend to your heart’s content. I have gone for a pattern I can only describe as swirly – the pics describe it better than I can.

- Mix some fine dark grit with cheap acrylic black paint. The paint will cover it so the grit colour doesn’t matter too much. Apply it around the lava and on the rest of the mdf, and use it to texture any flat areas of cork that are exposed.
- Paint the cork pieces black.

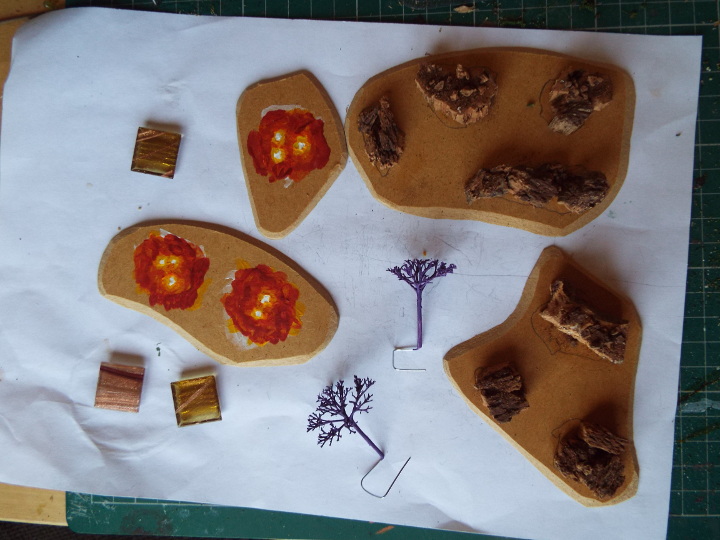
- Highlighting to finish off. I have used light/mid blue to highlight areas away from the lava, because I decided my sun issues blue light. Around the lava, I have used red and orange to represent the light given off by the molten rock.
- Stick the ‘trees’ into the outcrops.

Second idea.
Not as happy with this, but I completed it in the hope that someone else might be happy with it, or that some of the ideas could be used to better effect by someone.
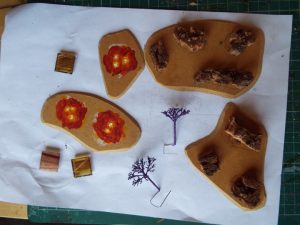
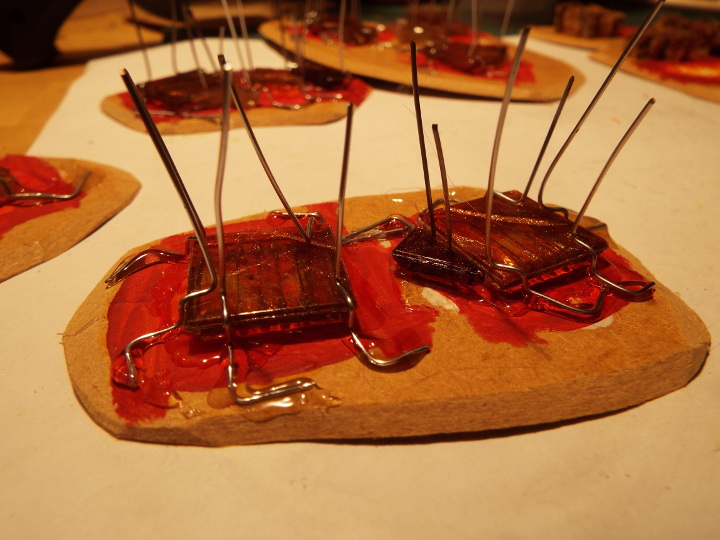
Again, mdf is used for the base as above, and the base grit is used and highlighted as above. These use glass mosaic tiles which have a part-transparent metallic gold surface. These can be got from tile shops if you don’t have some left over from a bathroom project as I have. The thinking behind this is that metal/crystalline material is being forced through the crust, and that it grows through tubes, ejecting material from the top which when there is a number of these grouped together, forms sheets of glass-like material between them. The chemistry and physics behind this is probably nonsense, but if I’d worried about that sort of thing I probably would have stayed awake at school.
Important note – These tiles can be broken with wirecutters, but they are glass, so if you do this wrap them in something that will prevent glass splinters being thrown about, handle cut edges carefully, and dispose of any bits properly. If youngsters are reading this, get your parents to help with this bit, and if there is no-one available to help – Don’t do it. Your models will look rubbish if you bleed all over them. The tiles can be left out, and I suspect that leaving them out might make the pieces look better anyway.
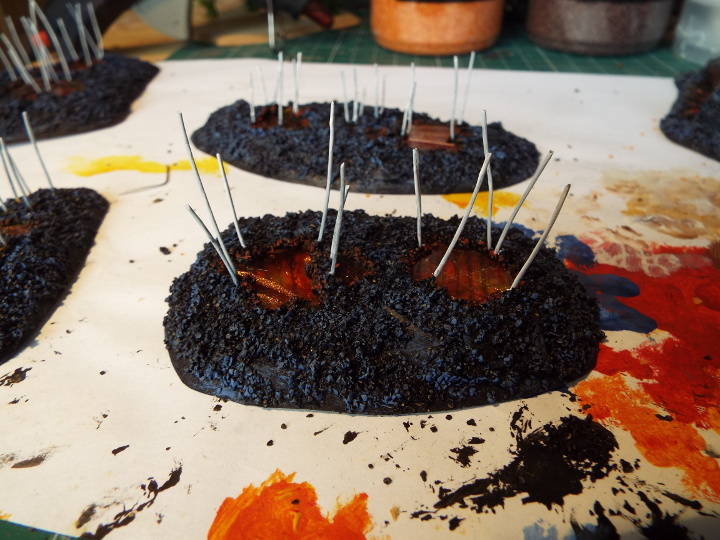
- Cut some mdf bases as before, and paint smaller patches of lava where the tiles are to be positioned, so that they give some impression of the molten rock beneath the surface. You can see where I have done this in the pictures in paragraphs 8 and 9 above.
- Using a hot glue gun, attach some pieces of fairly fine wire – these are the crystal tubes that will rise above the surface. They are various lengths, but I reckon the longest is only around an inch. It is supposed to be Epic scale, after all. Note that I have bent them so they don’t all come up at the edge of the tile. I didn’t want to end up with squares that look too regular. That’s also the reason for the broken pieces of tile.
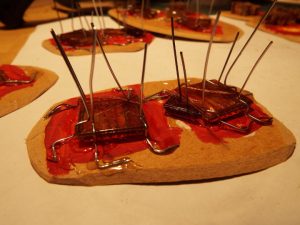
- These tiles are thicker than I’d like – translucent paint on bits of clear sheet plastic would probably be better. A further downside is that it takes more grit and black paint to bring up the level round it. Realising this I used a lot of small mdf scraps to pack it and save paint and grit.

- When they have dried in place use the grit/black mix to cover the base and shape the pools. When that is dry, I painted the wire white. With hindsight, I should have used gold. Highlight the surface as for the tree bases – blue for most with orange around the pool edge.

- Next, the crystal tubes. These are small tubular beads, bought from The Works. It comes in a partitioned plastic container which has 6 or 7 different types of small beads. Slot them onto the wires, leaving 2-3 mm of wire protruding from the topmost bead. They vary between 1 and 5 or 6 beads per stem. I carefully bend each one at the joint between each so that each stem has a series of angular kinks rather than being straight.
- I then mix some fine sand and gold paint and put a blob on the exposed wire at the top. Allow that to dry. I then give each blob another coat of gold, and while that is still wet dip it in a small pot of very fine gold glitter, again sourced from The Works. The final result is here;


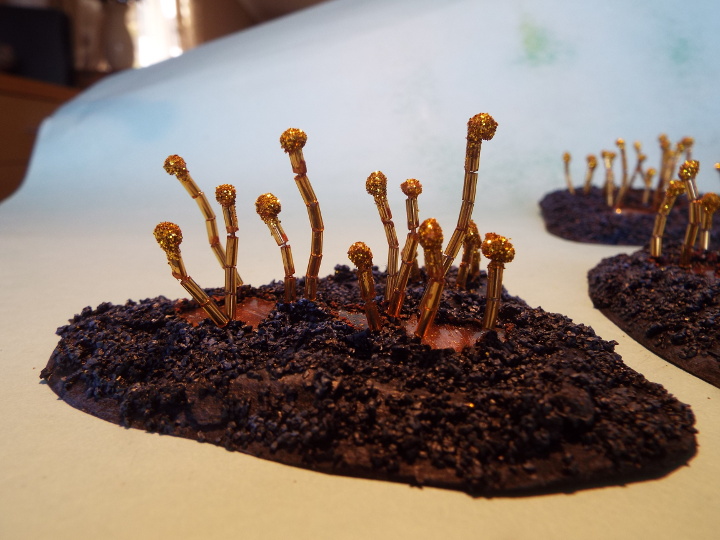
Personally I prefer the first of these 2 items. I’m not overly happy with the tops of these stems. and there is too much bare base around the edge. I may pick up some red glitter tomorrow, and mix it with some varnish to create a kind of crystalline moss. If it works I’ll add it to these and post an updated picture on here.
Meanwhile, I have a couple of other ideas involving plastic tubular tile spacers and some plant seed cases I have used for a number of purposes, along with some led light sets from Poundland. If you have any ideas for improving these, let’s hear about them.

Hi Aidan,
I never got into epic when I was a kid, but I like seeing your terrain builds nonetheless.
I’m a bit concerned though with a comment you made in your opening paragraph, “given that I don’t have a great deal of time left to live”…….please tell me that was a typo.
Hi Papafakis,
It’s Alan here. That wasn’t a typo, but it refers to me rather than Aidan. Used to game with him many years ago and he lets me put articles up on his blog. I’ve had cancer for a few years now but it is at the stage where it can’t be fixed. Not only is Aidan in good health, afaik, but he is a good few years younger than me, so he should be around for many years to come. I’ve had a long time to get used to the idea so I’m fairly relaxed about it, but I have 40 years of wargaming and modelling stuff to sort out, and should be doing that rather than coming up with new stuff. Bit of an addiction though – can’t stop now.
Al