Recently bought some palms from one of the Chinese Suppliers via ebay. I was fairly happy with them, and the price is very good, but wanted to give them a bit extra and make them a little bit more realistic. At the same time, found some bunches of bananas that I had made a while back and decided to give them a paint job, and add them to some banana trees I constructed years ago – suspect the instructions for the trees are on the old warfactory pages.
Starting with the bananas, I came across some twigs when on holiday in Cyprus where the dried leaves on the stem have something of the shape of bananas. I also used a section of them, added to a dowel, to give the impression of carved stone leaves at the top of a 15mm column used in my biblical temple.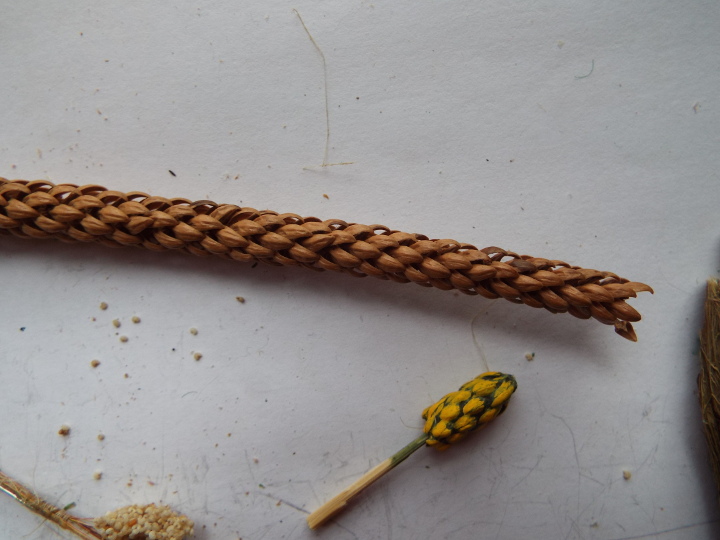
As a brief aside, I think that a more accurate impression of bananas would be got by using Caraway seeds available in food stores. They make great 28mm scale bananas, but building a bunch of them would be fiddly. My method is quicker if you can get similar twigs to those in the picture, but they are over-scale. I think the impression is acceptable though- it’s for you to judge for yourself. For a bowl of individual bananas, use the seeds and paint them.
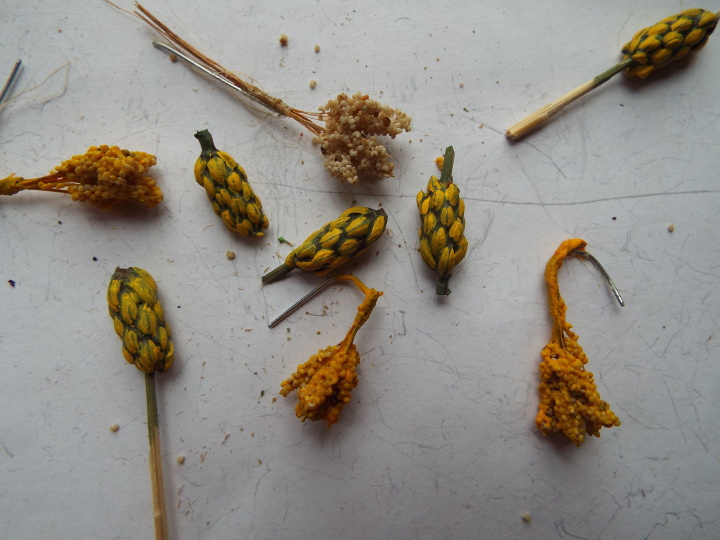
The construction method is to use wood glue to fix a section of cocktail stick into one or both ends of a section of the twig. When the bunch of bananas grows on the tree, the flower juts out at the bottom of the bunch. Do a search of banana tree images to see what the bunches look like. I made the mistake of attaching the bunches to the tree the wrong way up until a friend burst my bubble!
When the cocktail sections have dried they can be used to handle each bunch. I you think the top of the bunch is too open, take some dried leaves from a spare piece of twig and glue them to the top layer around the stem.
I then apply further layers of wood glue, pushing it between the dried leaves so that there are no spaces in there. I suggest you mix some dark green paint in with the glue to colour it – the glue I used didn’t take the paint very well at the painting stage.
Then use yellow to hint at the bananas. An unripe bunch would be green and I suspect that these might make better green plantains, but I opted to have them yellow. The flower looks quite exotic if you wanted to model it, but I wanted a few for attaching them to trees, and some for porters and baggage. The one below has the stem attached to the tree and stem jutting out of the bottom where the flower, or riper fruit which has been harvested, would have been.
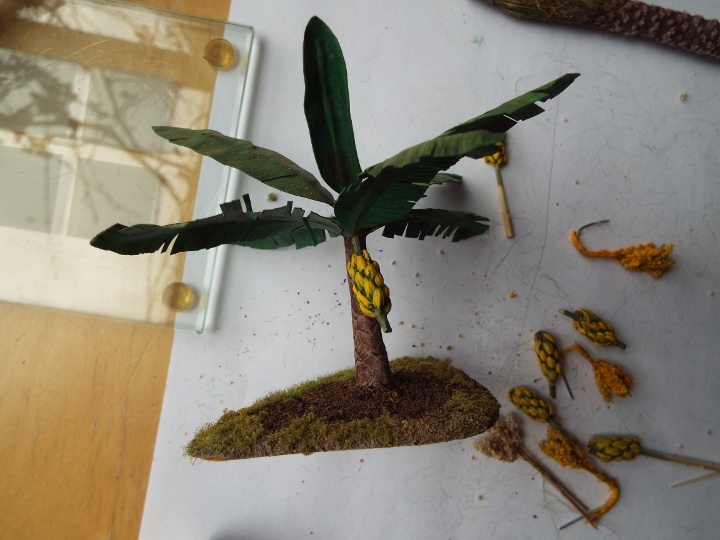
If you are interested in the construction of the tree and can’t find the description elsewhere on Warfactory or a link, let me know and I’ll try and figure out where it is. Basically they are paper leaves on florists wire, and the stem is a spiral of masking tape cut with pinking shears to represent the bases of older leaves.
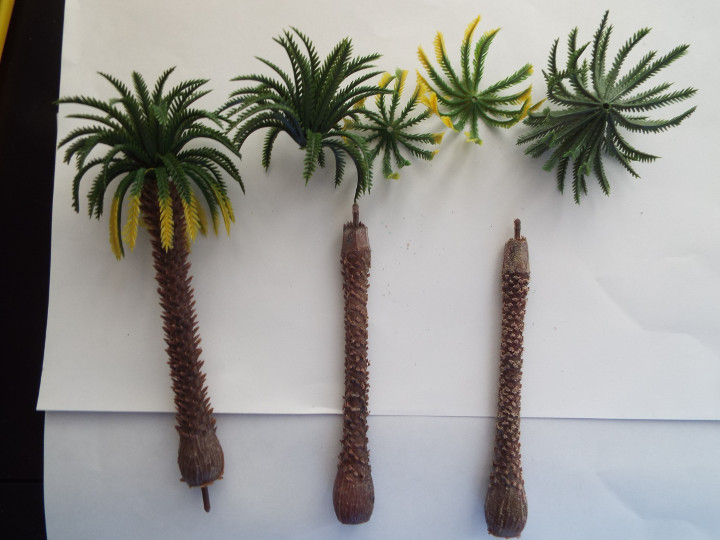
On to the date palms. These are from a pack of mixed sizes but all of the same design. Wasn’t keen on the jagged stem, so cut the spikes back with a cheap craft knife. This is easier if you pull the leaves off of the lug that holds them in place. I think that palms look better if you try and replicate the remnants of older fronds hanging down from the crown, and in this case I wanted to have bunches of dates added in. The models bulge out near the top of the crown, I guess to represent this mass of vegetation. I trimmed it back with the craft knife.
Next think was to rub the stem with some coarse sandpaper. It frays the cut spikes, to represent the less manicured appearance you would get in the wild as opposed to botanical gardens, where neat trimming creates a smoother appearance. I then painted the cut section at the top with a layer of wood glue and allowed it to dry.
Looking at images of date palms, they show the fruits growing as bunches of long slender clusters, arching out from the trunk and hanging below the fronds. The fruit stems and fruit start as green, then the stem ripens to yellow, and the fruit will then ripen through yellow to brown/black.
I started by dipping around 1 cm of the end of a strand of coir in wood glue, then rolling it in some yellow poppy seeds and letting it dry. The seeds are available in bags as cookery ingredients. Comes in handy being keen on cooking and gardening as well – always on the lookout for useful modelling materials. For me, these suit 28mm- for 15mm I think I would use fine sand but I’m not entirely sure I would bother with this below 28mm.
I then bundle 6 or 7 coir bunches together, together with a short length of flexible wire, a small amount of wood glue and wrap them together using a few strands of hemp – anything very fine will do. Once dry, I painted the whole thing yellow, mixing a little glue in with the paint to reinforce it. More glue and poppy seeds if you want to bulk up the bunches – these are quite substantial things. finally, bend the wire to get the arching effect. The bunch at the top in this pick shows the unpainted and unbent stage.
Using Plumbers hemp or some other suitable fibres, glue a clump around the top of the stem and allow to dry. Next, using a mix of green and brown paint with some glue, paint the fibres to glue them back against the trunk. Add more fibres to thicken if you wish – with hindsight a slightly more ragged appearance would probably be better. When that is dry, highlight with a light brown/yellow/white mix to get the effect you desire, When it has dried, use a pin vise to drill one or more holes down into the top of the trunk – then dipping the wire on the date clusters in glue, insert these into the holes.
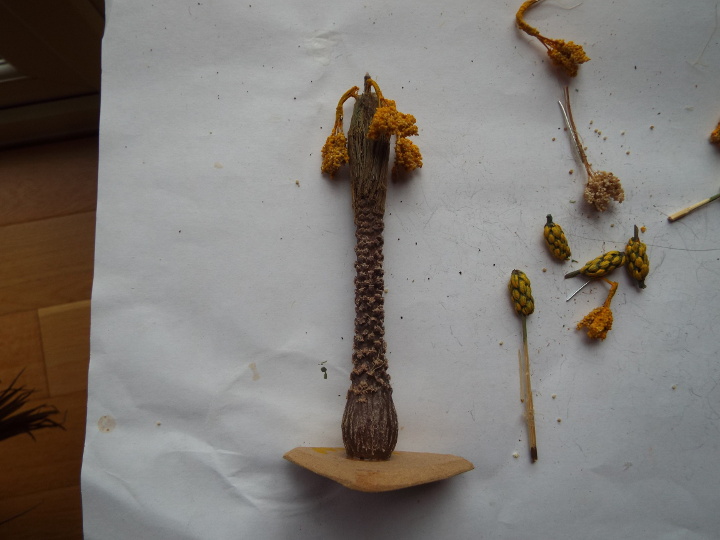
Put the leaves back on to the lugs to get the final effect. For basing, I cut off the lug at the bottom of the stem (NOTE – not the top one!) and use a power drill to drill a hole a centimetre or so deep through the bottom of the tree up through the step. I base them on mdf, and drill a hole through the mdf, then cut a recess around that hole on the underside of the base, then fix the tree to the mdf using a small screw dipped in woodglue. The recess is to make sure the mdf sits flat when the screw-head is in place.
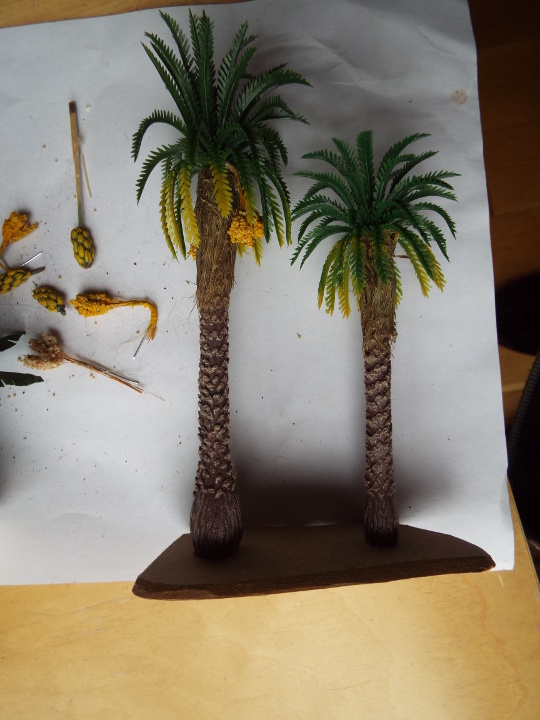
I think they are worth the extra trouble, although if I wanted a 100 of them I’d probably be less enthusiastic.
Hope you like them and if you have similar ideas to share we would be glad to hear from you.

Leave a Reply