Was thinking about some of the features I could recreate in my dungeon setup. Started to consider whether I could model some bioluminescent plants. Came up with some initial ideas but before I invest in proper stuff I figured I would use some cheap battery operated leds from a discount store and see how I could use them. The first idea with some seed heads didn’t really work – I’m going to persevere but need some heat-shrink plastic to try the idea out.
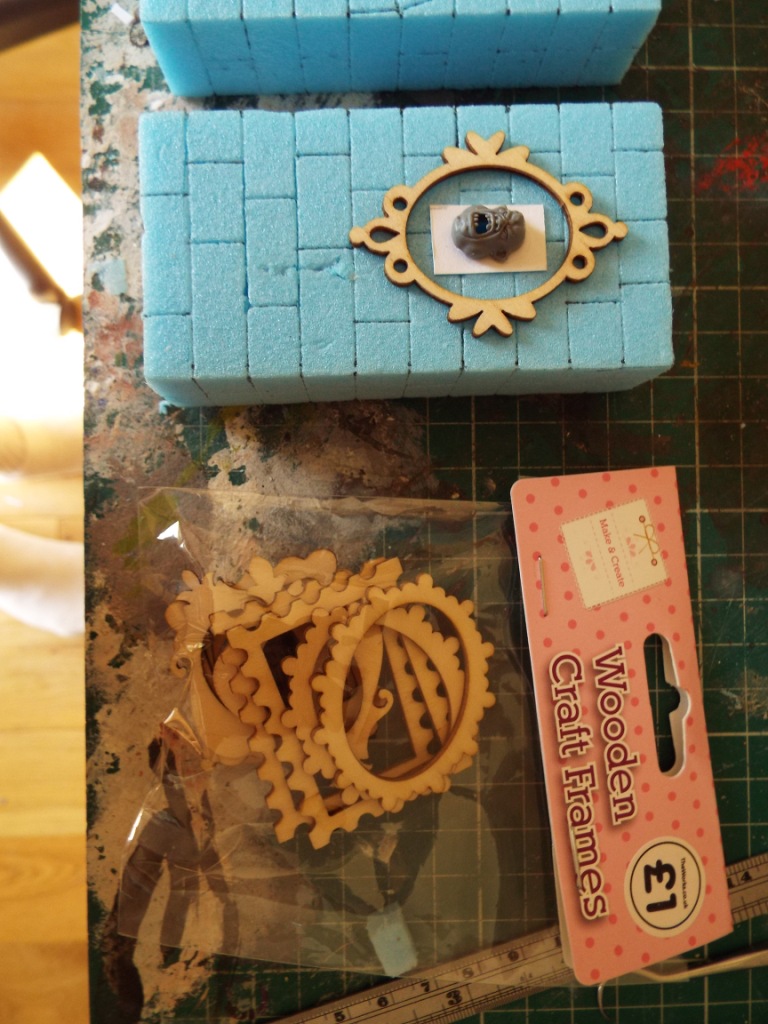
While I sort that, I thought I would try using the lights with a couple of small pieces I was making for the dungeon. If you’ve seen the earlier breeding pits posts, you might remember that I leave 2″ sections out of the room walls, then make different inserts to go in them. Blank walls and doorways and suchlike. The additional room I made required some more inserts, and the approach I took was to make a couple of inserts with one side plain and the other with a feature, and those features would give me the chance to see how they might look with lighting.
It wasn’t as successful as I would have liked, but it has encouraged me to try and get it right.
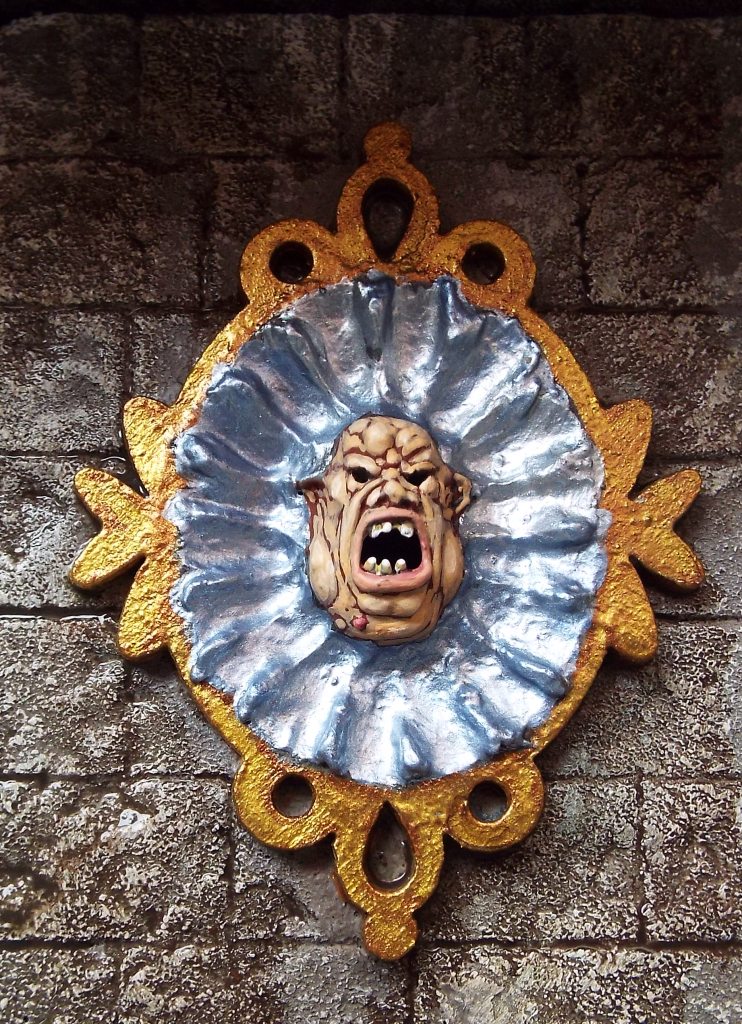
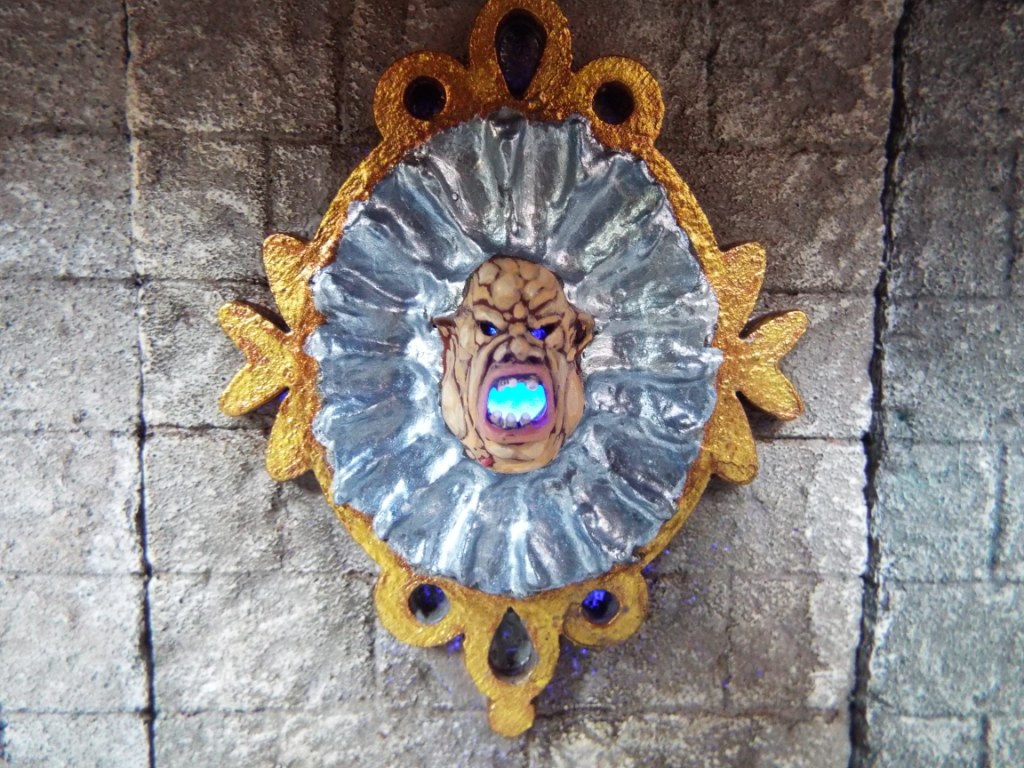
The concept behind the first piece was a magic mirror in which an ogre had been trapped. His face, set in a permanent scream, is embedded in the mirror, the surface of which has been distorted by the spell. The frame is one of a set of laser-cut mdf frames from a discount Craft store. The face is a spare head from the GW plastic ogres set. The mouth is wide open and there is no back to it. The eyes are solid, so I drilled them out with a pin-vise.
I cut a channel from the base up through the middle of the foam, and cut a hole from the mirror side through to that channel behind where the ogre head would be. With the frame and head in place some filler is used to fill the space between them and shaped into a series of ridges to have the mirror surface distorted.
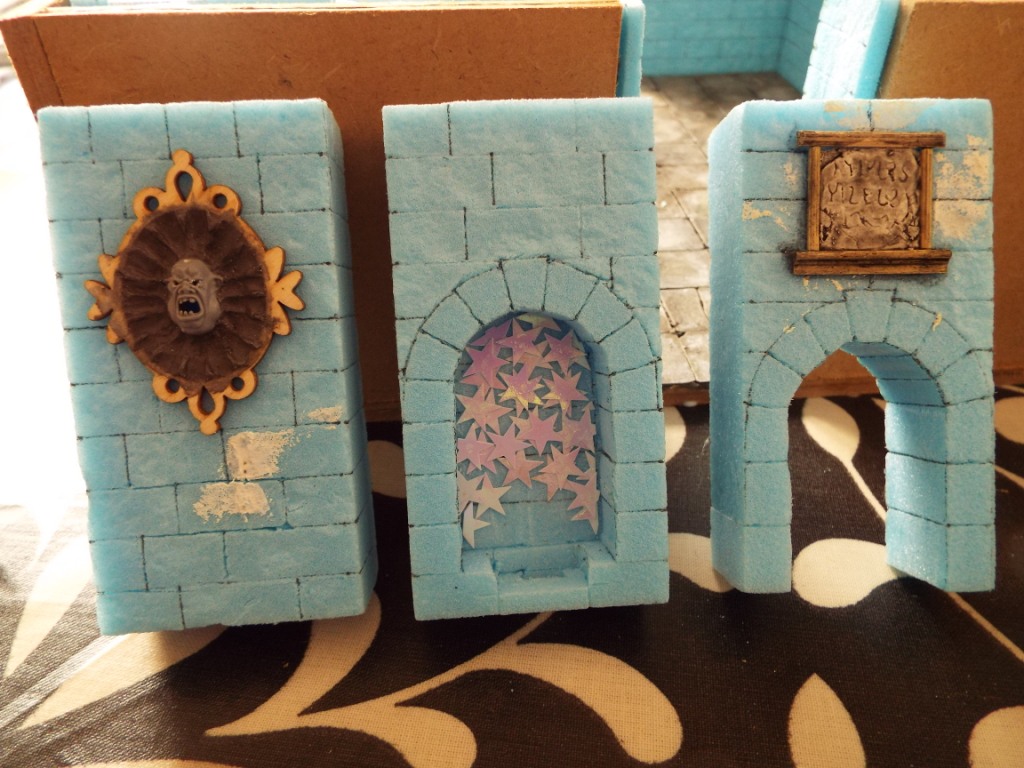
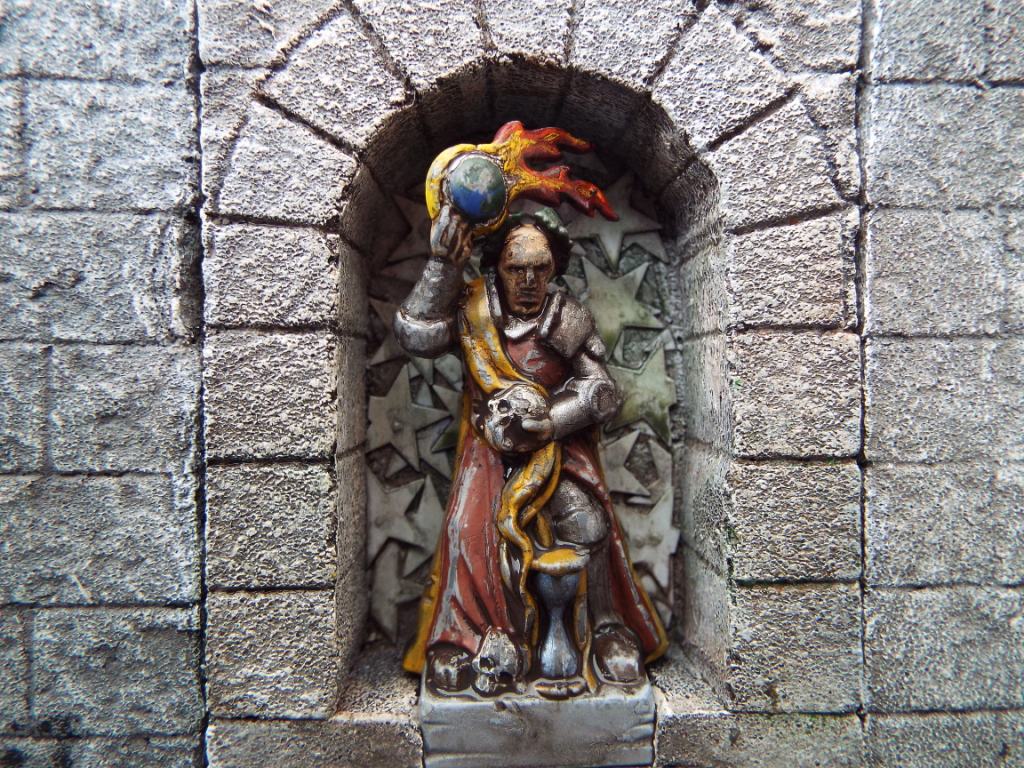
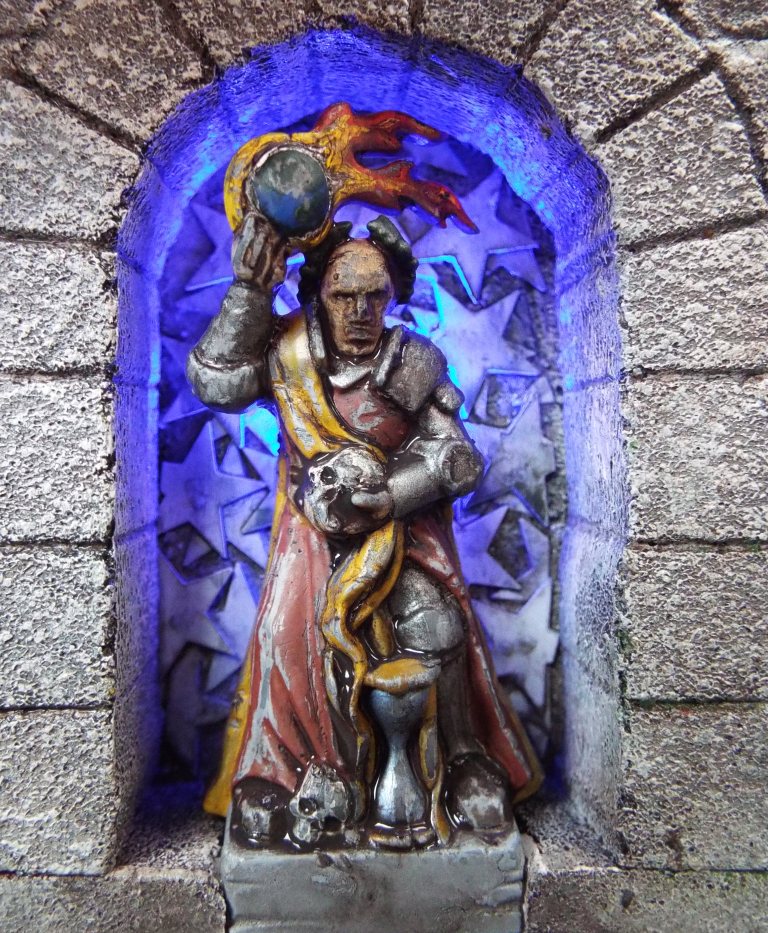
The second one is an alcove with a statue in it. The statue is a piece from the discontinued GW Manor House set. Shame they don’t still do it, it has a host of extras that come in useful for modelling. It has a groove in the back where it is designed to fit onto a wall – seeing that groove was what prompted me to put a light behind it. I have some plastic stars which are slightly reflective, and glued these to the back of the alcove. The statue was then painted (very sloppily) and when it was dry I attacked the paint with some scrunched-up foil and the side of a blade, in an attempt to show where the paint had been eroded away. I’m not really sure whether painting it was the right thing to do – it might have looked better if I’d have left it a stone colour. Ancient statues were often painted, but the passage of time has seen the paint fade and erode so we tend to see them unpainted nowadays. To maximise the light reflection, I lined the groove in the back of the statue with foil.
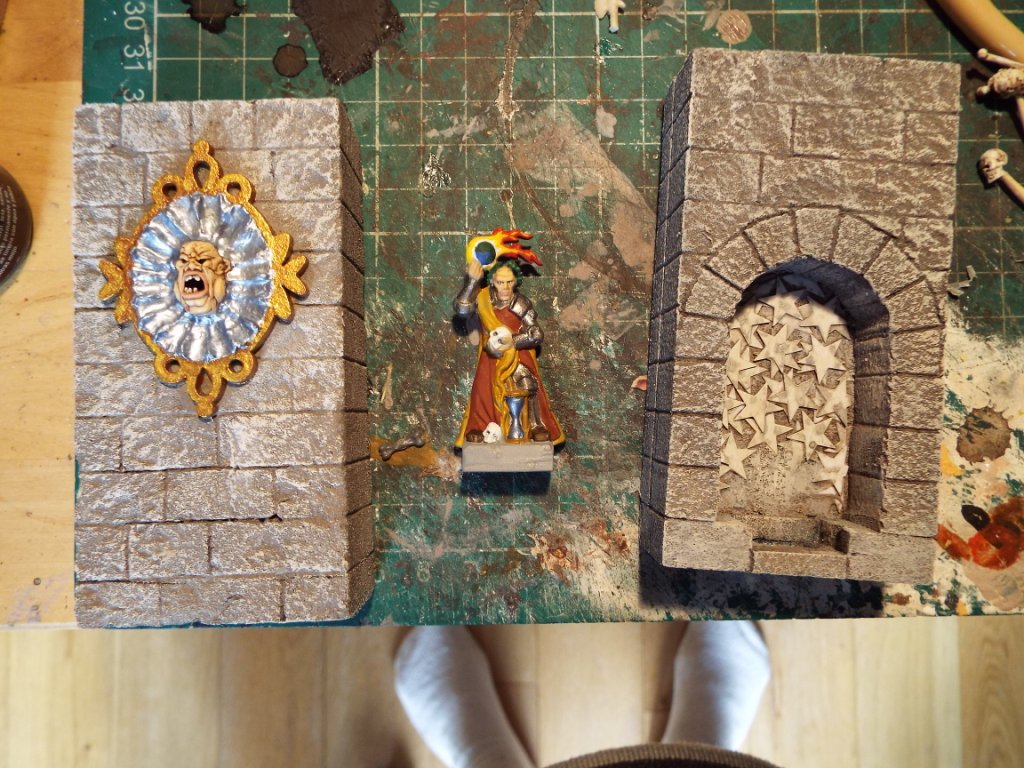
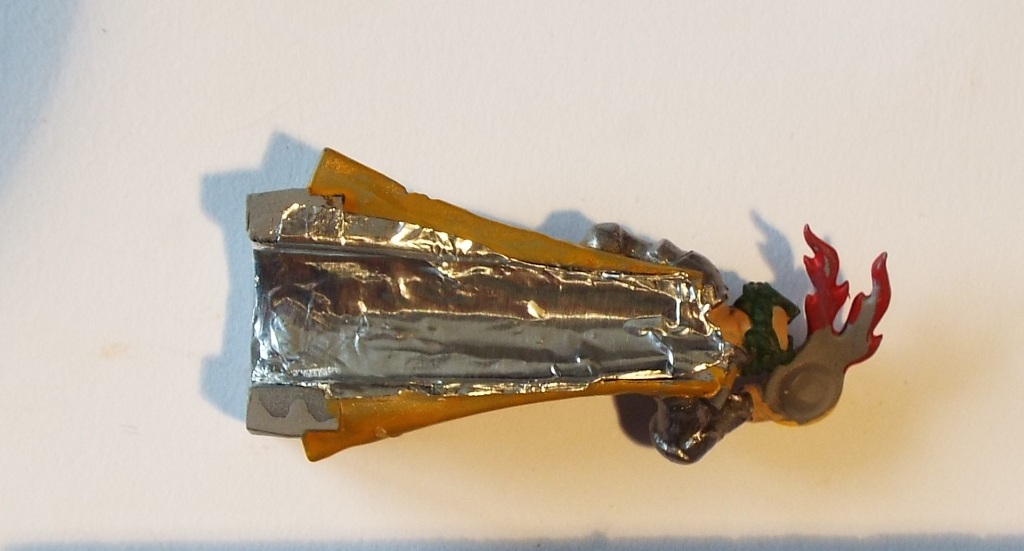
After painting the stonework of the insert I glued the statue in place with pva, then gave it a heavy black brown wash in the hope it would disguise the rubbish paintwork. It didn’t really, but it’s not quite bad enough for me to repaint it as stone. I might change my mind.
I then slid one of the LED lights up the holes in the base, and set the pieces in the gap in the wall of the room. Here are the final pieces lit up
.
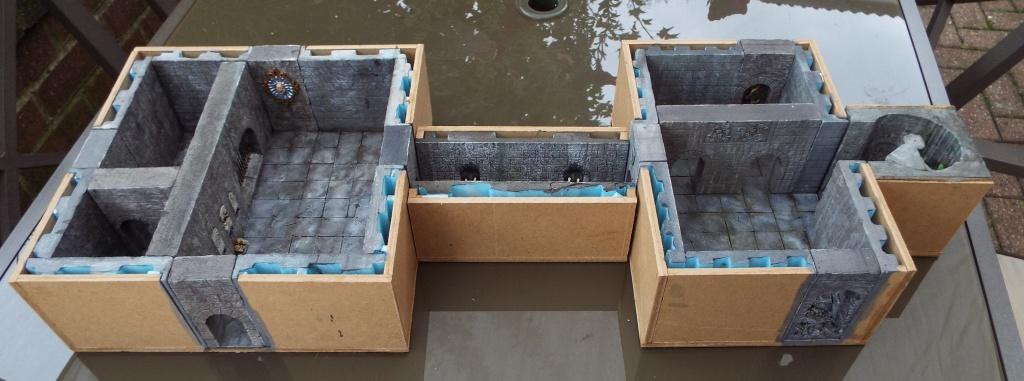
Finally, here is the setup so far. I think I need 2 or 3 additional rooms to have a playable layout, although I need to figure out how to simulate a larger cavern area – the breeding pits suggests a way round the dungeon solution by using the normal scenery as if it’s in a huge underground cavern

Leave a Reply