The Buildings.
Basically they are constructed from Artists Mounting Board. PVA or wood glue forms a strong bond very quickly. I make them slightly underscale, partly because I want to get more in to the space, and partly because I suspect they would have been smaller than we might think anyway.
The best sequence for a basic building, to avoid swearing and personal injury, is;
- Figure out how big the building should be.
- Measure and mark out the wall sections, including doors and window slots.
- Cut out the pieces, including window slots and doors, on a cutting mat.
- Construct the building structure without attaching it to the base.
- Do the same with other buildings that are going on to the base – as you make and measure each piece check the position on the base so that they are the size you need.
- Paint the building with smooth white masonry paint – or any other colour of choice.
- Cut some small cubes of wood, say 1.5mm square, to be the protruding roof beams and paint them brown
- Glue on the roof beams.
- Glue the doors in place.
- Paint the base.
- If you want any patches of paving on the base, glue or draw them on.
- Glue the building onto the base.
- Glue on all the accessories, such as rugs, awnings, pots, trees, booths, ladders etc
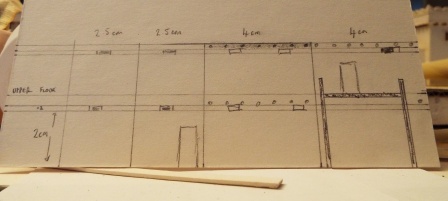
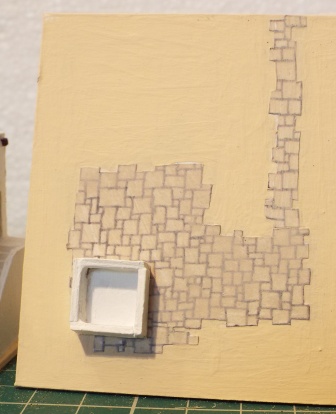
The following picture shows the walls of a building marked out. I normally draw the 2mm strip where the vents/windows and the doors will be, but on this one I have also marked where the roof beams will go, and where the walls and roof of a connected building will go. Use a pencil and do it lightly so that the paint covers it more easily.
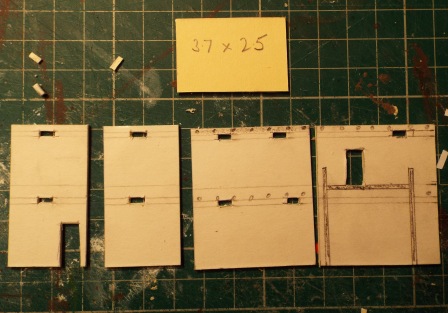
Here are the walls and roof of the building with the cutting complete. I can’t stress enough how much easier it is to cut these out on a mat before construction. Another tip – when measuring the roof make sure you allow for the thickness of the walls so that it slots in. The mounting board is about 1.5mm think. The roof size has been marked on here.
On roofs, I use 3 varieties. The simple flat roof with no parapet as on the building above, one with a parapet – I set it 5mm below the top of the parapet, and one that overlaps the walls supported by beams.
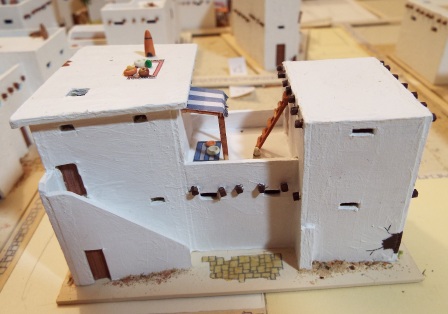
Here is a pic showing the above building on the right, with 2 other connected buildings. I like some steps. I cut a 5mm wide strip of mounting board and cut it into sections, then glue them to the wall as shown. On the far right is the wall section which will be stuck over it.

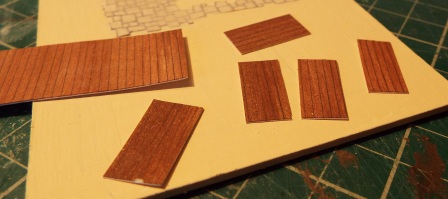
I mass produce doors by ruling planking lines on a piece of card, paint it brown, then cut it into strips which are then cut again to produce each door.
Here’s a shot of a couple of blocks with the basic painting done.
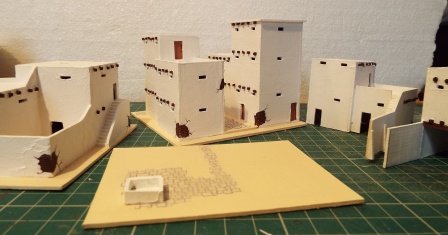
Here’s a shot of a base, ready for the buildings to be added. It’s going to be a linen workshop – the pool is used to soak the flax in water as part of the process.
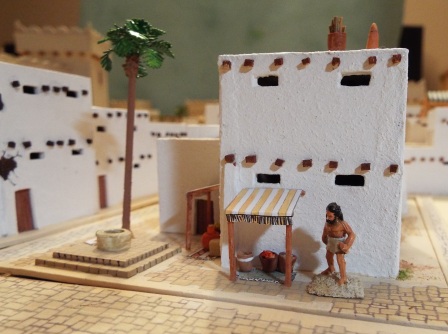
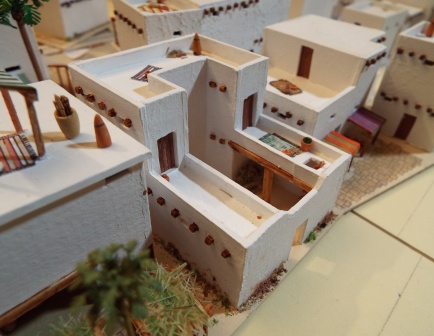
Here is a pic of the completed building from the photos above. The roofs are used as additional living space. Awnings are used for shade, and rugs for comfort. As per the paving, I created a master copy on a piece of card, painted it up, scanned it in, and now I have enough rugs and awnings to provide for plenty of buildings. As per the paving, we’ll eventually put it up for download, but if you want a copy meantime, let me know and I’ll send one over. Simply print it out on a4 paper.
The supports are cut from a sheet of obeche from the model shop. Pots, baskets and bowls are made from fimo which is then baked in the oven, and painted as required. Sand or plant seeds are then used to fill the containers and painted to represent grain, olives or fruit. Ladder si from obeche.
The pointy things are ovens.
Damage to the plaster is done by painting a patch brown, drawing on the brick lines and the cracks, then painting round it with the white masonry paint.
Finally litter is placed at the bottom of the walls. Street cleaning wasn’t high on the list of priorities – bit like Surrey now – and rubbish would have been just pushed to the side or wash into corners by the rain.
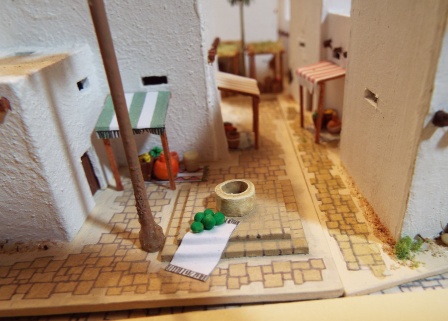
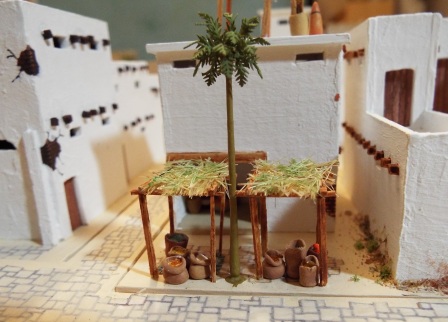
Next shot is a street booth with a few things for sale, near a well.
A different angle, showing some watermelons for sale from a mat. Not that sure if they had them, but hey. These are yellow mustard seeds painted green.
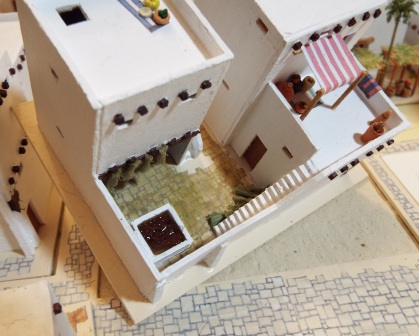
Next shot is of an Israelite 4 room house. Probably more iron age than bronze age, it shows the entrance yard with covered areas to each side.
A couple of roadside booths.
The linen works. Fresh bundles of flax are piled by the stairs, while a previous batch is hung up to dry. The pool is filled with water and another batch of flax.
As further buildings are completed I’ll post more pictures. If anyone wants any further detail, just ask.

Leave a Reply