This bit is laborious and you could go without it if you didn’t mind seeing gaps between the building bases, but I think it’s worth doing for aesthetic reasons.
The buildings are based with Artists mounting board. I have some where the bases are cut to size to fit into a specific position, but I subsequently realised that I should have a variety of standard sizes and shapes which I could then interchange if I wanted to vary the layout, so more recent models are on these bases.
The following photo shows a variety of configurations that would sit in a slot measuring 6 by 4 inches.
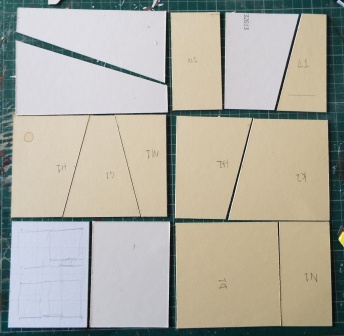
Using these placed together would create a grid-like appearance which didn’t fit right with my idea of how the city should look, and I want a few intervening spaces that break it up a bit, so the first thing is to take a larger sheet of mounting board and cut it to fit to the internal shape of the city.
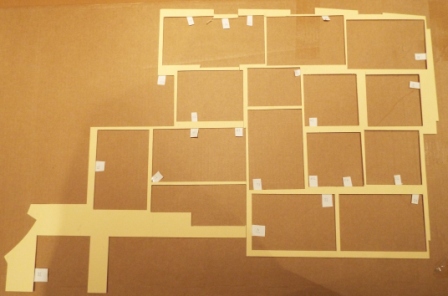
I wanted a main roadway heading in from the gate, so leaving space for that I positioned the buildings on the board.

As you can see, I don’t yet have the buildings to fill it, so I have cut and positioned some blank bases, which I’ll put buildings on. I want the road to run up to a ceremonial square, with a temple sitting behind it. These are just marked with bits of paper on the picture.
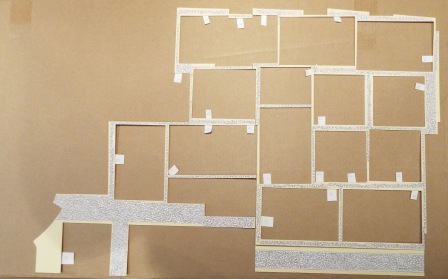
Once I was happy with the layout, I marked the positions on the larger sheet, and cut them out so that each block would sit in its slot. I labelled each slot so I knew which building block went where.
I like to create the impression of irregular paving in the open spaces and along the routes. In reality, the routes would probably have been muddy or dusty unsurfaced tracks, but I just liked the effect. I draw the slabs in using a brown fine-line pen.
.
You can draw each piece directly onto the board, but it takes time, so I drew some sections on a piece of card, scanned it in and copied drawn sections to create an A4 sheet which I could then print off. When we’ve sussed out how, we’ll put a sheet on here which you’ll be able to download and use. Meanwhile, if you want it, put a comment in with your email in and I’ll send it over.
I then cut suitably sized sections and use pva or wood glue to stick them to the base board. Cutting them out can be fiddly, which is why the sheet contains a couple of narrower strips.
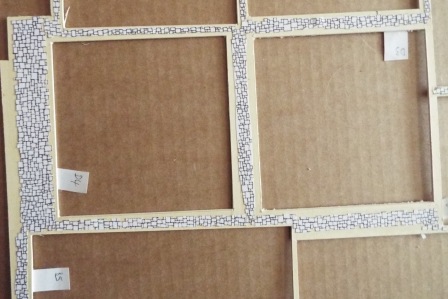
First mistake. They are then painted using the stone masonry paint. The lack of coverage that is frustrating on the walls in handy here, because it lets the paving joints show through. However, I didn’t think to check the colour against that used on some of the bases, which is browner and looks better to my mind, so I’ll have to re-do it. Once that’s done and dried, paint the unpaved areas with the Cream Masonry paint used for the ground cover. This is a bit fiddly, unfortunately, but worth doing to tie all the bases in. In retrospect, I would paint the paving and the board before sticking the paving in place – it would save time.
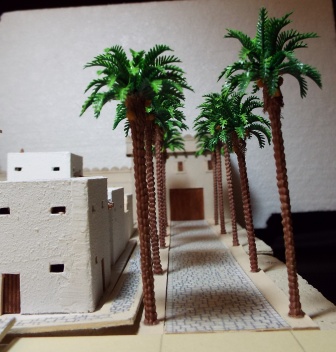
Next job is to put the roadway in place. Unlike the rest of the template, I’m going to fix this in place on the baseboard. Partly because I want to fix some trees through, to give me that Thunderbirds 2 runway effect that is a key feature of any biblical city according to all the historical sources, and partly because I’m not going to want anything other than a roadway running up from the main gate. I have resisted the temptation to hinge the palm trees, but only because I can’t find a tiny Thunderbirds 2 model.
Open spaces were not always features of ancient cities – they would use any space for buildings and the roads, such as they were, would not necessarily have the space to accommodate wheeled transport. Much of the social interaction and trade would have taken place in the area of the gate.
The palms are plastic jobbies which I have repainted. I have also added the dead foliage and fruiting bodies just below the crowns. I start by using pva to stick plumbers hemp around the trunk.
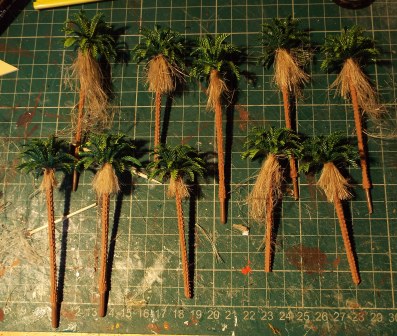
When it’s dried I crop it back with a pair of small sharp scissors and paint it brown. Photos of palms show the fruiting bodies as big clumps of orange seeds, so I used some yellow mustard seeds, applied a thin coat of pva and put them in some fine sand then allowed them to dry. Next they were painted a yellow-orange and 3-4 were glued to each palm. You can just see them in this shot down the roadway.
Buildings next.

Leave a Reply