At the start of the month, I posted a photo from a battle with this building dominating the centre. Here’s a bit more about how it was built.
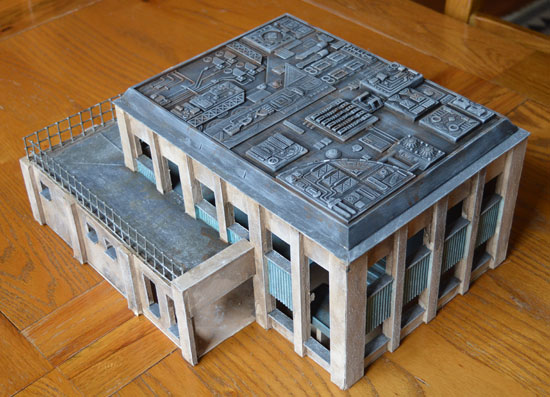
Large building scenery
Roof
It all started about 15 years ago with the roof, which is a base for a pair of ERTL tie fighters. I based them up separately, which left this big plastic rectangle covered in interesting detail. Hmm, I thought, that would make a great element for a building. At the time I was into the idea of Cyberpunk era skirmishing, so I decided to do a generic modern building. I built the
Walls

Foamboard corners
The walls are all built from 5mm foamboard. The regular sizes of the columns made it very quick – just slice it up with a metal ruler and a scalpel. To make the corners neat, cut one piece 5mm ‘too big’, so it overlaps the other, then cut a strip off the back so just the outer skin remains. This will then cover up the cut edge of the other piece. From the top, it should look like this diagram.
To hide the most prominent cut edges, I used mounting board rectangles for all the window cills. To add a bit of interest I stuck corrugated card on the panels between the windows (you can get this from craft shop – unlike cardboard boxes, it only has a ‘skin’ on one side of the wavy bit.
After I had built the walls, there was then a pause of a decade or more until a few weeks ago when I decided that I’d really like to see it finished.
Railings
This is 10mm mesh – you can get it from building suppliers like Wickes. You’ll need a strong pair of sidecutters to cut the heavier gauge like this. It also makes great ladders if cut in a single strip. I’m a big fan of balconies on buildings as they make them much more interesting when used in a battle.

Inside building
Inside
The main body of building has a removable floor. This makes it accessible and also means that it can have more scenery stored inside it (I’m always looking for ways to make scenery pack down. The floor is also foamboard with mounting board edging around the central hole.
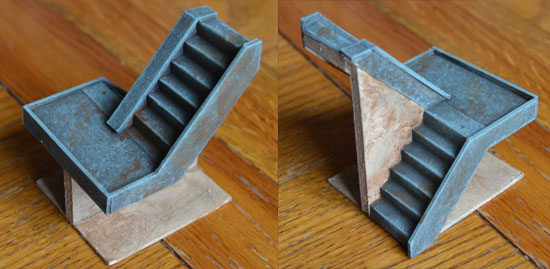
Stairs
These stairs are free standing, so they can also be used with platforms etc. The landing is just large enough for a 25mm base, and they are made from foamboard and mounting board. These were the fiddliest part. The stairs themselves have a foamboard ‘ramp’ underneath, then I folded a strip of heavy gauge paper (thinner than card) in a concertina style and stuck it on with PVA, smearing it the full length of each ‘ridge’ so that it was held very firmly to the foamboard underneath. This was much quicker and neater than making separate steps.
Painting
The concrete parts of the building were all painted with a textured emulsion. This has a lot of body to it, so it’s good for covering cracks, and it also gives a much more substantial look when painted. Everything was painted with emulsion – colours used were black, very pale cream, brown, turquoise (used on the stairs and interior floor). Emulsion is much, much cheaper than acrylic, and for something like this is just as good.
I didn’t add much detailing – signs etc because I was trying to stick to the bare essentials. and also it makes it more generic. This could serve for pretty much any period from WW2, to post-apocalyptic, to Necromunda. Here survivors deal with a typical zombie infestation. Figures from left to right are: 2 Wargames Factory zombies, 2 Copplestone Castings zombies, a converted GW Delaque ganger and an engineer from my Warfactory range.

Leave a Reply