We’ve just finished building a large piece of 6mm trench fortification – something I thought about doing years ago, but never did. However, over the holidays Rowan had a school project to build a model of a WWI trench. This seemed like an ideal opportunity to kill two birds with one stone, so I helped him build something that would work for both. Here’s the finished model – it’s just under 2ft long.

Model trenches
The base for the model was hardboard, cut square on two edges and irregular along the ‘front’. The idea of the square edge on the right hand side is that it could be expanded by adding on another length at some point in the future. The area has been formed as a hill to give it interest, and also so that the rise in ground level required to dig the trenches into could be made to look more natural. The next step was glue a couple of thicknesses of heavy duty cardboard box onto the middle of it to form the hill. The board was weighted down with heavy objects to reduce warping while this dried.
After sketching out the layout on the base, we built the walls of the trenches, gluing them directly onto the base with PVA so they stuck up like walls. We used strips of a fine corrugated cardboard to give it a man made look – logs etc. combined with plain mounting board, strips of cork and balsa wood. These were all cut to different sizes to give a ragged and scruffy overall look. On the base layout we had drawn round some Epic scale bases, so that wherever possible, the trench could accommodate a standard 10x40mm Epic scale base, with the odd spot where a 20x20mm would fit. Once the trenches were done, we filled in some of the largest gaps, mainly with cardboard cut into thin strips so it stood up vertically. This is much less convenient than lying the cardboard flat, but it gives something for the plaster to key into. If you glue cardboard flat then cover with a thin layer of plaster, it will tend to flake off.
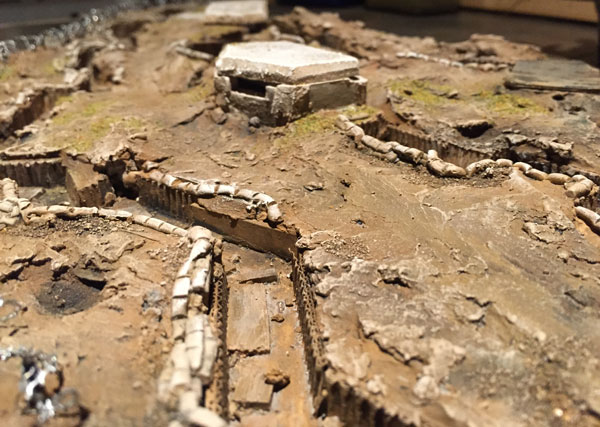
The bunkers were built from foamboard, carved to shape with a scalpel. They were painted with a textured emulsion.
The next step was to cover the ground in plaster. I used plasterboard adhesive because it dries much harder and tougher than any other building plaster (and I’ve got a big sack of it). This was smeared on with our fingers and pressed in to fill all the gaps between the trenches up to the top of the trench. As it starts to dry, you can roughen up the surface to get a realistic texture. The fence posts for the barbed wire were pushed into the wet plaster at this point. The posts were cut from wire from old sparklers. A few craters were formed by just shaping the wet plaster.
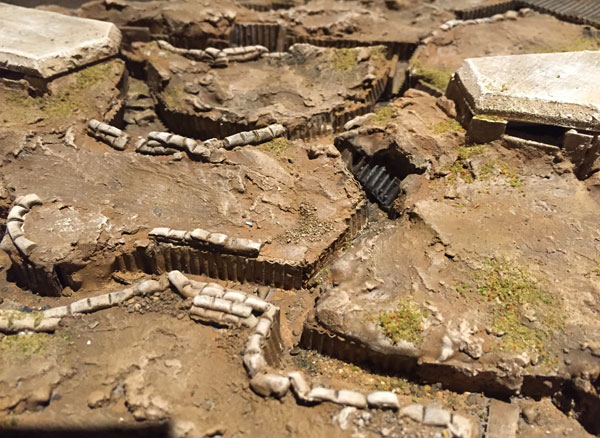
With the main areas complete, it was time to detail the trenches. The sandbags are made from milliput, rolled into sausages, pressed in place and then cut with a scalpel. Where they are stacked, the first layer was allowed to set before adding another layer in a later batch. I experimented with moulding them in Oyamaru, but it wasn’t any quicker and didn’t give such a good result. The other main detailing exercise was adding lots of thin strips of card and balsa down the trenches to represent duckboards. A few patches of PVA and sand were also added, mainly to hide joins or to protect areas round the edges where the plaster was very thin and starting to flake.
Trench model close up
With the main detailing done, it was time to paint it. The bottoms of the trenches (including the duckboards) were painted with textured emulsion to give a grungy look. The whole thing was painted with an earthy brown colour (emulsion tester pot), and once dry this was washed with a mixture of black and a rusty orange. When the wash was dry the model was drybrushed with the original base colour mixed with increasing quantities of a pale cream colour. The sandbags and concrete were painted with a lighter base colour to make them stand out.
After painting the ground, the barbed wire was added. The wire was made by cutting aluminium mesh as detailed in this old post – http://www.warfactory.co.uk/scenery/barbedwirefence.php, and twisting it together with fine wire to strengthen it. Sticking it down was rather fiddly because it’s hard to do it strongly. In the end we wrapped lengths of fine wire about 2″ longround many of the posts, and superglued them in place. Then the free ends were threaded through the barbed wire and twisted tight before being snipped off. Some of the posts came loose during this and had to be superglued back in.
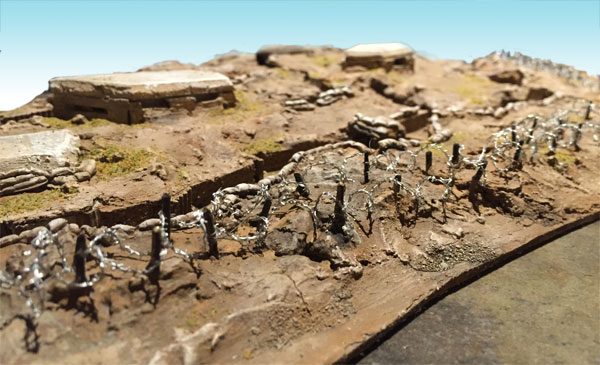
Close up of model trench barbed wire
The final step was to dab on PVA in a few patches and add some brownish flock, especially in the corners where the ground was less likely to be disturbed.
Third post this year – I’m on a roll! Keep watching this space.

Leave a Reply