Index
Introduction
Stage 1 - Assembly & Preparation
Stage 2 - Undercoat
Stage 3 - Semi-Dry Wash & Wipe
Stage 4 - Basecoat Minor Areas
Stage 5 - Shade Minor Areas
Stage 6 - Fine Detail & Varnish
Introduction

This model is a typical example of how to paint fairly large, smooth
and flat or gently rounded surfaces which are required to look reasonably
clean. If a more dusty and battered appearance is required then drybrushing
should be used as the principal shading method.
Stage 1 - Assembly
& Preparation

I used super glue to attach the wheels & reinforced this with small
blobs of epoxy putty (either Milliput or green stuff is fine). Flash was
removed with a sharp scalpel.
Stage 2 - Undercoat
& Basecoat

Undercoat
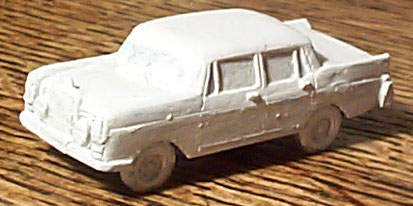
Fairly dilute white acrylic was applied as an undercoat.
Basecoat
Once the undercoat was dry, a second thicker and less dilute coat
of white was applied.
Stage 3 - Semi-Dry
Wash & Wipe

Shadowing
Because the vehicle is white, there can't be any highlights for obvious
reasons. When shadowing white it is often better to use a colour other
than grey. Introducing a tiny bit of blue or brown to the white, as well
as black, will create a clean or dirty looking white. In this case I have
used a bit of blue for a slightly cleaner look, as I wanted to emphasise
the difference between my dirty beat-up jeeps, and this gleaming presidential
motor.
The semi-dry wash
Paint for the shadows is applied more dilute than the base coat, but
it is not liquid enough to be a wash. Paint it approximately in the recessed
areas and then, before it can dry, wipe it off the more exposed areas
with your finger. (Make sure it is not dirty or greasy for artistic as
well as personal hygiene reasons). After some experimentation I have discovered
that the finger is just the right absorbancy for this. Tissue will remove
too much paint and sponge tends to smear.
The finger-wiping technique helps concentrate the paint in the right
areas and also provides a smooth transition between different shades of
paint. Using a standard wash on this sort of surface, where there is little
undulation, will tend to result in just an overall patchy covering. This
will just make the miniature look dirty rather than emphasising its form.
Also if you leave a wash to dry without wiping, you will often get unsightly
tidemarks.
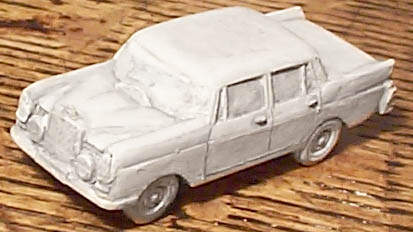
(The shading in reality was a little stronger than it appears in the
above photo - my miniature photography is still improving).
Touching up
After the bulk of the shading had been done with the technique described
above, more purewhite was used to neaten up areas such as the edges of
the doors.
Stage 4 - Basecoat
Minor Areas

Basecoat minor areas
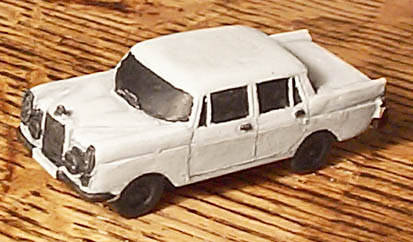
Now that the main area has been fully shaded, the smaller areas can be
done. The windows, tyres and metal parts were neatly base coated black.
Stage 5 - Shade Minor
Areas

Drybrush metal areas
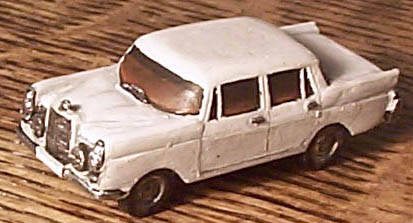
The metal areas were then drybrushed with silver using a small brush
rather than a standard sized one to allow the small areas to be neatly
targeted.
Shade windows
Once this still fairly messy business of drybrushing was done, the windows
were shaded. Black and a dark orangey-brown were blended together to give
the impression of smoked glass. The lighter lower areas help to give a
vague impression of transluscency.
Stage 6 - Fine Detail
& Varnish

Inkwash metal
Metal always looks best when inkwashed, because it smooths out the rather
crude shading created by drybrushing and adds a realistic patina. For
'silver' metals I almost always use Games Workshop's brown ink, which
is very dark and almost black. The ink should be diluted about 50/50 with
water, so that it doesn't darken the metal too much.
Numberplate
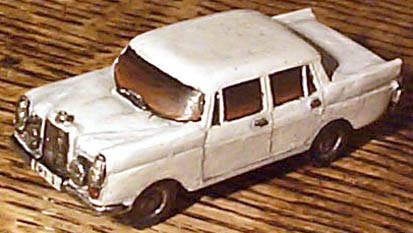
One of the finishing touches was to paint a few letters and numbers on
the license plate with a standard but very new brush. (As explained here,
I don't use a smaller brush for fine detail).
Varnishing
I don't use a spray varnish as I have had a few past disasters. I'm also
not fond of a high-gloss finish, although for a car it would be particularly
appropriate. I use Humbrol Matt Acrylic Varnish, which actually has a
slightly satin finish.
|
Painting Coloured Lights
Getting an effect which looks like a light is very difficult, because
where in reality the light is made of transluscent plastic, on the
figure it is solid and opaque.
The best approach is to paint the lights with a silver drybrush
over metal. Then apply a coat of transluscent glass paint (for painting
glass). These are sold in most art and craft shops and are highly
transluscent, and conveniently available in water based as well
as solvent based form.
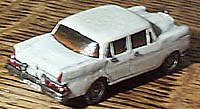
In this rear view, the transluscent red effect on the tail lights,
can (just) be seen.
|
 |
|