So I have succumbed. My problem is that I have so many bits and pieces that could be used that I have to decide where to start. I have one of the GW Manor house sets that would look good, so the start is to construct bases to put these on. I have also purchased a hot wire table from ebay to hopefully make styrofoam construction quicker. I have to try and stop myself from flitting from one thing to another and never actually finishing anything.
This is just the first base and I haven’t even painted the building which goes on it, but I’m posting this because I’ve used a couple of things from discount stores here in the UK which others might find useful.
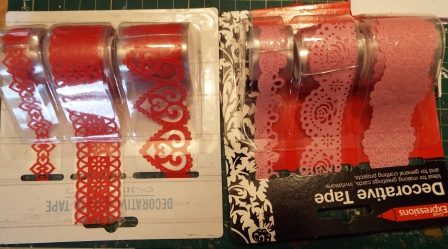
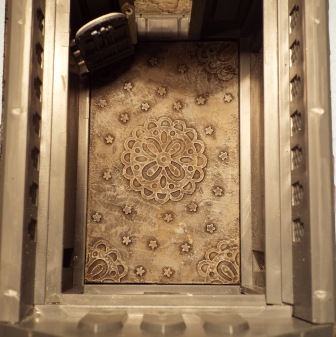
The first items are from Poundland – each consists of 3 plastic tapes with ornamental shapes. These can be applied to floors or walls and overpainted to look like decorative stonework.
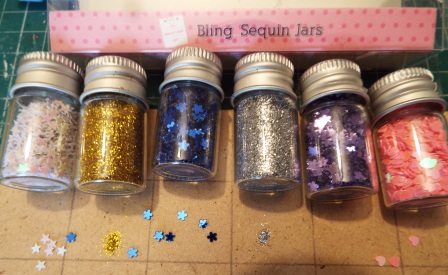
I have used a section of the rightmost tape to put some texture on a floor. I have also used some sequins from a set bought from The Works. This has 6 jars, 4 of which contain 3 shapes of sequins, and the other 2 have tiny circles of Gold and Silver which look like tiny coins, and would look good in a treasure chest or open moneybag. I have used some of the sequins on the floor.
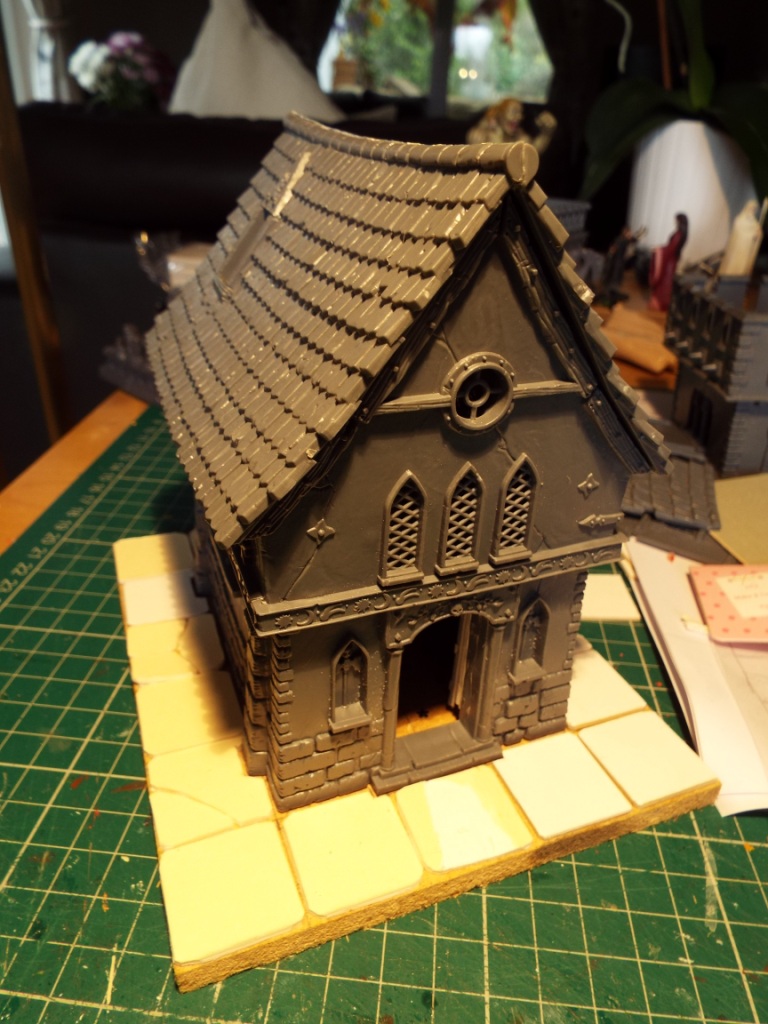
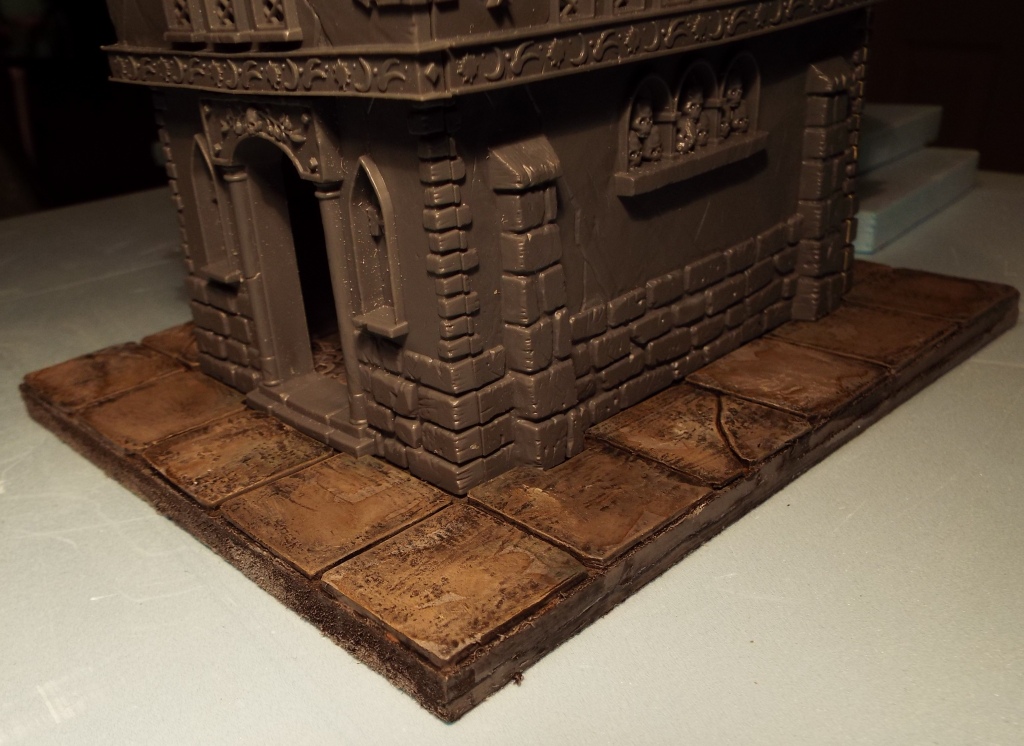
Here we can see the building sitting on the base. Outside the building there are flagstones, each approximately 1 inch by 1 inch, some of which have been damaged. I used this convention when I was doing some scenery for a period when I was into D&D 4th edition. I loved the combat mechanisms and I think I might apply the idea of Frostgrave and warbands to create a 4th edition skirmish. The flagstones have been cut to allow the building to sit into them.
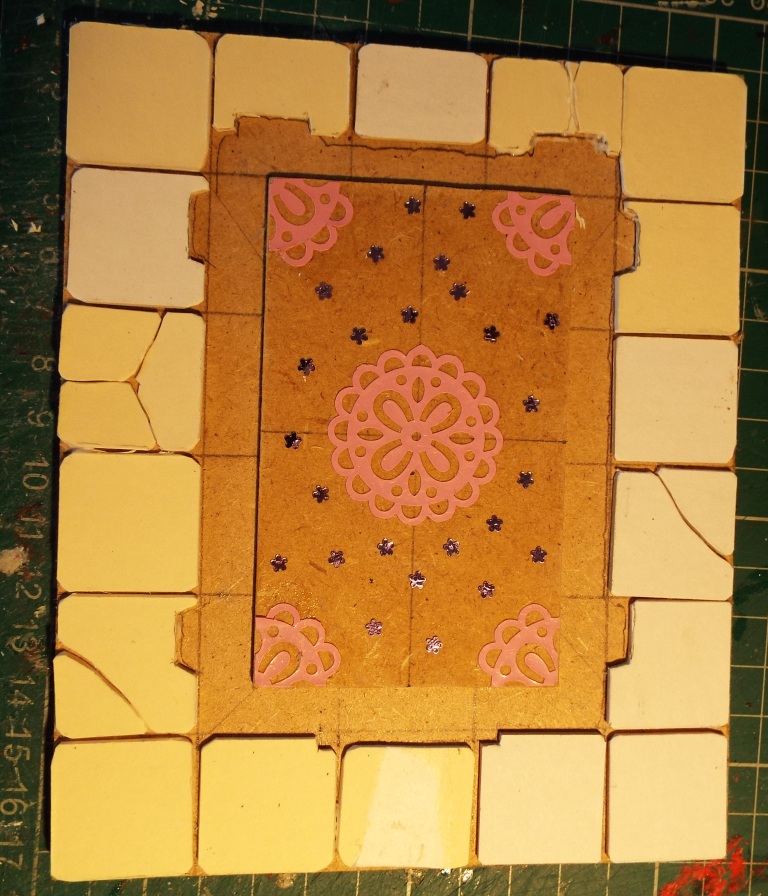
 Here is the base without the building showing the interior floor. The pink tape is self-adhesive and has been applied to a 3mm piece of mdf which has been glued to the MDF base. The darker spots are some of the sequins glued with PVA to break up the flat area.
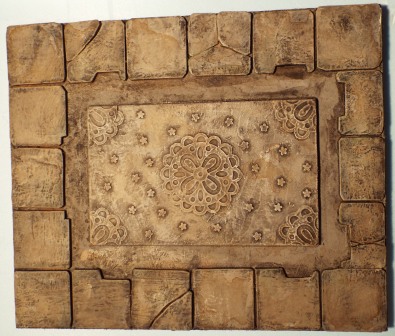
 The next job was to spray the base with a matt grey primer. When dry, liberally apply a wash of black and burnt umber acrylic. When that is dry, dry-brush with white, toned down with a small amount of the black/burnt umber mix. A very watered down wash of burnt umber has then been applied – I have deliberately made this a bit patchy to try and make it look like muck has been deposited by rainwater runoff or snow-melt. The final bit, which you can’t really tell from the pics, are a few splodges of a green wash close to where the building walls will sit, to represent algal/liverwort growth in the damp. The final picture, which makes the base look browner than it is, shows the building sitting on the base. I modified the door to allow it to open and close. I have an ambition to detail the internal walls, but whether that ever happens, only time will tell.
I think the tape will look particularly good on decorative wall friezes, and I’ll be giving that a go on my next blue foam building. Hope the tips are useful.

Leave a Reply