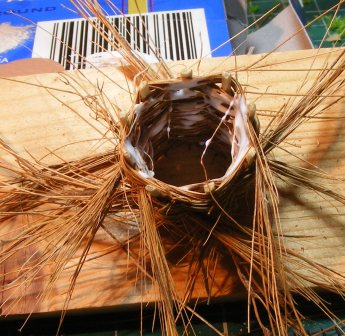
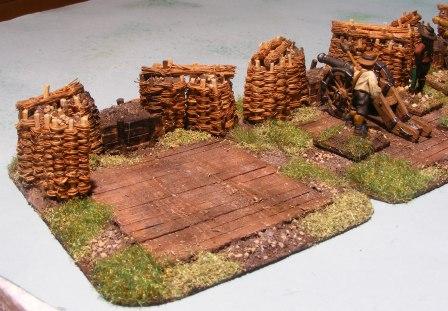
To give an idea of what the final product should look like;
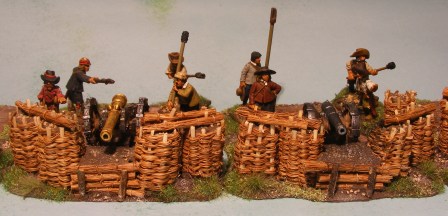
This shows Gabions topped with fascines held in place with pegs driven into the tops of the gabions. The fascines are also used to front the lower central sections which allow the guns to fire through.
The staves are cut from Bamboo cocktail sticks. The advantage of bamboo over other cocktail sticks is that the grain is tight and seems to run straight from top to bottom.
The brush used in the gabions and the fascines is coir – coconut fibre. These are sold as nesting material for birds in pet shops, in thick bundles of straight fibres around 6 inches long.
The earth fill consists of the Sandtex masonry paint I use for bases and terrain tiles. It’s a mix of Bitter Chocolate and Beige. I add grit and playpit sand for bulk, with a sprinkle of additional grit for texture on top.
Bases are 3mm MDF, chamfered at the edge.
This was the first batch I made, and I think I made 2 mistakes. One was that I varied the size a bit, and the other is that most of them tapered a bit from top to bottom. From photos of their use in the Crimea and ACW, I think they would have been consistent in size and straight cylinders so that sat tightly together, with no gaps through which balls or bullets might pass.
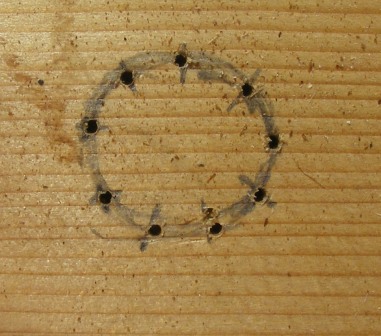
For this tutorial, I decided that the best chance of fixing this was to use the same wooden template, so I marked a circle around 1.6 cm across and drilled 9 holes to take the stakes using a pin-vise. I think it’s a 1mm drill bit. You could use more or less depending on the size of the gabion, but it must be an odd number of staves to get the weave right.
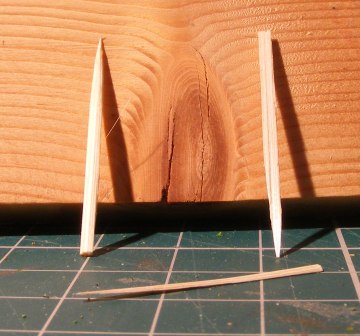
Next cut the staves. I cut a cocktail stick in half. I think the whole sticks are too thick, so first time round I shaved each half-stick down to create one thinner stake. Took time and made lots of mess which impressed the wife no-end! I decided a quicker approach would get me 2 staves from each half and be much quicker. I carefully shave off a narrow section from each side which I discard – I guess it would be ¼ to a third of the thickness of the stick. I then slice right down the middle of the remaining piece to get 2 staves as per the following picture;
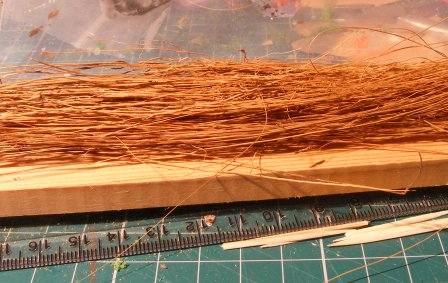
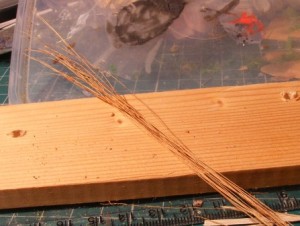
Now for the Coir. This is a thumb-sized bundle taken from the much larger bundle I bought. Other potential uses for it are straw and dried reed – it’s a bit thick for hay.
Take a smaller bundle of say 10-12 strands which will be the first layer.
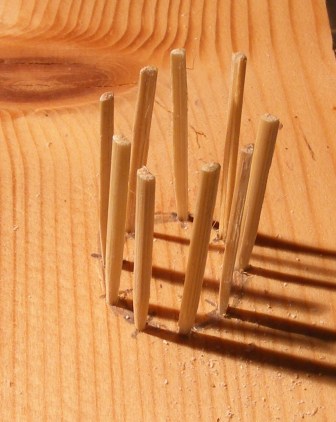
Place 9 staves into the holes in the template.
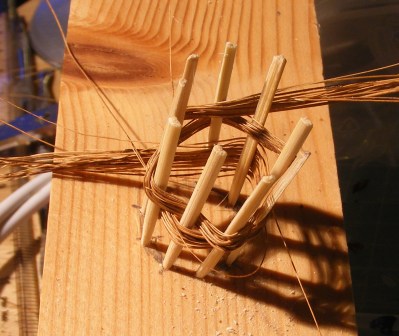
Weave the first bundle in between the staves. This is the trickiest one because the first loop will pull half the staves inwards and push the other half out, and the second row will counteract that. You are aiming to keep the staves upright to get those straight sides. You need to try and make that your objective as you add each bundle, and you will find yourself having to pull it quite tight as the tendency seems to be for it to get wider if you don’t. I made that mistake again as I did this demonstration gabion – But it will come with practise. As each bundle goes in, use a spare cocktail stick or similar to push each layer hard down to the base – try and get it quite tight. If your staves are splaying outwards, tighten the weave. If they are drawing in, loosen it.
Repeat with similar bundles. As you add each new bundle, overlay the end of the previous bundle with the start of the new, carrying on with the weave as if it were a single long bundle. Don’t bother trimming it off at this stage. Continue until you are left with only a couple of millimetres of the tops of the staves showing. Remember to push each bundle down when it’s in place, to try and get a tight weave.
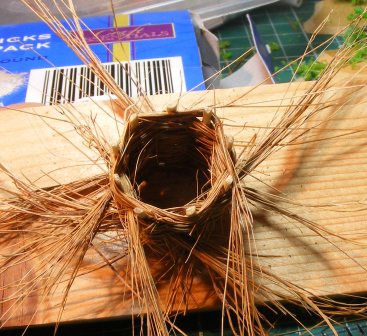
Now spread some wood glue around the inside for extra strength. It will hold together without it – in fact you’ll have to lift it from the template to get the glue to the bottom layers. Set it aside to dry before trimming it.
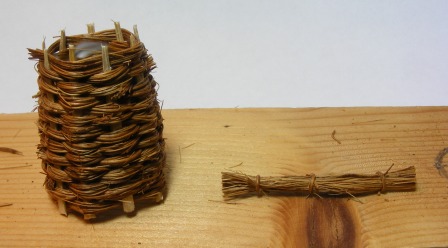
Now for the fascines. These are slightly thicker bundles of Coir, tied together with a strand of coir.
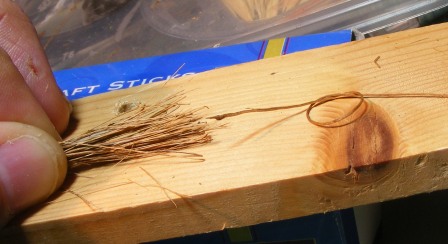
Spread some glue on the loop of the tying strand and slip it over the bundle, then tighten it. Trim the tying strand ends and trim the end of the bundle to neaten it. This makes sliding the other ties over it a bit easier.
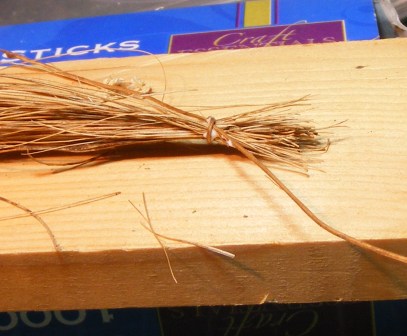
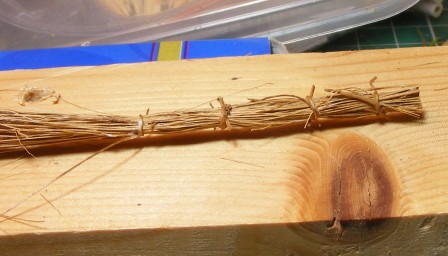
Depending on the length of the fascine I want, I will opt for 3 or 4 ties for the fascine. In this case I am making a fascine around 3.5 cm long with 3 ties. The reason for the 4th in the picture below is so that the bundle holds together for the next fascine when I cut the completed one off.
The completed fascine alongside the gabion which has been trimmed with sharp scissors.
This shows a rear view of the completed bases. I have distressed the ground boards to represent the effect of the heavy cannon being moved back and forth, and drybrushed the fire aperture with black paint to represent deposits left from the discharges. I suspect that they may have had to keep it wet to prevent it catching fire. I have put balsa boards at the back of the aperture rather than fascines simply because I think the frontal fascines and the earth would be intended to absorb the shock and they would have wanted something more solid at the back, but I don’t really have evidence for that.
I hope that makes it clear as to how it is done – happy to take questions if you are unsure, or suggestions for improvements. If you have a go and like the results, please share them.
Alan

Leave a Reply